Jump to content
  • Welcome to 205GTIDrivers.com!

    Hello dear visitor! Feel free to browse but we invite you to register completely free of charge in order to enjoy the full functionality of the website.

Sign in to follow this  
Tom Fenton

[body_work] My Saved From The Scrapyard 205 Gti Overhaul

Recommended Posts

Tom Fenton

In addition to my track car, I'm also currently in the process of reviving a pretty tired 205 GTI 1.6.


Here's the story so far.


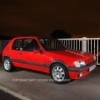
Here is the 205 GTi 1.6 I saved from the scrappers, it belonged to a member on another forum, but had some running problems, and as he was moving house needed it gone or else it would have gone to the scrapyard! So the trusty estate car and trailer was dispatched to collect it from Leeds. I've always liked the 1600 205's, and I have a 1900 and a 1900 Mi16, so this one completes the "set". Also thankfully its not white like all the other Peugeots I own!


Here it is in more or less the condition it arrived in, apart from a quick wash over with fairy liquid and an old sponge!


Photo-0073.jpg


Photo-0072.jpg


Photo-0071.jpg


Photo-0074.jpg


It has got "JUST GTI'S" number plates on so that suggests either it has been a reasonably tidy car, or it was a s*itter that has been smodged up and sold on at a great price! It has however got loads of history with it. The bodywork is good apart from a minor crunch on the NSF, and the bonnet and grille have faded badly. It looks like it may have been sprayed at some point, but it is a good job. The wing will be replaced, and then I shall paint the wing, bonnet, and grille to make it look tip top again. The interior is typical 1989 205 GTI, wear to the bolsters, carpet a bit grubby etc. As yet I have not decided whether to get some 1/2 leather for it, or whether to make a good set of original 1.6 seats out of a few donor seats (which I already have in stock).

Mechanically it was in a poor state, when I collected it, it would just about fire up on 1 cylinder, some new plugs got it on 4 but it smokes horrendously....dumping the oil revealed about 10L of oil/petrol mix, so it looks like it has been overfuelling, bore washed itself, and so the rings are u/s and its smoking. A s/h engine has arrived today to pop in.

Edited by Tom Fenton

Share this post


Link to post
Share on other sites
Tom Fenton

After a few months deciding what to do with it and collecting parts, I gathered up some enthusiasm, and got cracking


I set about the front of the car, the car had sustained a light bump to the NSF corner, not at all hard, but the bumper was cracked, and the wing crumpled and pushed back.

With both the wing and bumper removed it was obvious that the edge of the front panel where the wing bolts on had also been pushed back out of shape, a small amount of panel beating soon sorted this out though. Apart from this though, the inner wings were in good shape, and a replacement bumper iron from "stock" soon sorted the bent one.


Photo-0188.jpg


I then started the faff that is getting 205 replacement wings to fit, as the car had only had a very light tap I was pleased to find that it lined up pretty well straight away. It will most probably need a slight trim to the top corner where it meets the windscreen surround, but otherwise it is pretty good. I also wire brushed some localised rust on the front panel, rust treated, primed, and then sprayed locally with a can just to tidy up, you can't see it when the bumper is on but you know it is there LOL!

Here it is as it stands at the moment-


Photo-0193.jpg


Next, I went to the paint factor and bought 2 litres of cherry red, primer, thinners etc, then set about undersealing the rear of the front wing to let it go off before I am ready to paint it, I always do this to new panels, it seems a shame to fit new panels to a car and not to paint the rear of them (as some people do).


Photo-0196.jpg


Then I spent an hour or so getting together a useable set of bumper mounts, these are always corroded to buggery, so it took a bit of time and 2 donor bumpers to get a decent set together.


After that my wing was still drying so decided to do my favourite little easy 205 mod and colour code the wing mirrors.


Photo-0198.jpg


Next I set about the wing.


Prepped

Photo-0200.jpg


Primed

Photo-0201.jpg


Painted

Photo-0203.jpg


Looks a funny colour in the last pic, but that is because of the floodlight just above it.

Edited by Tom Fenton

Share this post


Link to post
Share on other sites
Tom Fenton

Next up was wing fitment. Whilst I was giving the wing a day or two to harden off, I built up the valance onto a new front bumper, fitted the red strip, and then sorted out a decent pair of front spot lights. Bonnet is yet to be painted as its faded badly.


Photo-0205.jpg


Photo-0207.jpg


Rear brake rebuild came next in my random order of sorting things. The handbrake had been sticking on and the lever felt dead so I was expecting the worst. With the rear drums removed I was pleasantly suprised; wheel cylinders not leaking and pistons freely moving, shoes maybe 1/2 worn, drums OK condition.

The handbrake cables were however mullered, so a quick trip to the motor factor and £15 later a pair of new cables fitted, everything given a quick clean/overhaul, and back together.


Photo-0206.jpg


I do have a braided flexible kit to fit, but that can be done at a later date, as I've a feeling one or two of the solid brake pipes are going to fail the MOT, so I'll change the flexibles then.

Edited by Tom Fenton

Share this post


Link to post
Share on other sites
Tom Fenton

Needed to get the exhaust out of the way to sort out the rear brake lines, whilst it was off the plan was to weld a lamdba sensor boss in it, better than the current method of the wideband stuffed up the tailpipe on a piece of rod!


However when I got it off I was glad I had done, found this-


Photo-0195.jpg


10 mins with some big water pump pliers and Mr MIG welder and voila, much better.


Photo-0196-1.jpg


Then turned my attention to one the reasons the exhaust was off the car.


Photo-0197.jpg

Share this post


Link to post
Share on other sites
Tom Fenton

Well a successful bit of part sourcing today, first of all I tried phoning the local (bloody useless) Peugeot dealer, to enquire about prices for both the lower hoses, however they seemed to be engaged for a good 20 mins I was trying, so seeing as I had to go to pick up a bumper from the bodyshop anyway, I decided to drop into the factors I use to see if they had anything listed in their catalogues. I was fairly sure the top hose was available aftermarket, but wasn't sure if the lower hoses were, anyway, worth an ask.

Dropped in about 2pm, sure enough, listed in the gates catalogue were upper and both lower rad hoses for a 205 1.6 GTI. Great I thought, and asked Jason to get me a price for them, and check stocks, expecting them to be a couple of days. Was pleasantly suprised #1 when he said they would be about £12 for the pair, and pleasantly suprised #2 when he said he could have them there for just after 3.30pm that afternoon!

Heres a pic-


hoses.jpg


The shaped hose is specific to the 205, the other one is deliberately left long as it must be able to fit a number of applications, the graduated scale shows you where to cut it off for your application, the catalogue said for the 205 to cut it at mark 12, however I'll compare it to the standard one when I fit it and report back as to how accurate this is.


Part number for the shaped one is GATES 3472

Part number for the longer 90 deg one is GATES 3323


In a fit of enthusiasm last night (considering how cold it was) I fitted my newly acquired water hoses.


Here is a pic of the new ones (with new steel pipe) next to the old ones, as you can see they are an accurate copy.

hose01.jpg


Here is a picture of one of the old ones showing why it needed changing. This is on a G reg 205 1600 GTI. If you've got one of a similar age that looks like it still has its original hoses I'd think strongly about replacing them......

hose02.jpg


The hose that had to be cut back to the graduated scale worked well and fitted well when cut to the mark suggested in the catalogue, so no problems there.

Share this post


Link to post
Share on other sites
Tom Fenton

That brings things pretty much up to how the car sits at the moment (in the garage, on 4 axle stands!).


More progress as and when, its just sooo cold out there the last few weeks.

Share this post


Link to post
Share on other sites
maturin23

Good work - nice one Tom!

Share this post


Link to post
Share on other sites
ashley peddle

cool project - the sort of thing id like to do once i have my current 205 up to spec :)

Share this post


Link to post
Share on other sites
danpug

Cool. Are you nocturnal by any chance? :)

Share this post


Link to post
Share on other sites
CaptainK

Wow! Thats impressive. I've always wanted to restore a car, but I have no skills whatsoever when it comes to cars. :(

Share this post


Link to post
Share on other sites
steve@cornwall

Nice one! - Feels good to save a basically good 205 - well done

Share this post


Link to post
Share on other sites
Tom Fenton

Thanks chaps. No I'm not nocturnal LOL

Just work nights occasionally :(

Share this post


Link to post
Share on other sites
matty_gti

Very nice work mate, keep the pics coming :(

Share this post


Link to post
Share on other sites
Tom Fenton

Braved the cold tonight and did a bit more, mainly centred around the rear brake lines, which are (a) chuffing awkward and (:blush: not very photogenic.

In between grovelling about on the (very cold) floor, I changed one of the gear linkage rods for one I had in stock as the old one had a load of play in it.

I also managed to get the union to undo from the compensator (1.6 GTI) by holding the large hex on the body, its 22mm in case anyone does the same job.

All that is left to do now is to fit the main front to rear brake line, then the brake lines are finished.


Here is one of the fronts fitted

Photo-0208.jpg


Whilst I was under the wheelarches at the front I took the opportunity to finish off the wing replacement on the passengers side, and re-sealed the wing to the inner upper arch. If you ever see a 205 with a rusty wing it is usually because it has been replaced in the past, and they haven't sealed it properly afterwards, the standard sealer is very thick rubbery stuff. I'll be cleaning the sealant off my fingers for weeks.

Photo-0207-1.jpg

Share this post


Link to post
Share on other sites
Tom Fenton

Damn cold out there.


Finished the brake lines off this afternoon and bled them up. In the end had to go and get another 3-way union for the rear split as the original 18 year old Peugeot one had knackered threads. Even so still had to go back to it twice to arrest leaks, it seems OK at the moment but I'm not 100% confident in it so will be keeping an eye on it.


With the brake lines done I put the exhaust back on, connected my wideband lambda up temporarily, and then fired her up to have a go at setting up. I knew she was running very rich, and with the wideband just after the downpipe divider I was seeing a reasing of 10:1 AFR, this is at the limit the gauge will register, so it could have been even richer. Adjusting the screw on the AFM that I believe is there to alter idle mixture had no effect, so my next plan was a different AFM. I had bought one of these whilst I was in the preparation stage of the project (summoning up enthusiasm!) and after reading an article via this forum had re-tracked it. Swapped this over and straight away saw 12:1, and with a bit of adjustment up to between 14.5 and 15:1. The engine also runs a lot more nicely, no hunting or "chugging" (due to being too rich).

Photo-0210-1.jpg

At the risk of sounding a flash b*s***d it really is so nice working on one of these with some decent kit. The last time I worked on an 8v fuelling problem was some time ago, where a problem like this would have had me changing all sorts of random parts pretty much on a guesswork basis. A little knowledge gained from various sources and kit like the wideband makes things so much easier, and also very satisfying when you sort something out.

Next thing I had on my list to check after some research on here was the vac advance can on the dizzy. Sure enough a suck on the pipe yielded no resistance whatsoever, so a new one of those is on the list. Any advice on a good place to source one much appreciated.

Share this post


Link to post
Share on other sites
Astra Dan

Nice work! We're pretty much working on similar projects, only I think mine's suffered from standing outside for years.


So the lambda sensor is purely for fault diagnosis?

Share this post


Link to post
Share on other sites
Tom Fenton

Yes the lambda is just to give an instant (and accurate) reading of what the engine is doing mixture wise, I knew it was horrendously rich so rather than guessing at the problem, this enabled me to straight away know whether I had made any difference by changing things.

I already had the wideband lambda kit, so just needed to weld the nut to the exhaust to make use of it, the kit was expensive but I have used it on a few of mine and mates cars now, and has been really useful.


Few niggly things to sort out now, but then it is getting close for an MOT. Next job is to sort out the dead screen washers and put the dash back together.

Share this post


Link to post
Share on other sites
Tom Fenton

Not written much here over the last couple of weeks, what with xmas and other commitments progress has been in fits and starts, a couple of hours here and there.


Anyway, since last writing here the car is now running well, I changed the plugs which will hopefully cure the occasional misfire at 5-6000rpm, the ones in there were an oddball set I scrounged together out of what I had kicking around when the car first arrived running on 1 cylinder. Pleasingly when I removed the old ones they were a biscuit brown colour indicating the mixture is right, and they were not oiled up either.


Today I had a go at sorting out the wiring, most things on the passenger side front of the car were not working, washers, indicator that side etc. I ended up replacing the earths on the front panel, the original spades and plug were all corroded up beyond recovery. I used a 6-blade terminal and mounted it to the panel with two M4 stainless capheads. Should work better than all the corroded standard stuff was.


Photo-0211-1.jpg


After that I got the washers working, again had to cut off the standard corroded terminals and put new ones into the housing. The back washers sprang into life with a good second hand pump I happened to have knocking about.

It was starting to get dark so I pointed the car at the garage door and setup the headlights, I then started checking round for MOT, only the rear fog light defeated me, I'll have a look at that tomorrow.

Share this post


Link to post
Share on other sites
Astra Dan

Good stuff. So that ground point is just in front of the battery, on the slam panel? Might have a look at the state of them on mine. Shame they're not a touch longer so the could go straight to the battery -VE.


Did you know you can remove (and presumably replace) the brushes on the washer pumps? No idea where to get new ones though.

Share this post


Link to post
Share on other sites
GLPoomobile

Is it worth fannying around with the brushes in the washer pumps for the meagre cost you can get new pumps for? I'm planning on fitting a 406 pump on mine as apparently it's a bit more powerful, and I've found a supplier on eBay who does them for about a tenner IIRC, and he supplies washer pumps for most models.


Still, I guess if you can get brushes for pennies and are as tight as a Nun's chuff then go for it LOL :)

Share this post


Link to post
Share on other sites
Astra Dan

Yeah probably not! I was impressed at the design though, allowing me to strip the rear washer motor down, clean it, re-asseble it and get it working. :)


And yes, I guess I am tight! lol

Share this post


Link to post
Share on other sites
welshpug

Any details of the AFR gauge? I guess you just weld a suitable boss/nut into the downpipe just after the split and plug it afterwards with a short bolt?


I'm thinking that setting the fuelling this way would be better than an emissions tester.

Share this post


Link to post
Share on other sites
Astra Dan

M14 I believe? Same as spark plugs I think.

Share this post


Link to post
Share on other sites
Tom Fenton
Good stuff. So that ground point is just in front of the battery, on the slam panel? Might have a look at the state of them on mine. Shame they're not a touch longer so the could go straight to the battery -VE.


Did you know you can remove (and presumably replace) the brushes on the washer pumps? No idea where to get new ones though.


The usual ground point is inside a grotty looking vinyl "bag" for want of a better description, mounted on the captive nut you can see in the picture I posted, below and to the right of where I mounted my new earths. There are two yellow multiplugs going there, and a brown wire with a ring terminal. The brown wire is the horn earth, on one of the multiplugs there is a thick yellow wire, this is the cooling fan earth. On the other multiplug there are three thin greens and two slightly thicker yellows, these are earths for the indicator and side repeater that side, washer pump, headlight and sidelight, and possibly something else.

I didn't know you could repair the washer pumps, but I had a spare anyhow, the dead rear one has gone in the bin!

Share this post


Link to post
Share on other sites
Tom Fenton
Any details of the AFR gauge? I guess you just weld a suitable boss/nut into the downpipe just after the split and plug it afterwards with a short bolt?


I'm thinking that setting the fuelling this way would be better than an emissions tester.


The gauge is an AEM wideband lambda gauge, not to be confused with the narrow band type available. The wideband sensor can measure accurately from 10:1 up to 17:1, whereas the narrowband sensor is only really accurate around stoichiometric air fuel ratio of 14.7:1.

I sourced mine from the States about 2 years ago now, I did it this way as they were significantly cheaper over there than in the UK, all told I think I paid £170 for it. You can now get them on ebay from UK sellers, search for "AEM lambda". Innovate also do a kit, but I personally prefer the AEM as it is all contained within the gauge, whereas the Innovate one has a seperate processing unit and then a seperate display. The output from the wideband sensor is complex meaning you cannot just read it from a multimeter as you could do with the narrowband sensor.

See about 3/4 of the way down the first page of this thread for the boss (a half-nut) being welded into the front pipe. The thread is actually 18x1.5.

It is a really useful bit of kit, allowed me to immediately know that I had cured the overfuelling when swapping the air flow meters over, also useful at MOT time, you can get it to display lambda e.g. in the region 0.97-1-1.05 instead of AFR 10:1-17:1.

Share this post


Link to post
Share on other sites

Please sign in to comment

You will be able to leave a comment after signing in


Sign In Now
Sign in to follow this  

×