Jump to content
  • Welcome to 205GTIDrivers.com!

    Hello dear visitor! Feel free to browse but we invite you to register completely free of charge in order to enjoy the full functionality of the website.

Sign in to follow this  
X-mo

X-mo goes 1.9 GTI | goes MI16 | goes 2.0 T.C.T

Recommended Posts

X-mo

Hi guys,

after beeing a lurker for more than 8 years, I decided to finally make a contribution to this forum and open a project thread for my first ever 1.9l GTI i bought in 2010 as my second ever car.


First of all a little introduction:

My name is Axel , 31 years old/young. I'm from a little village near Nuremberg, Germany.


First got in touch with the iconic Peugeot 205 about 12 years ago as I bought a low milage 1.4l Forever as my first ever car. Never really was into cars but that changed with owning one by myself...did a few smaller jobs like lowering and putting on some new rims...but nothing major.

After some while I discovered that there was a GTI version of my loved Peugeot 205. So double the power from what I was used...that was my way to go.


So searched for a reasonable advert and made my find. The car has gone through a constantly evolving process since I owned it. I will try to take you through all the steps it made and then add up to the current conversion from N/A to some more powerful F/I 


This is the car back in 2010 right after I bought it. The previous owner used it as a daily driver before I got it and therefore the body needed some love.

Despite the 217.000 km the car was mechanically in a good condition....considering it only costs 1550€  back then :D


img_20101013_1738543akcr.jpg


img_20101013_17370713j1m.jpg


img_20101013_1742580ajvx.jpg


img_20101013_174311yujsk.jpg


img_20101013_174535vnk6g.jpg


The usual rust spots were included in the price.


img_20101020_144158zckq4.jpg


img_20101020_144004qnjsw.jpg


img_20101029_184359wejjb.jpg


Without any big experience I started stripping down the car in order to get rid of all the rust and dirty that settled for the last 20 years of daily abuse. At that time I had to borrow nearly every tool to work on the car and a friend of mine had to help me weld in the needed sheet metal....oh how the time has changed :wub:


img_20101026_153058h6jxp.jpg


img_20110210_154741vij2y.jpg


img_20110216_1128576tkt3.jpg


img_20110216_112911vlkw2.jpg


img_20110216_151537nikwu.jpg


img_20110221_111318jnjm6.jpg


All sealed up again and ready for some stone chip protection / paint


img_20110222_11524477jh1.jpg


img_20110222_140803rvjw9.jpg


img_20110222_140813mckup.jpg


img_20110222_1644135bjt8.jpg


img_20110302_141520y4knf.jpg


img_20110330_202337hkjoi.jpg


Real wheel arch got some protection too


img_20110302_141352i7k6y.jpg


Fixed some dents and closed the aerial port as I never intented to use it.


img_20110228_14594552jtf.jpg


img_20110228_145956d4k3l.jpg


img_20110302_162729znjrb.jpg


Next I had to gather a few rust-free attachment parts as the old ones were beyond my repair skills...even it was a costy affair for me as a student.


img_20110302_1627391tkq4.jpg


img_20110303_184901rtjw7.jpg


img_20110309_150254r3jtq.jpg


img_20110305_172426ksk1b.jpg


Luckily my uncle owns a paint shop and he was willing to paint the car for nothing than the material costs BUT only on the outside and I had to do the whole prep work beforehand . That meant I had to sand the whole car off, paint the whole inside by myself and wanted to get it running in order to drive it onto his trailer.


Priming, sanding, priming, sanding :rolleyes:


img_20110309_164252t3kyy.jpg


img_20110309_1706052pkkj.jpg


img_20110309_170552v4jwv.jpg


And now I'll have to admit my youthful sin...I painted my Peugeot 205 GTI with a mat RAL 7016 lacquer....played a lot NFS Underground at that time if that's an excuse. Don't worry....the paintwork isn't the same anymore. :ph34r:


img_20110311_115402ngkmj.jpg


img_20110311_1154134qjxm.jpg


img_20110321_123627w1k2h.jpg


img_20110322_184312ltj51.jpg


After preparing the engine bay I only needed a engine to throw at it. Never had my hands on a proper engine before....so this was a exciting stage of the rebuild for me.


img_20110221_111411bmkh5.jpg


Aha...this is what an engine looks like cracked open B)


img_20110301_122233sqk57.jpg


img_20110301_13331201joe.jpg


img_20110301_134151jykmk.jpg


The head got a surface grind and went back together with "smoothed" valves.


img_20110307_162020mujz4.jpg


img_20110308_191312qljrz.jpg


img_20110309_114937agkls.jpg


img_20110310_2228430ijnb.jpg


The bottom end got treated with some new conrod bearings and new liner seals.


img_20110314_20410063j4s.jpg


img_20110318_150942k3j06.jpg


img_20110318_1544341kk4y.jpg


And everything falls back in place


img_20110321_170834j8jc5.jpg


img_20110324_1418562ijzf.jpg


img_20110325_174231zmkcl.jpg


Off goes the Harlekin 205 to get the paintjob done


img_20110401_121945lpkdk.jpg


img_20110401_1705361hjfj.jpg


img_20110401_1809293qk0p.jpg


Back again with a dark-grey-tuning-205-thing ready to assemble


img_20110401_183448olj0t.jpg


img_20110405_180632rvjep.jpg


img_20110405_180646xfjzu.jpg


img_20110406_122821anj42.jpg


img_20110408_132725gokc8.jpg


img_20110409_132437p9j9z.jpg


Finally starts to look like an Pug205 again


img_20110410_18220671khc.jpg


img_20110410_182220vhk4d.jpg


Professional rear screen assembling here :lol:


img_20110412_174831eyjuc.jpg


The driver seat needed some love on the outer seat cushions before fitting. Got me some hard foam and tried to recreate the form. Cheap fix and it did it's job.


img_20110411_141404apjo0.jpg


img_20110412_102843a3jpl.jpg


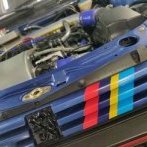
Only some BMW M3 side mirrors left and I finally got to drive around my rebuild 205 in 2011


img_20110509_175846r4kzz.jpg


Hope this wasn't to much at once but there is a lot more to come...so prepare your scrolling finger for more mat-grey-205-action.


Cheers


Axel


  • Like 8

Share this post


Link to post
Share on other sites
X-mo

Hello again,

got another load of pictures for you guys. :rolleyes:


Starting with a nice auto bonnet I could source back then from a nearby scrapyard. My uncle was very pleased to paint another carpart in mat gre.


img_20110929_2053xikku.jpg


img_20110930_0821s7k5z.jpg


img_20110930_1112z0kla.jpg


img_20111003_16354492ksv.jpg


Drove the car like this in 2011 and 2012 until I decided it was time to go a bit further down the 205 rabbit hole.


I treated the obviously rotten parts as I got the car home, but as you all most likely know there can be quite a lot of rust hidden under the factory coating without even knowing. So I decided to crawl under the car, get the grinder out and scrub down the whole underbody....what a lovely job ;)


img-20130213-00545g2o2b.jpg


The final outcome wasn't by far not as bad as it could have been.


img-20121214-004775tq7i.jpg


img-20121214-004789rqbu.jpg


img-20121216-00489hlrr1.jpg


img-20130213-00547eir4f.jpg


img-20121216-00490i1pyk.jpg


The worst part were the joints between the boot floor and it's struts. Had to remove most of the stock welding spots and add new sheet metal. Some went for the lower boot strut itself and the backing plate of the boot (hope you know what I try to explane :D)


img-20121222-00496b9pc5.jpg


img-20121215-00485jupfp.jpg


img-20121222-00497n7qfd.jpg


img-20130209-00535hlpdd.jpg


img-20130209-005394bofg.jpg


At that time I already sourced myself an old MIG welder to be able to get rid of stuff like this on my own. After some practice I gave it a try...all holes closed and everything was flushed with Owatrol oil to prevent it from rusting again.


img-20130107-00504iao3h.jpg


img-20130116-0050817rkt.jpg


img-20130209-00537ytqho.jpg


img-20130213-005468qr63.jpg


The welded spots got two layers of a primer called Brantho 3in1. After that the whole floor was painted with Ovagrundol Primer followed by Brantho 3in1 and a top-coat of Chassislack OH in the same RAL 7016 the upper body was painted with. :ph34r:


img-20130214-00549u0qfm.jpg


img-20130210-00540phrhc.jpg


img-20130210-00541torwf.jpg


img-20130214-00551msp0m.jpg


img-20130214-00552wcrie.jpg


img-20130224-00571wmqrd.jpg


img-20130223-00566vwrwj.jpg


Unfortunately both ends of the side rockers (is this the ride word :D ) and the mandatory rear bumper fixing points were pretty rotten too. As I was just about able to weld in some flate sheet metal, I left this work to a professional and "only" had to repaint everything after.


img-20130307-00605eardo.jpg


img-20130307-00606h4pa5.jpg


img-20130307-00608pfpol.jpg


img-20130310-00629zrrl0.jpg


img-20130316-00651vjq4e.jpg


img-20130316-00652wurjo.jpg


The boot got a new layer of paint to


img-20130307-00607lkrjx.jpg


Before getting everything back onto the car all parts were derusted and painted and new brake / fuel-lines were fitted too.


img-20130216-00554luom6.jpg


img-20130224-00572ucqnm.jpg


img-20121119-004269ip8b.jpg


img-20130223-00567pprii.jpg


img-20130308-00611a9ryu.jpg


img-20130305-00598s7ojy.jpg


This was my winter 2012 underneath the car...seems like I had a lot of time as a student back then as there had happened a few more changes simultaneously :P

More to come next time. Please let me know if this is a bit overkill with all the pictures


Cheers


Axel


Share this post


Link to post
Share on other sites
yeti-dj

Hey, good work!


everyone loves picture, keep them coming. 
 

Rus.....

Share this post


Link to post
Share on other sites

Please sign in to comment

You will be able to leave a comment after signing in


Sign In Now
Sign in to follow this  

×