Jump to content
  • Welcome to 205GTIDrivers.com!

    Hello dear visitor! Feel free to browse but we invite you to register completely free of charge in order to enjoy the full functionality of the website.

jigs2895

1986 205 CTI Restoration

Recommended Posts

jigs2895

Hello all,


I'm new to this forum although over the last few months I've been updating my progress over on Detailing World. I'm going to upload all of the content from there onto here, so apologies if the time frames done quite make sense! 

 
I purchased this car in September 2017, I had been searching for a little 205 for a year or so, but never found one local, and nearly all of them needed a lot of work. (that also turned out to be the case with the one i've bought!)
With GTI prices sky rocketing, I decided to go for a slightly cheaper but just as good alternative, a little CTI. The market for these is very hit and miss, not many around, and not many good examples.
 
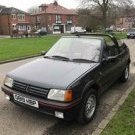
I found this 1986 Space Grey Phase 1 205 around 2 hours away. Chap had owned it for 2 years, driven it a handful of times and kept it in a large empty unit of which he had free use of due to being the site maintenance man of a large industrial estate. The bonus of this is that the car had been dry stored for the last 2 years of its life.
 
I initially walked away from the car due to it needing paintwork, engine work and interior work, however the 2 hour car journey home soon let me change my mind, I later called him with an offer, to which he accepted.
 
Add photos:
 
yRYAV82.jpg
 
4Q9HWP7.jpg
 
Qs9sp8f.jpg
 
qgmWnB3.jpg
 
yUfRs2N.jpg
 
JiOBXaN.jpg
 
3Ulub4F.jpg
 
D0N9sjD.jpg
 
DKSoQc9.jpg
 
19rYgaT.jpg
 
yIl7CiE.jpg
 
Jn0W9k4.jpg
 
buOOU3s.jpg
 
Collection day:
 
lVEMamE.jpg
 
And soon it was next to my restored MK1 VTS: (which I have since regrettable sold on)
 
hSawYWi.jpg
 
VpTqIkT.jpg
 
First job was to go through all the paperwork and date organise it and file it correctly, there was plenty to get through!
 
eaH5Kp1.jpg
 
The original dealer 'stag hill' had done a lot of the servicing on the vehicle in its early life.
 
M8KwhDw.jpg
 
1mxiCUZ.jpg
 
Next I moved onto giving the old girl a good check over, carried out a full service, replaced the timing belt and waterpump, radiator, thermostat and replaced all the cooling hoses with some replacement hoses from BakerBM.
 
1thAxVJ.jpg
 
As you can see in this image, the coolant consisted of nothing but K seal, something that later down the line came back to haunt me... more on that later.
 
swV4dZW.jpg
 
Timing belt covers where all broken and in need of replacement!
 
OIYevXv.jpg
 
fJkXx3e.jpg
 
Good second hand upper covers where sourced, and a modified re-made lower metal cover was purchased. (plastic lower cover is prone to breaking)
 
JflOShd.jpg
 
HU7tIA6.jpg
 
oFGsfrX.jpg
 
NSccDKC.jpg
 
Whilst waiting on new parts, I sourced the correct 1.6 phase 1 pepperpot alloys and had them powdercoated and new Pirelli P1s put on.
 
ut9Wr8O.jpg
 
qwY9GWC.jpg
 
With the engine service all complete, I installed the new wheels and assessed the bodywork.
 
zh4kv1W.jpg
 
48YTOBy.jpg
 
pq0D9Ed.jpg
 
Bodywork is not to bad, unfortunately someone had decided to paint the trims black whilst leaving them on the car! :wall: they where kind enough to mask with 2 inch masking tape next to the trim but nothing else!! Which resulted in a ********** line of overspray, all around the car. Shocking.
 
GEykvzG.jpg
 
90ZvsV9.jpg
 
JkeUTrN.jpg
 
On the plus side, the engine bay was looking good with a new battery, powdercoated airbox and correct period jack all installed.
 
hlAViMt.jpg
 
cwZUQsa.jpg
 
Interior condition is not horrendous, however some of the dash plastic trim is broken and needs replacing, which is incredibly hard to source!
 
Y7lhBId.jpg
 
K4Apl4U.jpg
 
oa9lX9v.jpg
 
UaOBTa8.jpg
 
A few weeks later... replacement matts, correct phillips headunit and a bit of TLC.
 
gyo8nRA.jpg
 
29peCKn.jpg
 
2yme9xS.jpg
 
Z8qMaAz.jpg
 
I moved onto the bodywork issues, a few weekends work with the polish and tar remover saw the bodywork back to life. The NSR quarter will require paint though.
 
Fx1EVlE.jpg
 
umditg0.jpg
 
qv0nGOf.jpg
 
3zTKZK6.jpg
 
f03nUlf.jpg
 
3oqDn69.jpg
 
ZjUDkSw.jpg
 
gPweHBr.jpg


Share this post


Link to post
Share on other sites
jigs2895
As mentioned above, I was lucky enough to know where my 205 was originally sold. ‘Stag Hill Peugeot’. I got in contact with Dave at DMB Graphics and luckily he had the dealer logo on file, so he made me up some original dealer plates and sticker set!
 
Nb19moP.jpg
 
qBCGv3z.jpg
 
Also had the spare wheel, cage and bolt powdercoated, and of course a new tyre to match the rest!
 
yDq4K5F.jpg
 
At this point I was happy enough with the car to take it for its first drive out! Just one little job left to do, change the inlet manifold gasket! Quickly removed the inlet and uncovered this....
 
nuY5jOx.jpg
 
Unfortunately this is known as chemical metal, and has been used to cover a crack in the engine block, this goes back to the K seal I found in the cooling system, I suspect that was used to aid sealing up the crack! :wall:
I could not drive the car now knowing it’s there... which meant sourcing a replacement engine, any replacement engine I purchased would be at least 30 years old and require a rebuild, this is a massive turning point for the car as initially I was restoring this car to just a useable standard, however now it will undergo a full engine rebuild and front end restoration.
 
....................................................................................................................................................................................................................................................................................................................................................................................................................
 
So with the unwelcome news the engine block was cracked, I picked myself up and sourced a replacement engine. The next weekend I found myself on a little road trip down to Somerset to pick up an engine from a fellow enthusiast.
Whilst I was there I decided to buy a few other parts from the chap, and fully built front CTI subframe so I can strip, powdercoat and rebuild that and install it when I replace the engine.
 
Rvy1USU.jpg
 
The replacement engine had 97k on it, although it makes no sense to put it in like that, so began stripping both the engine and subframe right down. The engine will be fully rebuilt and aqua blasted, and the front subframe rebuilt and powdercoated.
 
gLYPAdt.jpg
 
Spw7edu.jpg
 
ncvBP6y.jpg
 
First things first the subframe got torn apart:
 
TS4SztJ.jpg
 
rf6pPBj.jpg
 
qzK4iXQ.jpg
 
epXw0ua.jpg
 
Next was onto the engine:
 
q3KsKCg.jpg
 
brW0dm2.jpg
 
txssm6R.jpg
 
5cAJHiA.jpg
 
gLJecO7.jpg
 
JjxYsN6.jpg
 
MMNrQcZ.jpg
 
VTzxIcY.jpg
 
With the engine stripped right down, I gathered up the aluminium parts and de-greased them ready for aqua blasting.
 
3jKzAgO.jpg
 
l6yJung.jpg
 
KuCrATv.jpg
 
All the bits ready to be powdercoated:
 
kFPNoBV.jpg
 
dRG5MMB.jpg
 
Boot all loaded up (only benefit of driving a insignia, the boot is huge!)
 
UplV7QJ.jpg
 
Crank will be going to be checked sometime next week, hoping it will only need a polish, the bottom end shells seemed to be in good condition.
 
N4OhFl2.jpg
 
Parts for front subframe rebuild are building up.
 
KTunQ6P.jpg
 
The chap at the powdercoaters was kind enough to show me a quick sample of the aqua blasting process on my rocker cover, results look very promising!!
 
5GtU1Mh.jpg
 
More updates next week hopefully!
....................................................................................................................................................................................................................................................................................................................................................................................................................
 
Collected the bits from the blasters (powder coating bits take a bit longer so ill get those next week).
 
Absolutely over the moon with the finish, a quick reminder of how the parts looked before hand:
 
5cAJHiA.jpg
 
VTzxIcY.jpg
 
l6yJung.jpg
 
And how they look now!
 
i8LniI9l.jpg
 
VicdU9Ql.jpg
 
hRxeJeQl.jpg
 
nySOruLl.jpg
 
RfBwsUHl.jpg
 
vu6LWm2.jpg?1
No pictures of the cylinder head I'm afraid, I dropped that straight off to the machine shop to have it skimmed, valve guides replaced, valves re-seated, stem seals replaced and camshaft shimmed. I'm hoping they don't get it covered in grime as it looked brand new!
 
Whilst the bits where at the blasters, I had the crankshaft checked over, unfortunately it required a regrind of .3 on the ends and .5 on the mains, not the end of the world, the machine shop supplied me with replacement correct size bearings and new thrust washers too.
 
9tt3h2H.jpg?1
 
Next on the list is to have most of the engine bolts zinc plated, just trying to find a good company to do it at the moment. Once that is done and the cylinder head is back, engine assembly can begin.
I'm also hoping to have the original cracked engine out the 205 this weekend, so I can get the last few bits powder coated that I need to. I'm hoping to have the front sub-frame and suspension components back from powder coating next week, so I can begin building that too.
Edited by jigs2895

Share this post


Link to post
Share on other sites
jigs2895
Today began with a lovely sunny Hampshire morning, although a little cold, perfect weather for removing the engine, so nothing for it but to crack on!
 
2pp45c0l.jpg
 
My starting point was simply the complete engine all together, minus the inlet manifold that I had removed and discovered the crack in the block.
 
yihVeZcl.jpg
 
lYDcRf8l.jpg
 
I6UGZdQl.jpg
 
Began with stripping to top end and draining the fluids.
 
A few hours later I had the car turned around (more room for the engine hoist) and jacked up and began the underneath work, shortly after it was time for a bit of lunch :thumb:
 
9fG281Cl.jpg
 
Stomach satisfied, I got cracking and was quickly at the point of engine removal.
 
Fql6BQql.jpg
 
4Xstz6ml.jpg
 
A bit of wiggling later..
 
DWaLTR3l.jpg
 
ARlxfI9l.jpg
 
Engine bay is looking a bit tired, going to need a little corrosion attention whilst access is good. Nice to see someone left one of the gearbox mount support bolts out!
 
9WAr35sl.jpg
 
Popped the driveshafts and lower ball joints back in (to keep the wheel bearings together) and had a good tidy up and popped it back into the garage.
 
RvvXhOwl.jpg
 
Plan of action is to keep plodding along with building the new engine and subframe at work, and at the weekends address a few bits on the car whilst the engine is out, makes sense to make up some new copper brake lines, clean and degrease the engine bay.
 
....................................................................................................................................................................................................................................................................................................................................................................................................................
 
Got the cylinder head back from the head shop, and everything was looking fantastic..
 
Until I turned it over...
 
26DXGEll.jpg
 
When I dropped the cylinder head off, I advised the chap of slight corrosion on the cylinder head face, and asked him to skim it first and if its ok after the skim, to continue and replace the valve guides, valves and rebuild it and shim it.
It seems he skipped the 'check it after the skim' phase, and cracked on with the rebuild. The corrosion around the water ways isn't a problem, the problem is with the corrosion around the combustion chamber between cylinders 2 and 3, the fire ring on the head gasket sits right on top of this, and its likely it wont seal correctly.
 
After speaking with the headshop they have apologised, and offered 2 options:
 
1. Weld the head (although in that area its not nice, and wont be perfect)
2. Source another head, and they will rebuild that FOC.
 
Of course I'm trying to complete this engine rebuild to the best standard possible, so option 2 it is! With that in mind, thought I'd remove the head off the old engine and check its condition.
 
B9bIbU8l.jpg
 
To my surprise, its not to bad. There is no corrosion present near the combustion chamber, however still some near the waterways, so first things first will be to get it skimmed and see what's left after the skim, keeping my fingers crossed.
 
B9bIbU8l.jpg
 
qRPMpQFl.jpg
 
If it skims and is useable, then its over to the aqua blasters (again) then back to the head shop for its rebuild.
 
....................................................................................................................................................................................................................................................................................................................................................................................................................
 
Good progress this week.
 
Stripped down the new cylinder head ready to be skimmed to check its condition:
 
6d1g56al.jpg
 
And I am happy to report it came back in good usable condition. Dropped it straight over to be aqua blasters, then had it rebuilt. Second time lucky!
 
VVMfIQbl.jpg
 
Made a start on cleaning up the filthy gearbox:
 
U8CNBnPl.jpg
 
R6ysxkOl.jpg
 
rp5YQlEl.jpg
 
NmuOxtCl.jpg
 
About half an hours work (lots more to go):
 
VeouPVsl.jpg
 
Also had all the suspension and engine bolts Zinc plated, this is not something I have ever had done before, in previous rebuilds I've always given the bolts a clean and used them like that. I was pleasantly surprised with the results, its really going to finish off the rebuild!
 
5y7vip2l.jpg
 
SQxPtfkl.jpg
 
SwKdpHIl.jpg
 
2ypJgXfl.jpg
 
Also got the last of the engine bits back from the Aqua blasters, and the other parts back from the powder-coaters. I'll let the pictures do the talking...
 
Previously..
 
kFPNoBVl.jpg
 
Now..
 
k5wGqMJl.jpg
 
QNtiDhul.jpg
 
Now I have all the parts I need, in the condition I need them in, I've begun to build bits back up.
 
Cylinder head:
 
19sp9k9l.jpg
 
wL12js7l.jpg
 
1uFzZy3l.jpg
 
8D9oSuOl.jpg
 
New wheel bearings into the freshly coated hubs:
 
sFJublel.jpg
 
mZcoai0l.jpg
 
New shocks, springs, top mounts, and all plates coated:
 
Z1xam4yl.jpg
 
18gupVNl.jpg
 
Made a start on the subframe:
 
88hRomXl.jpg
 
7Yvqts6l.jpg
 
Very happy so far considering this is how it looked around a month ago:
 
TS4SztJl.jpg
 
Plan is to concentrate on building the front suspension and subframe over the next week, and attend to the dirty and tired engine bay the following weekend. By then the bottom end should be ready for collection and engine re-assembly can begin.
Edited by jigs2895

Share this post


Link to post
Share on other sites
jigs2895
On my previous post I had begun rebuilding up the front subframe.
 
This week ive managed to finish building it up as much as possible.
 
FVMep2Nl.jpg
 
Began applying ACF50 to the aqua blasted parts, and painting whatever I had left to paint (manifold etc..)
 
SW9YXptl.jpg
 
Also had the car recovered to the workshop to make engine and subframe instillation a little easier (excuse the Fiat 500!)
 
JGB6F0Sl.jpg
 
Looking very sorry for its self...
 
cJxX5S3l.jpg
 
zMoeopVl.jpg
 
ivYzIw5l.jpg
 
EheV0I6l.jpg
 
Started by replacing the brake pipes, a member on here a few posts back suggested I tried Kunifer brake pipe. I've always used copper, but decided to try something new..
 
wwm7USDl.jpg
 
3nF7IOFl.jpg
 
BfCh218l.jpg
 
Happy with the Kunifer pipe, slightly harder to flare and work with compared to copper, but it certainly feels more durable. I wish Peugeot had routed their pipes a little neater, however I've replicated the routing and shape from the original pipe so I can't complain! I've also had the bottom end built by a well known local business who specialise in 205's.
 
Liners in and clamped down:
 
nFFszSAl.jpg
 
Pistons, crank, oil pump and sump back on:
 
F1Stv03l.jpg
 
kbLq3Oql.jpg
 
Head bolted on and torqued down:
 
MiBHIp3l.jpg
 
Engine timed and cambelt re-installed:
 
kj2IZ8Ul.jpg
 
zSKkNUhl.jpg
 
He also refurbished my steering rack too:
 
3kuqd8Xl.jpg
 
Engine and rack collected, I made a start on finishing off the engine..
 
NtlDNF4l.jpg
 
jUGTgwcl.jpg
 
hBqqwl2l.jpg
 
PyYb8tQl.jpg
 
BBDR6lsl.jpg
 
8koITaOl.jpg
 
JVm9R82l.jpg
 
Still plenty to do, however I'm extremely pleased with how the engine is looking. With the engine mostly complete, I was forced to start a job I've been putting off for weeks....
 
U8CNBnPl.jpg
 
R6ysxkOl.jpg
 
NmuOxtCl.jpg
 
3 HOURS worth of cleaning, and further hour of painting later.....
 
IQ0vYnsl.jpg
 
CHG0E4xl.jpg
 
I've painted a gearbox or two before, but this was by far the worst I've ever had to do, but its also come out the best I've ever done!
 
And finally got the old subframe out the car today:
 
SXGSItOl.jpg
 
IjTQgvml.jpg
 
RgIhX1Gl.jpg
 
TnGwWBVl.jpg
 
And just enough time to bolt the new one back up into the car:
 
llD0s99l.jpg
 
I hope to have the engine done and bolted back up into the car in the next few days, then it will just be slow pottering, slowly re-connecting the ancillaries, wiring and hoses till I can turn the key!
 ...................................................................................................................................................................................................................................................................................................................................................................................................................
 
Last week I got the majority of the engine built and assembled.
 
Se3DCXdl.jpg
 
Now to slowly bolt it up to the car..
 
eGpdFpZl.jpg
 
Lots of wiggling later...
 
V4Q9Il0l.jpg
 
SMZuv4gl.jpg
 
Slowly re-assembled the maze work of breather pipes and coolant hoses, taking extra care and time to ensure they are routed correctly.
 
2zPtKYJl.jpg
 
ZTpTzGRl.jpg
 
QOkQTGml.jpg
 
Nice new driveshafts.
 
AK0rnokl.jpg
 
Before I knew it, it was ready to fire.
 
w9N7HZul.jpg
 
Left the plugs out and disconnected the coil and injectors and cranked it over to gain some oil pressure. Then it was time to add the final piece....
 
XyC0TQ0l.jpg
 
Not forgetting some fresh fuel! Its hardly been used in 6 years!
 
L4X2gFsl.jpg
 
Sure enough, its started after a few coughs! Ran it up to temperature, checked for leaks, none present! - Result.
 
Next was to set the ignition timing, I personally have only really worked on new cars since learning my trade, so using a timing gun and adjusting the distributor was a learning process for me. Managed to get it set, and took it down the road, felt ok, however a little flat up the rev range...
 
Ah... that will be the problem!
 
Ys9BCDnl.jpg
 
hukhh3Kl.jpg
 
Vacuum advance unit was not working, I guess the diaphragm inside has failed, what a pain. Spoke with the engine builder that evening, he had one on the shelf. A short 3 hour drive to collect a £25 part later...
 
w6afHW0l.jpg
 
Set the ignition timing back up, and another test drive... what a difference! Over the moon with how it drives!
 
0ov332Ol.jpg
 
ddvgyePl.jpg
 
CgLnuuol.jpg
 
Went and had the wheel alignment done.
 
80L1wLXl.jpg
 
Overall thoroughly pleased with how its turned out. Next on the list is the bodywork and the roof, however I think that can wait whilst I enjoy it over the summer now!
 
And there is 6 months worth of progress, well done to those of you that have read it all, and thanks for reading!
Edited by jigs2895

Share this post


Link to post
Share on other sites
Kane

Cracking job you've made of it. Here's hoping we actually get the weather for you to make use of that roof this summer. 

Share this post


Link to post
Share on other sites
barneys66

What a great read and a quality job !!  Nice to see it back on correct wheels too.


Looking forward to more updates, but enjoy the driving in the meantime.

Share this post


Link to post
Share on other sites
mechanicalrepairs

Brilliant work and attention to detail.


carl 

Share this post


Link to post
Share on other sites
petert

Loving your work. I'm amazed at how good that vapour blaster is. Stuff we'd throw in the bin over here in Aus, you guys bring back from the dead. Don't be afraid to weld a head. A good operator weld and machine a head successfully. Alternatively, you can take up to a massive 2mm off a 205 head.

Share this post


Link to post
Share on other sites
Krash67

Excellent work, especially to detail and having the original fasteners re-plated. most people, like myself ,would of just replaced with new off the shelf fasteners. Definitely gives it that " factory look". Keep up the good work.

Share this post


Link to post
Share on other sites
nomis

That's a great thread and a fantastic build. Well done.


Nearly bought a CTI before my GTI and then discovered only lapstraps in the back, which didn't work with two small kids. 


They still look very tempting when you see them for a good price. Hope you get a great summer to enjoy it.

Share this post


Link to post
Share on other sites

Please sign in to comment

You will be able to leave a comment after signing in


Sign In Now

×