Jump to content
  • Welcome to 205GTIDrivers.com!

    Hello dear visitor! Feel free to browse but we invite you to register completely free of charge in order to enjoy the full functionality of the website.

Leslie green

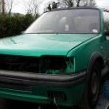
Barn Find Laser Green 1.9 Gti.

Recommended Posts

Leslie green
18 hours ago, series111 said:

Looking well, now the fun begins putting it back together 

Be good to see the bits going back on and all the boxes of spares emptying for sure.  it's been a bit hectic this last while taking up a lot of time as I had deadlines to meet with painters , looking forward to chillaxing a bit 

  • Like 2

Share this post


Link to post
Share on other sites
Leslie green

Are 205 gti 1.9 and 309 gti 1.9 rear wheelbearings the same ,seller says they are not and don't fit but they seem to have same part number , looking the correct first-line part number if anybody knows it .Is the difference due to the large backing washer that sits behind the bearing ?

Edited by Leslie green

Share this post


Link to post
Share on other sites
Anthony
49 minutes ago, Leslie green said:

Are 205 gti 1.9 and 309 gti 1.9 rear wheelbearings the same ,seller says they are not and don't fit but they seem to have same part number , looking the correct first-line part number if anybody knows it .Is the difference due to the large backing washer that sits behind the bearing ?


AFAIK 205 and 309 1.9 GTI rear wheel bearing assemblies are the same.


ZX/306/Xsara ones with ABS are different with a wider offset and require a different stub axle.


I see quite a lot of supposed 205 GTi rear bearings on eBay and the like which clearly have ABS teeth on them (205's with ABS only had teeth/sensors on the front axle, not the rear) - I've never tried one of these, but my guess is that they're actually 306 ones and thus the wrong offset for 205's.


Cracking work so far btw - shell is looking great after paint :) 

  • Thanks 1

Share this post


Link to post
Share on other sites
Leslie green

Thanks Anthony the ones on ebay are firstline but only show a bearing and nut no other parts and only listed for 309. I might just buy one to see. 

Spending money now on new bits 3 of 4 bearing are shot one of front is completely siezed and won't turn at all by hand. Gathering bits up for blasting now one of front arm ball joints seems very tight and one of front shocks busted plus top mounts fell apart not much reusable on this shed lol

Share this post


Link to post
Share on other sites
Leslie green

Shocks stripped and the top mount bearing fell to bits , will need springs too  as they are too short and rusty , Stripped the front sub frame and one of the anti roll bar clamps the captive bolts spun round  but I got it out after a battle . The circlips on the front bearings were stuck too and broke my cir clip pliers ,one bearing was totally siezed and would; not rotate anyway  bearing are now out and had to grind the races of the hub flange ,I marked both a little with the grinder but should do fine . The seller on ebay would not agree the 309 rear bearing fits a 205 gti 1.9 so got one on the way from a different source . New Bilstein B4 shocks are here now and just gathering up stuff for blasting .  Went in the garage for 2 mins and cat followed me in and jumped up on the bonnet while my back was turned !!!!!!!!! luckily no damage although I did managed to knock over the box with the front spoiler in and put a tiny scratch in which was annoying , first of many no doubt lol. The newly painted shell is just a sitting target for damage ,have tried to move everything as far away as possible ,will get a sheet to put over it but a carcoon might be better  as dust is going to be a real issue in the shed.

  The front subframe is in very good condition must have been all the oil leaking kept it mint .


52409927463_a4d4f817db_k.jpgIMG_20221002_183155 by Leslie, on Flickr


52409861950_722b466b8b_k.jpgIMG_20221003_155215 by Leslie, on Flickr


52408915412_e0ff3223dc_k.jpgIMG_20221006_181316 by Leslie, on Flickr

Edited by Leslie green

Share this post


Link to post
Share on other sites
Leslie green

Got some wire wheeling done today on all the little brackets and stripped the spindles these were siezed as well and the shafts are badly corroded ,more scrap for the bin lol  I thought they were supposed to be  different sizes but they look the same or the shafts are the same length anyway /


52411598950_23e719729b_k.jpgIMG_20221007_163615 by Leslie, on Flickr


52411598885_12f9ba0e30_k.jpgIMG_20221007_163135 by Leslie, on Flickr

Share this post


Link to post
Share on other sites
Tom Fenton

The flat arms are (or should be) different length, the passenger side wiper moves over a bigger angle than the drivers does.

Share this post


Link to post
Share on other sites
Leslie green

I think you are right looking at the pic now  , will check again next time I was down was comparing the wrong bit lol ,matters not anyway they are about as much use as a chocolate fireguard ! 

Edited by Leslie green

Share this post


Link to post
Share on other sites
Leslie green

You are right Tom 5mm difference in total length on the flat part. 

Not much to report other than got a quote to make some sunroof top hat spacers in aluminium the problem is its 6 quid eack which wouldn't be so bad if I didn't need 27! 

He said aluminium doesn't cut well on cnc so small so needs done manually and can do brass for a fiver eack or some plastic for 4 but I don't like the plastic idea. 

Any problems with brass.? 

You can't fit m4 rivnuts as Peugeot made the holes small in the roof to 4.8mm and you need 6mm for an m4 rivnut and I ain't drilling the roof now after paint. 

Anybody have any other ideas or a bag of them they don't need, I did message Farmer a whole back but seems he rarely visits now. 

840349 is the part number. 

Edited by Leslie green

Share this post


Link to post
Share on other sites
Leslie green

Tried adjusting the bonnet fit while waiting for bits , moved it back as far as I can even put a scratch on the bulkhead as it was too low ,put the fan scroud on to support the slam panel and this is the result , the striker is still too far forward by at least 5mm , I had to screw the striker in below in this pic it won't go through the hole for it .I think the headlight panels need to come forward a little which is a bit of a pain now it's painted , The bolt holes for the slam align up fine and the inner wing appear straight  , can't see how else i can make it fit !


52465001697_c3f05bd1f4_k.jpgIMG_20221030_153620 by Leslie, on Flickr

Share this post


Link to post
Share on other sites
welshpug

Bend the bracket the pin screws into.

Share this post


Link to post
Share on other sites
Leslie green
4 hours ago, welshpug said:

Bend the bracket the pin screws into.

Thanks Its an option although I'm not keen on messing with a perfect auto bonnet incase I mess it up .I was down today at the car and the original bonnet the pin is bent which explains why it fitted and the new one doesn't. 

Share this post


Link to post
Share on other sites
Leslie green

I Have measured either side from bulkhead to edge of slam panel and I an getting 59.5cm  can anybody have a check on their car to compare it too see if their is much difference thanks too see what my option are   ?


52467884321_4eda448c9b_k.jpgIMG_20221031_152334 by Leslie, on Flickr

Share this post


Link to post
Share on other sites
Reebmit

Hi Leslie, bit wet out there dashing across to the garage lol, but just checked for you, right side 59.2 and left side 59.5

Edited by Reebmit
  • Thanks 1

Share this post


Link to post
Share on other sites
Leslie green
1 hour ago, Reebmit said:

Hi Leslie, bit wet out there dashing across to the garage lol, but just checked for you, right side 59.2 and left side 59.5

Thanks very much Mate much appreciated  that's a great help  :D, given that measurement my bonnet should fit  as the front headlamp panels are not pushed back , I had a good look today and it's hard to see how they could be without inner wing damage .  my striker is away for plating at the minute which makes  making adjustment difficult  but it can't really go back anymore without damaging the bulkhead . When I got the car the slam panel was off and I don't think its original as I believe it should be beige , the front bumper looked like it had been there a long time and had a crack in it where it was lightly bumped on passenger side .

Maybe the striker plate on the bonnet has had a little bend as the auto bonnet was in storage when i got it  but it's not this cars bonnet and was never on this car till now  dunno running out of ideas now I might push it in the corner and start back at my xr2 I left 5 years ago when this arrived lol Losing the will with this one now ..............

Edited by Leslie green
  • Like 1

Share this post


Link to post
Share on other sites
Tom Fenton

You are getting worked up over nowt here, fit the striker to the bonnet without the spring, put a piece of tube over it and bend it till it is where you need it to be, it will take you 30 seconds then you can move onto the next job.

  • Like 1

Share this post


Link to post
Share on other sites
Leslie green

I think it's the pin will bend first will use a bolt tightened down on a spacer so the metal skin below it bends rather than the spot weld on the nut tearing out. It shouldn't need much as you say. Cheers. 

Share this post


Link to post
Share on other sites
Leslie green

In other news my plated parts are nearly ready unfortunately no word of powder coated parts and I sent the servo mount out so can't brake pipe the car till it comes back but have waxoyl to do among other things. 

Edited by Leslie green

Share this post


Link to post
Share on other sites
Leslie green

Postman has been !

Did message Bakerbm would they be interested in making these Phase 2 sunroof Top hat spacers  but not at the minute so got  a Cnc engineering place to make some up for me , the originals are in 2 pieces why I'm not sure and getting them made that way would double the cost . These were fitted from late 1990 and it seems most cars on there are earlier and use the screws Baker do make , unfortunately when pug changed to Rivets they reduced the hole sizei in the roof skin as well from 6mm to 4.8mm as far as I can tell   so M4 rivnuts won't fit without drilling  . 

You need 26 of these 9 each side and 8 on the front , the rear just uses rivets but no spacer so it will clear the glass and these are only to hold the trims on anyway . Machine  shop guy said he had a limited edition Miami 1.9 with full leather which was a good omen ! Oh and don't go drilling these with an 8mm drill bit to remove them like they can be replaced cheaply cos they can't lol another sore lesson learned the hard way so you don't have too !!!!!!!:D


52470270537_5f0214c2f6_k.jpgIMG_20221101_205344 by Leslie, on Flickr

Edited by Leslie green

Share this post


Link to post
Share on other sites
Tom Fenton

I can understand why they are 2 piece, easier to make to me. Rather than making a 1 piece "top hat" you can effectively make 2 washers and sandwich them together and they will do the same job. If I was making them on my lathe that's how I would do it as it would be much quicker, just turn a length of bar to size drill the hole up the middle and then part off at the length you need, repeat for the other size.

Anyway, you've got it sorted so its another job out of the way.


Share this post


Link to post
Share on other sites
Leslie green

The real ones are not like that Tom I will get a pic later the top part is still a top hat design  the bottom part is just a spacer so it would be no easier to make for them,cant understand why they did it that way Yes your way is easier I agree but with no lathe I couldn't find the correct combination of spacer with a 4mm height nearest was 5mm but then centre hole was too small. 

Edited by Leslie green

Share this post


Link to post
Share on other sites
Leslie green

Original tophat spacers a 2 part design :


52476721312_3904a74a5e_k.jpgIMG_20221103_135629 by Leslie, on Flickr


Got the car waxoyled today what a nightmare of a job , I bought a waxoyl hand operated  sprayer they sell , it blocked so many times despite thinning with white spirit  it was a right pain , You need it in boiling water  for a good while before or it won't spray more than a few secs .Waxoyled inside doors. 1/4' panels , chassis legs , front chassis rails , and along the rear panel box section ,should be good for a few years hopefully .  I sprayed then brushed inside doors etc for a smoother look .  I think id  get an air operated one of I was buying again but it needs its own tank as the ones sold don't  fit a waxoyl can as the thread is different ! 


Waxoyl inside door :

52477770173_06da5bc8e6_k.jpgIMG_20221104_174709 by Leslie, on Flickr


Got my plating back too,looks really good quaiity, he did say though the blaster was using a bit too aggressive a media but some of them were very rusty before blasting . and an almost full car's worth  of bolts too but forgot to take an pics  :


52477521339_fd9d623386_k.jpg312725199_141323818644979_2502290386848889764_n by Leslie, on Flickr


52477722750_106c8039c9_k.jpg313027220_141323885311639_6529670864251038474_n by Leslie, on Flickr

Edited by Leslie green
  • Like 1

Share this post


Link to post
Share on other sites
SRDT

At least rough sandblasting can hide uneven pitting on the parts, it's not exactly like new but it's shiny and uniform.

Share this post


Link to post
Share on other sites
Tom Fenton

Plating looks well, where did you have it done?

Share this post


Link to post
Share on other sites
Leslie green
1 hour ago, Tom Fenton said:

Plating looks well, where did you have it done?

A local guy " restore parts NI ", can see his pics on Facebook does vapour blasting, plating and restores stuff. His way takes longer but gives a nicer finish, colours of the bolts etc is really nice.He only works part time though as a 2nd job so I think he is going to have too much work on soon. 

Srdt can't complain you can't make new parts out of 30 year old ones that have seen many winters. 

Edited by Leslie green

Share this post


Link to post
Share on other sites

Please sign in to comment

You will be able to leave a comment after signing in


Sign In Now

×