Jump to content
  • Welcome to 205GTIDrivers.com!

    Hello dear visitor! Feel free to browse but we invite you to register completely free of charge in order to enjoy the full functionality of the website.

Leslie green

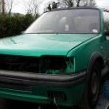
Barn Find Laser Green 1.9 Gti.

Recommended Posts

Telf

caught up, great progress! reminds me of mine being all shiny 4 years ago :)


  • Thanks 1

Share this post


Link to post
Share on other sites
Leslie green

I often have a look at your thread Paul to see what needs doing next, progress is being made if a bit slow working 4 nights next week so another week lost .

Share this post


Link to post
Share on other sites
Telf

it will be having some bits taken off it come the summer proper, needs  a bit of work after 4 years of being battered, driven into walls and generally abused !:D

  • Like 1

Share this post


Link to post
Share on other sites
Leslie green

That's what they were for anyway though , well not the walls bit , I would never drive mine in the winter after all this work .

Got a few more bits done , got the gear linkage back from the  bits zinc platers and put back together with Bakerbm bronze bushes and got the front of the jig removed so the sub frame can be fitted , It was powder coated then build up with new anti roll bar bushes from France think it's cool how these are different colours . I had to but one new antiroll bar clamp as it was rusty and one of the studs was spinning round .Got it lifted up and on the car steering rack isn't ready so can do till later . The subframe was absolutely mint with no corrosion at all probably due to all the oil leaks over the years ! I decided the anti roll bar should be red to match the rear torsion bars . The main loom is no sort of in but needs more work and I have the fuel filter in as well , throttle and speedo cable also fitted.


52735213628_05104f5917_k.jpgIMG_20230308_140906 by Leslie, on Flickr


52734732351_d62efa71f3_k.jpgIMG_20230308_164938 by Leslie, on Flickr


52734210097_a205a54b47_k.jpgIMG_20230308_170907 by Leslie, on Flickr


Question ...The parts diagram shows a washer between the chassis leg side mounts and the subframe but I'm not sure if it should actually be there does anybody know for sure ? I guess they fallout when the subframe is taken off and are usually lost ? , the back 4 mounts have a spring washer and flat washer each.


52734751866_0ef5b63021_k.jpgIMG_20230308_170859 by Leslie, on Flickr

Edited by Leslie green

Share this post


Link to post
Share on other sites
Leslie green

I managed to get a much better main dash locally , mine I had ripped the 2 bulkhead screws out and near the centre vent was broken too. I've had the clocks in and out binacle and column on and off many times as each next part seemed to need the last part removing again to put the screw in. There just didn't seem to be enough room to get all the wiring in and trying to fit the large piece around the glovebox  screwing up into the dash was a nightmare , 2 screws are lost in there somewhere can't get them out and the fusebox was in the way etc and the piece that went in front of the heater box to divert air  only seemed to have 2 screws on the bottom into the heater box sides and I couldn't see how it was supposed to be held.

       I put a new piece of soft foam on the underside of the dash as it had turned to dust , not the easiest to cut but will never be seen and its stuck with contact adhesive pic was taken as I got it shaped before gluing . Of course now the dash is in my aerial lead arrived tonight !

  Spend trying to put the roof wiring down the inside of the A pillar then realized it never went down there only the drain tubes lol


52782239923_a847bc0ed7_k.jpgIMG_20230329_150605 by Leslie, on Flickr


52782239783_f1404936f3_k.jpgIMG_20230329_182419 by Leslie, on Flickr


52782181320_c3ad322af8_k.jpgIMG_20230330_160226 by Leslie, on Flickr


Edited by Leslie green
  • Like 1

Share this post


Link to post
Share on other sites
Conorocon

Amazing work, starting a similar restore on a 92 1.9 lazer green PAS with no AC. Body is in poorer shape to yours. Considering getting it blasted to give a clear base to work from.


This thread is give me a good heads up on what lies ahead!

Share this post


Link to post
Share on other sites
Leslie green
20 hours ago, Conorocon said:

Amazing work, starting a similar restore on a 92 1.9 lazer green PAS with no AC. Body is in poorer shape to yours. Considering getting it blasted to give a clear base to work from.


This thread is give me a good heads up on what lies ahead!

Good to hear of another one ,I've been told there is one lying outside a few miles from me in poor condition  but I've not seen it .  Id maybe blast the underneath of the bootfloor my factory underseal om the main floor was mint so I wanted to leave it plus once you blast the galvanising is gone .  It depends how bad yours is ,I saw a laser on ebay recent sold about 3 times in last year and I guess each buyer once they had a good look saw it really was very rotten and needed  a lot of welding. Being stored for the last 17 years has saved this one .

Share this post


Link to post
Share on other sites
sorrentopocketrocket

Leslie what a build!! Can’t wait to see it done and out in the sun!

  • Like 1

Share this post


Link to post
Share on other sites
Leslie green
22 hours ago, sorrentopocketrocket said:

Leslie what a build!! Can’t wait to see it done and out in the sun!

Thanks Jason and nice to meet you . Its progressing slower than id hoped so will probably be next year now by the look of it  just need to keep screwing bits back on every week .

Share this post


Link to post
Share on other sites
Telf

nice job mate, it takes some commitment to do doesnt it!


Share this post


Link to post
Share on other sites
Leslie green

Yes it does Paul progress has been slower this last while as I was having chest pains / now on meds but got some boxes ticked on the 205.


Share this post


Link to post
Share on other sites
Leslie green

Got new underlay cut and fitted and the carpet vaxxed and scrubbed to remove an oil stain . The old underlay had been sitting on the floor under the car and just fell to piece with being stood on . The stuff I got is nice and easy cut too with sharp scissors ,I got it from Coverdale uk and its latex backed. The carpet is in fairly good condition with hardly any wear .


53185545540_af38dde4f4_k.jpgIMG_20230725_143113 by Leslie, on Flickr


53185545590_dabc056faa_k.jpgIMG_20230725_134642 by Leslie, on Flickr


53185342731_b013d7b64c_k.jpgIMG_20230727_134730 by Leslie, on Flickr


53185545500_6579d1ff6e_k.jpgIMG_20230727_134720 by Leslie, on Flickr


53185342741_402c472e08_k.jpgIMG_20230727_155737 by Leslie, on Flickr

Edited by Leslie green

Share this post


Link to post
Share on other sites
Leslie green

I got some stepped sleeves turned to sit in the bearing and spread the load on the outer lip and avoid damaging it to help pull in the inner and then the outer bearings in the axle with threaded bar, its very import ant to grease the tube as well as the bearing outer not just the bearing or the force to draw it in is much too high .Once I realized this the other 3 went in a treat !. I changed the little 30mm  round plugs( yellow in pic 2) that the torsion bars are wound in against but one was stuck after power coating and in the end I had to weld a nut to it to get it out even though it was loose before. While a 12mm length of threaded bar was fine for the inners it was a little too short to reach the outer ones hence the second shorter length and joiner in the pics below  . Marine grease was used so should be more resistant to water getting in . The torsion bars were coated in copper grease and the splines cleaned so they slide in with hardly any effort .

     I also made a tool to set the shock height to suit new Eibach springs , the ends I found are a little big to get it in and out but it did the job . The shock height was set at 312mm .Once the height was set and new Bilstein shocks fitted with replated bolts I offered up the axle myself on a trolley jack , with no help this was a bit tricky but it worked out ok 

New stub axles were pressed in .


53184661552_1c6b17b597_k.jpgIMG_20230530_141729 by Leslie, on Flickr


53184661527_3b28be19da_k.jpgIMG_20230530_141326 by Leslie, on Flickr


53185436879_b02218d183_k.jpgIMG_20230530_141100 by Leslie, on Flickr


53185741898_c5a7474199_k.jpgIMG_20230530_144727 by Leslie, on Flickr


53185370596_5d12899b10_k.jpgIMG_20230530_143550 by Leslie, on Flickr


53185572885_3405c080dd_k.jpgIMG_20230704_145457 by Leslie, on Flickr


53184661402_168f932c39_k.jpgIMG_20230531_115558 by Leslie, on Flickr


53185741858_1a3d7167be_k.jpgIMG_20230707_143016 by Leslie, on Flickr

Edited by Leslie green

Share this post


Link to post
Share on other sites
Leslie green

The wheel bearings were fitted loosely and the rear calipers and backplates (originals powercoated) fitted and the flexi and hard lines fitted finsh the brake pipes off. All the larger bolts were  replated along with all brackets  with the small bolts  for the backplate replaced. The rubber fuel lines to the tank are in too, must have had the tank in and out 10 times and trying to push that filler hose on without the front tank plastic mounts popping off again  by yourself is a pain  and then you find the fuel pup wire has fallen down the front and it needs to come of again to get it . I bought 4 new calipers as it was far cheaper than refurbishing originals and I heard the rears were a right pain to do anyway.


53185486519_db8936c223_k.jpgIMG_20230804_165538 by Leslie, on Flickr


53185486524_823af0c2bb_k.jpgIMG_20230804_165534 by Leslie, on Flickr

Edited by Leslie green

Share this post


Link to post
Share on other sites
welshpug

312mm is going to be super low!!


a bit late now, but your outer bearing only needs to go in to the edge of the chamfer, not fully home.   


it doesn't matter for function, but pulling them out to fit new bearings will be a faff as the tool wont drop in behind it to draw them out as it is larger than the tube.

Share this post


Link to post
Share on other sites
Leslie green
16 minutes ago, welshpug said:

312mm is going to be super low!!


a bit late now, but your outer bearing only needs to go in to the edge of the chamfer, not fully home.   


it doesn't matter for function, but pulling them out to fit new bearings will be a faff as the tool wont drop in behind it to draw them out as it is larger than the tube.

Hi Mei 312mm was the  recommended dummy shock height by you in a post last year ?, I definitely don't want it low I want it to match my eiback 30mm lowered springs . I hope to not need to remove those outer bearings again but I think that's the way they were when I removed them but someone was probably in there before me lol

Edited by Leslie green

Share this post


Link to post
Share on other sites
Leslie green

Bit more progress :


Dyed the kit or most of it and the back bumper with Wurth black dye. The drivers rear arch had broken mounts so I got a replacement which has turned out to be grey but I gave the dye a try and it looks grand for now  . One front arch has a scuff and won't do and both fronts are missing 1 peg so I will buy at least one new front arch at a later date. 

   The valance was attached to the rear bumper and I got 2 better reverse / fog lights as my fog light had one lug broken and both lenses had cracks . The rear lights are brand new bought a few years back when they were cheap and the dark tinted lenses look great . 2 bumper irons were new but one had to be reused as I couldn't get a new one . The right replacement came with only 1 hole on mount to the bumper side and it should have had 2 and I only noticed after it came back from power coating and the one was there was too large  but I got another hole sorted and it fits ok. I looked on miamai stu and there seems to be only 1 part number and it came in a pug bag .I put new rubber washers on the irons like original to help keep moisture out.

       On with the absolute nightmare of fitting these kit clips , I used a poly pocket under the clip to prevent scraping with a bit of wax on it and the first 2 went on great but the ones on the door were a nightmare and 2 rivets snapped on one side and 1 on the other and the force I was using was crazy to fit them. I had a few spare and put the rivet in the clip this time then riveted it on , easy peasy and you could fit them all this way in 5 mins with no hassle which must be the way pug did it. 

I used the black pine tree type clips for the rear arches .

   Both door glasses and the winders and door locks etc and in now ,after several attempts I can now fit one in 5 mins . I got some new clips on ebay for the outer door seal after the first set not turning up.  I haven't put the outer seals on in case there is a problem and the glass has to come out again as once they are in they are difficult to remove. I put cardboard either side into the door as the clips are sharp and stick out and the winder has teeth sitting in just the right spot to put a big score in the glass.  I had the channels replated ,out of 6 I had 2 fell off , 3 were usable and one was rusted on so bad it took about an hour to remove and lots of wd40 . I also replated the seat bolts and seatbelt bolts and wiring clips of the doors etc. and wiper spindles after failing to find any better ones then packed them with marine grease . They were virtually siezed before I took them apart.


53187706233_523c90907f_k.jpgIMG_20230907_161552 by Leslie, on Flickr


53186622467_5cab2f0188_k.jpgIMG_20230907_164039 by Leslie, on Flickr


53187339796_7d141fcb73_k.jpgIMG_20230908_160740 by Leslie, on Flickr


53187706078_faaea17083_k.jpgIMG_20230914_163255 by Leslie, on Flickr


53187706048_4047f0cc93_k.jpgIMG_20230913_144541 by Leslie, on Flickr


53187404959_0a44f40cad_k.jpgIMG_20230913_160715 by Leslie, on Flickr


53187786948_c6c9db702d_k.jpgIMG_20230801_130353 by Leslie, on Flickr

Edited by Leslie green

Share this post


Link to post
Share on other sites
Tom Fenton

It is looking great.

Share this post


Link to post
Share on other sites
welshpug

One day, maybe, I'll  do mine :unsure:


Yes, 312 should be ballpark, did a 306 last and I was thinking of those :lol:  They sit a little higher, especially base models.

Share this post


Link to post
Share on other sites
Anthony

As others have said, looks like you're doing an excellent job on this and should be great when finished.


Rear callipers are a little fiddly but not particularly difficult to rebuild - certainly judging from the rest of the work you've done you won't have any problem doing them if you want to refurb your old callipers for spares.  You'll need to fabricate something to compress the sprung washer stack sufficiently to remove and refit the arm, but that doesn't look like it would pose you any problems judging by the other tooling you've made to do other parts of the build.


As for rear beam height, 312mm is around 30mm or so lower than standard GTI height (322mm), assuming you're still using the GTI 19mm torsion bars.  Given that it'll all be greased up and free moving, it'll be easy enough to adjust it up or down slightly to match the front if required once everything settles.

Share this post


Link to post
Share on other sites
Leslie green

Thanks Lads , I wouldn't fancy going near that axle again , hate the things now ! 30mm is what the fronts are so all good.


Mei have you a Laser hiding away ? 


I will look at the rear calipers  at some later date , need to press on now with putting bits on.


Share this post


Link to post
Share on other sites
Leslie green

Some shiny new calipers , the pads were fitted today and the little locking plates are a right faff to get in but got there in the end and I got a mate to press in the front bearings in the powder coated hubs and then onto the rack and a new bush in the engine steady , the high pressure hose looks fine I just cleaned it up and painted it drab olive green as original and the ram was gold zinc  plated along with the short pipes . The rack boots were taken off to renew the inner track rods which seem ed ok but once you start driving no doubt they would have play and its a right hassle to get the rack in or out later . The locks I got had 2 dimples and the originals only had 1 so wouldn't fit the rack so I had to reuse these but with the new spring washers..


     I bought a new rack top hat boot but it didn't have a metal ring so bought a sasic one instead but had the rack in before it arrived but its easy fitted later .Without the ring I just don't think it will stay on as there is very little area to sit on. The UJ was painted and seemed ok . I fitted new 10mm hose to the cooling loop while I was at it. 


      The 2 heat shields were cleaned and scotchbrited with fairy liquid  to make them a bit more presentable 

Then onto the expansion tank I flushed it but could heat what sounded like 2 pebbles inside with turned out to be balls of sediment which too ages to get out .


    I had ordered new clips for the outer window scrapers but these never arrived but eventually I got a set and then fitted the glass using cereal packets each side on the door as the clips and winder gear are very sharp and would score the glass easily. I put the mechanism in first seemed to work best and if you take the screw of the front channel the glass can drop in no problem and the rubber of around the top frame .. I did though mark the channels before taking them of the glass then when plated look at another door and get confused and put them on the glass too far to the other side and the nylon wheels wouldn't stay in . The wiper spindles were plated and coated in marine grease before refitting.


53199681040_4c2c0cfa9d_k.jpgIMG_20230728_183503 by Leslie, on Flickr


53199160979_b7fb5291e6_k.jpgIMG_20230731_125943 by Leslie, on Flickr


53199681070_8e561f77f1_k.jpgIMG_20230731_145003 by Leslie, on Flickr


53198903252_b5fd211b27_k.jpgIMG_20230808_150153 by Leslie, on Flickr


53199171599_9c41071800_k.jpgIMG_20230808_150821 by Leslie, on Flickr


53199591053_4d73db7850_k.jpgIMG_20230817_151116 by Leslie, on Flickr


53199193184_5c00ead3fb_k.jpgIMG_20230901_165817 by Leslie, on Flickr


53198908952_b20e8a9f43_k.jpgIMG_20230823_173606 by Leslie, on Flickr


53199177684_fa16e9a7d4_k.jpgIMG_20230831_172619 by Leslie, on Flickr

Edited by Leslie green

Share this post


Link to post
Share on other sites
welshpug

Not a laser no, an 89 White 1.9

Share this post


Link to post
Share on other sites
Leslie green

Welshplug best to see whats needed and make a start ,time passes so fast 

Thanks Paul ,gearbox stripped and casing away for blasting,bearings look fine but operating arm pin put up a fight as they all do ,engine block painted and sunroof surround painted. I've a lot of painting to do in the house now so on hold at the minute :(

Edited by Leslie green

Share this post


Link to post
Share on other sites

Please sign in to comment

You will be able to leave a comment after signing in


Sign In Now

×