Jump to content
  • Welcome to 205GTIDrivers.com!

    Hello dear visitor! Feel free to browse but we invite you to register completely free of charge in order to enjoy the full functionality of the website.

Leslie green

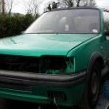
Barn Find Laser Green 1.9 Gti.

Recommended Posts

Leslie green

Telf ..They all go in the same areas it's true , rear bumper mounts being the worst place ,the waxoyl on the boot floor has certainly helped mine and it's been caught in time ..my sills look fine too and have never been touched .

I don't know if its leaks yet as it's probably been inside the last 10 years but I don't really fancy taking the wings off unless I need to but I'm going further in all the time !Looks like the drivers wing is a replacement and may come off easy as it doesn't seem to be sealed and it has a dent at the bottom that needs fixing. The floorpan inside still has most of the original paint but will have to do some water tests before the carpet goes back in, my original plan was just to get it mot'ed for now and drive it as the paint isn't too bad as i've another car that needs some final welding before getting painted and there is hardly any room in the shed to work , ideally Id like to have put it on a spit and fix the flattened chassis legs etc as it's far too hard working underneath .

As has been said before though compared to old fords the 205 is a welders dream ! I've more of an issue with loads of dents on every panel and the usual scrap engine block .

Edited by Leslie green

Share this post


Link to post
Share on other sites
Leslie green

The spare wheel mount bracket had been jacked on and squashed the box section ,spend a bit of time trying to pull it back out without success before cutting a square in it to get in easier ,hammered/pulled out the dents then weld a new piece back in again.

   I pulled out the dents in the cross-member in the middle of the boot floor before cleaning any rust all down with a wire wheel in the grinder , fixing a few busted spot welds with the inner arch where I tried to fix some dents in the inner arch .I then treated all the rust with Jenolite rust remover and primed it up afterwards.


27278637149_26a1beaca0_b.jpg20171020_162500 by Leslie, on Flickr


39024695422_490defb6e7_b.jpg20171213_160744 by Leslie, on Flickr


39056037671_014d1b50e0_b.jpg20171214_151713 by Leslie, on Flickr


27278560309_fbd0e742b4_b.jpg20171214_164831 by Leslie, on Flickr

Share this post


Link to post
Share on other sites
Leslie green

Sounds like a good idea CyberNck !


Got some seam sealer on a few places like the bumper mounts then a coat of grey gravitex , not easy to work under a car on axle stands with a shultz gun and got a couple of runs which I will leave to dry and recoat as touching them with a brush was a mistake ..


38192253675_06f2c7acba_b.jpg20171215_154850 by Leslie, on Flickr


Share this post


Link to post
Share on other sites
Leslie green

A few of the pics when i got the car saying as photobucket ate them .


38192354605_9ecfca1346_b.jpg20170310_121437 by Leslie, on Flickr


38363735714_c2ac09bfd3_b.jpg20170622_115850 by Leslie, on Flickr


25207248158_24d4cbb518_b.jpg20170310_121645 by Leslie, on Flickr


25207248778_0b0f79a91f_b.jpg20170310_121830 by Leslie, on Flickr


38192252895_bc331590e4_b.jpg20170310_141517 by Leslie, on Flickr


24212632937_61b9191259_b.jpg20170310_141524 by Leslie, on Flickr

Share this post


Link to post
Share on other sites
Leslie green

Got this today , looks better than mine ! Virtually corrosion free inside ,liners just lifted out . A bare block weights 19.8kg and with liners 25.8kg 


39395552061_6e6bffacaa_b.jpg20171230_174411 by Leslie, on Flickr


38687493514_f746541e48_b.jpg20171230_173942 by Leslie, on Flickr


25525364128_5d45367e0a_b.jpg20171230_173948 by Leslie, on Flickr

Edited by Leslie green

Share this post


Link to post
Share on other sites
Telf

leslie,


make sure you completely clean it inside. I thought on my first block it had no corrosion. It did but it was covered with water /scale deposits. Usual areas in the corner by the channels for the head bolts


Share this post


Link to post
Share on other sites
Leslie green

Will do Paul, got the engine out today nothing wanted to unscrew so it was hard work and when I was lifting the engine I realized I hadn't removed the steady bearing bracket for the driveshaft yet but both shafts were out of the box  . Sheared the drivers engine mount to get it off ,gearbox one didn't fare any better ! Car is that close to the door and couldn't be moved back with no axle so I was working outside and it was getting dark .Managed to bump it of everything on the way out ! Too many projects no room to work . The allen bolts in the alternator mount must be a strange size and someone had tried to remove them before unsuccessfully guessing m9 as m8 just spun round so had to resort to vicegrips to shift them.


39828175762_ae88c492c7_b.jpg20180123_173520 by Leslie, on Flickr


28080777429_de106c7dd7_b.jpg20180123_173659 by Leslie, on Flickr

Edited by Leslie green

Share this post


Link to post
Share on other sites
Leslie green

Got the gearbox off and put the engine on the stand which is a right faff by yourself as the stand legs foul on the crane legs and everything keep moving about and my stand tilts back too.Lots of oil in the bellhousing which i think is just form when the oil was pouring of of the rocker cover down the back of the engine.Head bolts out and one is different which isn't a good sign !

Found a good bit of sludge around the liners , sump has seen better days too ,someone has used it as a jacking point too ! Its been off before and I think the bolts are in the wrong place too. Crank looks good though when i got to it , centre amin bearing cmes out a lot easier once you undo the 2 side bolts ,this had me for a while lol. Put insulating tape on the journals to keep dirt out for now.

  Found the crack inside the block , no noticeable corrosion so its either frost damage or over tightening ,not sure if that wrong bolt head bolts  was in that position or not. Pistons  now out and a few whacks with a lump of wood had the liners out too. Head gasket completely shot on the paper bit but engine was running fine for the brief time I tested it but hadn't ran in 10 years before that afaik.


26099381818_28bd15ee87_b.jpg20180124_141301 by Leslie, on Flickr


26099379968_a4a56289f8_b.jpg20180124_125658 by Leslie, on Flickr


26099384668_f724810743_b.jpg20180129_143220 by Leslie, on Flickr


26099385758_a8a4b546c6_b.jpg20180129_143650 by Leslie, on Flickr


26099387128_b0ee35aa54_b.jpg20180129_143732 by Leslie, on Flickr


26099389018_6403ff92aa_b.jpg20180129_144321 by Leslie, on Flickr


39971757471_928ec877cb_b.jpg20180129_150204 by Leslie, on Flickr


26099392028_4f30967a98_b.jpg20180129_155447 by Leslie, on Flickr


26099396318_721d4c9bc4_b.jpg20180129_170929 by Leslie, on Flickr


Edited by Leslie green

Share this post


Link to post
Share on other sites
Telf

GoI'd work. Looks like mine did in 2015 when I stripped the first two down. Save everything that you can even if you don't think you will need it. Once I've finished my present build I'm going to strip my old block after the new one has done a few 1000 miles and try and sAve it

Share this post


Link to post
Share on other sites
Leslie green

I only got a block Paul nothing else came with it apart from liners  so I have to reuse everything , nothing wrong with this one apart from one big crack ,virtually no corrosion on a quick check tonight. Tried to buy a full 1.9 engine but got outbid in the end.Some of your old blocks looked like they could go again , we are not likely to find a mint one these days as they are just too old now  so can't be too fussy  and parts are scarse over this side of the water.

Edited by Leslie green

Share this post


Link to post
Share on other sites
Leslie green

Cleaned up the area around the crack in the block to have a look,it extends quite a bit either side of the head stud. :


39956135022_9f74ed46bf_b.jpg20180130_115758 by Leslie, on Flickr


39956135602_1a631bbb0c_b.jpg20180130_115858 by Leslie, on Flickr

Share this post


Link to post
Share on other sites
Leslie green

Got the rear half of the spit welded together ,the panel isn't flat either side where the plates needed to go( it sits flat along top and down outside only)  which wasn't ideal but will do rightly as I wasted enough time trying to find a butter place , I decided the tow eye was a good place to brace it to so just drilled a hole in it and welded a plate on .its a lot sturdier now , used flat plates inside to spread the load a bit and tied it into the centre mount too but could only use the bottom bolt  due to access. Ran out of welding wire too in the middle of it .

   Crank is away for checking and polish and head is away too see if it needs new exhaust guides and a very light skim ,seems one of the exhaust valves has been replaced in the past .


40124047432_1842659be4_b.jpg20180208_161904 by Leslie, on Flickr


26283605428_5b250ea878_b.jpg20180208_161914 by Leslie, on Flickr


26283604748_75cd65b4e3_b.jpg20180201_161411 by Leslie, on Flickr

Edited by Leslie green

Share this post


Link to post
Share on other sites
Telf

I swear you are copying me leslie!
 

Share this post


Link to post
Share on other sites
Leslie green

Its far easier when someone else has done it before Paul, just had to wait for you to get your engine finshed  !


Head and crank collected from the machineshop today.


Head needed 4 new exhaust valve guides ,seats cut , shimmed up and the surface lightly skimmed (about 5 thou ) You can still see the little tear shaped recesses that were there before so all good and these would be gone with much of a skim.Never going to look perfect on a linered engine  you would have to take about 2 mm off for that lol .You can see one  cylinder both valves have  recesses in the middle,others have only one  so must have been changed years before or maybe that's all Pug had to hand that day !

Got a full Gastet set , goetze rings and new torx bolts too but unfortunately due to some confusion on the shells ,something about 2 sets listed some with 5 or 6 plain shells these were not ordered !

Think I will replace the oil pump chain but keep the oil pump and the sump had several bad  jacking dents in it so I got a good used one of the bay .


39459784234_6813bc67d3_b.jpg20180209_163606 by Leslie, on Flickr


39459785274_a6b2c65765_b.jpg20180209_163951 by Leslie, on Flickr

Edited by Leslie green

Share this post


Link to post
Share on other sites
Telf

looks good, I replaced all the guides as I thought why not!


Did you have the valve seats angle cut or are they standard?


I didn't replace the chain- couldn't see the point - it looked ok when I cleaned it up so I'm not overly worried!


My engine is sitting waiting for the broken stud to be removed- oh and I need a water pump gasket!


Share this post


Link to post
Share on other sites
Leslie green

Paul they are standard seats , I liked the idea you had of 3 angle seats but didn't like the idea of needed to grind them in again every often as someone suggested might be needed ( I dunno if this would be needed or not tbh ) but as blocks are fragile as we know and whipping head bolts on and off isn't good for them and they can strip a thread or worse crack like mine. 


I said if the guides need changed change em but he said its most likely the exhaust ones only would be needed . The chain in mine has been in for 114k if its original and I know from ford they can and do stretch ,maybe its not an issue on pugs ? but they are cheap new so I think its worth changing. Good idea to get the machineshop to remove that stud I bet it is well stuck in there with the heat..Don't know if they took mine out to skim or not but I'm leaving them be .........Won't be long till yours is running now  if that's all you need .

Share this post


Link to post
Share on other sites
welshpug

I can't imagine why seats would need grinding after cutting, the 16v engines come with a basic 3 angle as standard and they don't need grinding!

Regarding the chain if it hasn't stretched it'll be fine, you can check it with a steel rule, say its a half inch pitch chain you measure a number of links (say 10) and see if its over the 5" mark.


Also inspect the sprockets, easy to see wear on them.


shame to see another scrap block.

Share this post


Link to post
Share on other sites
Leslie green

Hi thanks for the info Mei , I think the standard engine will do just fine for me tbh if we were looking to tune a 205 gti going straight to a gti6 engine is the way to do it as the Jetronic cars are not very tunable as i understand it but if were were looking to go fast we wouldn't be starting with a 205 anyway lol in 2018. I'm  going to hold onto my cracked block and may get a welder pal to have a look at it and see if it could be welded or not ,doesn't seem to be a corrosion related crack more a wrong head bolt or over tightening crack .

Share this post


Link to post
Share on other sites
Leslie green

Working during the week plus the cold weather mean't not much got done lately but got the front part of the spit welded together and fitted to the car today  but that's as far as I got :

Got 2 of these made with a captive nut welded on so you can bolt into the inner wing ,I only had 1 piece of this 1.5 inch x 10 mm steel plate so had to make the other out of 2 inch by 12 mm plate which was far too heavy and wouldn't fit down the chassis leg till I ground about 1/4 inch off . Made the angles by grinding a slit to weaken the steel then bending it over in the vice and welding it up again.Used M12 for the beam to bumper mounts and M10  in the inner wing and front panel.


26923374298_53ae39bd51_b.jpg20180313_121055 by Leslie, on Flickr


Almost ready to fit :


26923372848_504daa080b_b.jpg20180313_120130 by Leslie, on Flickr


Little spreader plates to keep things together nicely, one in each inner wing :


26923375238_fa9320ebeb_b.jpg20180313_141647 by Leslie, on Flickr


26923375928_6668d428e3_b.jpg20180313_141659 by Leslie, on Flickr


And up we go , have an engine crane but it was in another shed behind a trailer so trolley jack and some wood under the front subframe and 2 ratchet straps to the roof beam for the rear , The beam was off centre and health and safety wouldn't have been too impressed but its up now , never anybody there to help when you need 'em. I think I might put some little plates where the tube welds to the box later as its under a lot of stress . The side stands I made about 10 years ago for my xr2 , one of them was still holding my xr up so had to be swapped for some wheels as that car still needs to go back on the spit later.


26923377428_de19568e72_b.jpg20180313_155422 by Leslie, on Flickr

Edited by Leslie green

Share this post


Link to post
Share on other sites
Leslie green

Thanks Paul :D


Removed the shocks ,calipers , driveshafts, fuel lines  and front subframe and then wheeled it outside so i could turn it on its side to work on the floor . With the panels still on the car is  bit  top heavy and I couldn't hold it back once it rotated  , luckily I had a piece of box jammed in the front beam just in case and it hit the ground squashing a wd40 can in the process which showered me in the stuff !  I then welded up a bit of box into a right angle and it now stops the car at 90 degrees where I wanted it .

     Tried to pull out the squashed drivers footwell box but by the time it was pulled out it was a mess so in the end I just chopped it out and a piece where the chassis leg had been jacked on as a slide hammer just made it look worse than before .


39133804580_618c2e557e_b.jpg20180320_145117 by Leslie, on Flickr


27072122958_3cbbcdd7e1_b.jpg20180320_145122 by Leslie, on Flickr


39133806080_7c5371d441_b.jpg20180320_145128 by Leslie, on Flickr


27072124738_bc27df2071_b.jpg20180321_130352 by Leslie, on Flickr


39133807000_fb805f0eb6_b.jpg20180321_152723 by Leslie, on Flickr

Share this post


Link to post
Share on other sites
Telf

looks a lot like mine in a lot of respects- Ive took all the looms out though- going to inspect them and fix any issues


Share this post


Link to post
Share on other sites
Leslie green

Yes Paul they all had the same issues , mine is mostly careless jacking all over the place that has made a mess of the box sections etc rather than any rust .I was only planning a quick fix up then underseal the floor ,put it back together get it mot'ed for now sort any running issues and then a repaint some time  later on. 

I could and maybe should have cut the floor inside and bashed it out again but the more I worked at it the worse it looked lol .

  Got this part sorted and it took a lot of time and metal bashing to make a half decent new one in slightly thicker  1mm steel , came out ok though and I put a piece of tube between it and the floor so it wouldn't be able to squash as easy again as if it was on a lift they would put the leg there and it would be flat again.I put a few slots in to allow any water out again.


41035673082_0004496fdd_b.jpg20180328_145139 by Leslie, on Flickr

40184957685_f0ebf7c5c3_b.jpg20180328_163630 by Leslie, on Flickr


  • Like 1

Share this post


Link to post
Share on other sites
Leslie green

Put 2 patches in the chassis rails where they had been squashed with jacking and then got the passenger side box section cut out and a new piece made and welded in like the drivers side , turned out ok. Got some tyres and got them fitted on the alloys at last though it could be a while before I need them !


27407270978_9957a13ffa_b.jpg20180405_154004 by Leslie, on Flickr


27407272928_83a8140be4_b.jpg20180406_160949 by Leslie, on Flickr


27407271808_0798291e72_b.jpg20180405_165633 by Leslie, on Flickr

Share this post


Link to post
Share on other sites
Telf

Leslie,


Are you removing all the black underseal? I'm going back to red on mine. The workshop is using some sort of truck bed liner that is mixed with the red paint. Apparently it is super tough but will retain the factory colour.

Share this post


Link to post
Share on other sites

Please sign in to comment

You will be able to leave a comment after signing in


Sign In Now

×