Jump to content
  • Welcome to 205GTIDrivers.com!

    Hello dear visitor! Feel free to browse but we invite you to register completely free of charge in order to enjoy the full functionality of the website.

Mac Crash

Grey 205 (Evolving) Tarmac Rally Car Project

Recommended Posts

Mac Crash

You don’t need to be a user on this forum for very long to be impressed and helped by the brains and pool of freely shared knowledge here. The skill levels and standard of work involved with some of the project threads is clearly the inspiration and drive with a lot of perspiration for many to create their own project and document it here… so this is my first project thread which I hope will give me similar inspiration.


The view was to build a 205 for tarmac based rallying, in 2014 I bought a local white non-sunroof rolling shell minus engine/gearbox which had been out of use for several years, previous to this it had been a track based car powered by an 8v turbo.

There was little progress with this car mainly due to lack of premises to do the build work required, the daily 160 mile commute to work also meant there was little or no time through the week to do much. After securing workshop premises, closer inspection of the shell highlighted a fair bit of welding required, the wiring would also require work as the ECU loom was not present, finding a cardboard box in the boot with the large round brown connectors from the turbo conversion, then there was an engine and gearbox to source... a combination of the time constraints and the amount of work needed made me change my plans, I decided to buy a rot free car which already had the basic rally build set-up and to evolve the car from there and as we used it. Hindsight is a great thing they say and shows the importance of thinking things through, although having bought the shell impulsively due to it being local, it came with a lot of parts that I have retained for the new car including a brand new Quaife ATB and C44 roll cage.


So I began to break the shell down and waited for the right car to come along, hitched the trailer up and travelled down to Margate, thankfully, the car was as described: A clean, log booked rally car based on a rot free non-sunroof shell. As I was driving off with car on the trailer, the seller came rushing out of the house, he’d forgotten to give me his collection of spares that came with the car, half a van full, nice bonus.


Malc on here, just down the road from me, now has the white shell, glad about this, it’s in the right hands and scrapping it would have been a very reluctant last resort. Link to his project thread here:


http://forum.205gtidrivers.com/index.php?showtopic=166461


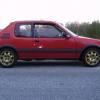
First impressions of the new car are mostly very good, not 100% sure if this is graphite or steel grey? I’m assuming graphite as it has a blue tinge running through it.


post-22670-0-88158100-1452026733_thumb.jpg


Some other photos attached which hopefully have the correct links...


post-22670-0-96847100-1452026754_thumb.jpg


post-22670-0-14787300-1452026768_thumb.jpg


post-22670-0-38624200-1452026780_thumb.jpg


post-22670-0-33881700-1452026815_thumb.jpg


I’ve only ever owned & driven 1.9 powered GTi’s, but have read a lot about the 1.6 and it’s revvy nature due to the square bore/stroke ratio, I fully understand this and I knew it wouldn’t have the lovely torque of the full power 1.9 engines but the first short test drive was disappointing power wise, the engine is strong and revs freely enough and has just been serviced including a new cambelt but it just runs out of gears very, very quickly. 4,500 rpm in 5th gear at an indicated 75mph, the gearbox has been rebuilt with close ratio gears according to the seller who I have no reason to doubt, proper gent, but he has no idea of the final drive ratio, is there a formula for working out the ratio without seeing the crownwheel & pinion? Don’t want to draw any conclusions on this at the moment as there are other things to be getting on with, it may be that the short gearing is suitable for the events we want to enter, on the other hand it may be totally inadequate.


Planned works to start are:


Remove existing OMP cage and fit Safety Devices double diagonal cage, this cage has provision for better harnesses mounting. Remove the standard seat rails, previous owner is a fabricator/welder and has already added an extra seat rail that sits behind the standard rail, so it’s case of just making up and welding in a new forward seat rail. Replace existing seats (out of date) with new side mounted items and harnesses (out of date) shame about this rule as there is nothing wrong with either seats or restraints.


Car is log booked but dating back to 2007, so not sure if I can just send it back to the MSA to have it updated or not. Something I need to check.


Currently, we aim to start with the 1.6 engine as it is to hand and there is nothing wrong with it if we can figure out how best to gear it. Despite being a big fan of the 8 valve, we may well end up going down the 16v route like so many others have for logical reasons. In the meantime I have collected the following parts for introduction to the car as it evolves;


Engine:

Stage III 8v Head with Steel valves, 276 cam & vernier pulley, kept from a phase one 1.9 many, many years ago, hopefully it will still be okay for refurbishment.


Gearbox:

New Quaife ATB, not an LSD but a big upgrade over an open diff. Probably makes sense to sell it and buy an LSD though.


Front suspension:

PTS adjustable bilstein coilovers, gravel inserts and springs.

AB motorsport rosejointed eccentric top mounts.

1.9 hubs with PTS studs.

Gartrac rosejointed wishbones.

Standard 205 ARB.

309 GTi driveshafts.


Rear suspension:

205 GTi beam.

23mm PTS torsion bars.

25mm ARB.

Baker BM Grp A solid mounts.

Grp A Bilstein dampers.


Brakes:

Front -1.9 calipers & M1144 pads.

Rear - Standard drums (upgraded shoes)

Goodridge flexi hoses all round.

Tilton bias valve, lever type.


Bodyshell:

Polycarbonate window kit with sliders.

Fabricated mud flaps to regs.


Overall, very pleased with the car, has been well put together, has no rot, brakes and drives in a straight line and the steering is lighter than my 1.9, leaks like a sieve though, think from the rear windows as the water was ponding on the floor in this area and couldn’t have made it’s way up hill against gravity, hopefully the plastic windows will cure this when sealed and fixed in.


Any comments or advice welcome, updates to follow as they happen.


  • Like 1

Share this post


Link to post
Share on other sites
Biggles

You'd need to know either the ratio of 5th or the CWP ratio as an indicated 75mph is what you'd see from a Quaife gearset on a 4.4 CWP & 195/50/15 tyres but it's also what you'd see from a std 1.9 gearset on a 4.93 CWP & 195/50/15's.


If it's just a change of address on the MSA logbook, your local scrutineer can probably change it, or you can send it back to the MSA for them to do but as it's a pre 2009 logbook I'd find a friendly scrutineer just to make sure it doesn't get lost....

Share this post


Link to post
Share on other sites
dobboy

Good luck with the project Mac

Share this post


Link to post
Share on other sites
Mac Crash

You'd need to know either the ratio of 5th or the CWP ratio as an indicated 75mph is what you'd see from a Quaife gearset on a 4.4 CWP & 195/50/15 tyres but it's also what you'd see from a std 1.9 gearset on a 4.93 CWP & 195/50/15's.


If it's just a change of address on the MSA logbook, your local scrutineer can probably change it, or you can send it back to the MSA for them to do but as it's a pre 2009 logbook I'd find a friendly scrutineer just to make sure it doesn't get lost....


Thanks for the info, Biggles, I'll check this with a local scrutineer then...


Good luck with the project Mac


Cheers James!

Share this post


Link to post
Share on other sites
Tom Fenton

Before you do anything really I would decide what events or discipline you are wanting to compete in. That will guide you a lot better in what needs doing to the car. To be honest I think you would be better to do the cage swap and get in date seats and belts in there and then go and have a go in it as is. 75mph @4500rpm equals roughly 110mph @ 6500rpm, thats plenty good enough for a rally car.

Share this post


Link to post
Share on other sites
Mac Crash

Before you do anything really I would decide what events or discipline you are wanting to compete in. That will guide you a lot better in what needs doing to the car. To be honest I think you would be better to do the cage swap and get in date seats and belts in there and then go and have a go in it as is. 75mph @4500rpm equals roughly 110mph @ 6500rpm, thats plenty good enough for a rally car.


Pretty much decided on Tarmac events STRC etc... the thought of putting a decent car together then killing it through forest/gravel stages, hmmm, maybe for bigger budgets than mine at the moment. As you say, that's the plan for now, sort the required safety/legality issues out and then get on with it, looking forward to evolving/upgrading the car as we go. The gearbox was obviously put together like this for a reason by someone making the most of what they had and concentrating on the important things like reliability etc.... it was just the initial shock/surprise of such a low geared car compared to the 1.9 road car.... well, with the 1.6 making power at higher revs than the 1.9 your right about the road speed of course... we have a very good proven head and cam which will bring more power later... so willing and happy to embrace the 1.6 for now and see how we go...

Share this post


Link to post
Share on other sites
Biggles

Before you do anything really I would decide what events or discipline you are wanting to compete in. That will guide you a lot better in what needs doing to the car. To be honest I think you would be better to do the cage swap and get in date seats and belts in there and then go and have a go in it as is. 75mph @4500rpm equals roughly 110mph @ 6500rpm, thats plenty good enough for a rally car.


Indeed. Unless you've got big power you're unlikely to see 100 mph very often. Good accel 20-80 mph is where you'll make the time.

Share this post


Link to post
Share on other sites
Mac Crash

Small update:


Existing cage & seats removed... waiting for Malc & Dobboy to collect, it's handy knowing local boys to sell spares to :)


OMP%20cage%20amp%20seats_zps0ebvl7r4.jpg


Nice to find proper seat rails already welded in, the standard seat rails prone to stress defects having been retained but not in use except from doubling up as headboards for the 2nd extinguisher and standard wheel jack. I'm conscious of weight saving but not sure if keeping this metal may add a little strength.


OE%20amp%20comp.%20seat%20rails_zps6zxbx


Welding appears to be of very good standard.

Extra%20metal%20welded%20in_zpsnntf11n5.


Navigator%20seat%20rails%20lower%20amp%2


Peoples opinions here about bolt in cages seems to differ with most not being fans of the OMP type, from what I see though it is a popular cage, probably due to costs. Having both cages available on the floor, the 10 point OMP is definitely a lot lighter compared to the SD cage, think this is mostly due to the rear section of the SD cage having more metal... the more I looked at the OMP cage the more I was reluctant to remove it though because the fit was very good and also the main hoop picked up and tied in with original high level seat belt mounts, something my SD cage doesn't. The construction design of the captive mounts also appears to be better thought out with welded in box section supports, with the exception of the rear plates which use the forward beam mounts, not sure if the latter is a good thing or not unless welded. In the end I decided to stay with the plan and use the C12 cage as it has the double diagonal and harness bars. I also ordered a new fitting kit from Safety Devices. The cage is marked as a C12 but has the C44 rear section. Homologation sticker is intact so hoping all should be okay with this.

Comparison%20of%20OMP%20and%20SD%20cages


Trial fit of side mounts for new seats, although I'm not a shorty, the drivers side will need some metal relieved from the OE seat rail to allow the mounts forward enough:

Trial%20fit%20of%20side%20mounts_zpsbyxd


Waiting on cage mounts coming... and now to find some new seats, eye watering how much they cost, but prefer to stay with Corbeau due to their compact size.

Share this post


Link to post
Share on other sites
TAG

Hi Colin, how are the fuel lines passed through the front bulkhead? Are they fed through the rectangular grommet near the top? Or dedicated bulkhead fittings? I'll be running internal fuel and brake lines in the near future and I'd like to see how others have run them.

Cheers

Share this post


Link to post
Share on other sites
allanallen

People prefer the c44 cage to the OMP the fit is much better around the front end and main hoop, the front half of the c12 is quite similar to the OMP.

Share this post


Link to post
Share on other sites
Mac Crash

Hi Colin, how are the fuel lines passed through the front bulkhead? Are they fed through the rectangular grommet near the top? Or dedicated bulkhead fittings? I'll be running internal fuel and brake lines in the near future and I'd like to see how others have run them.

Cheers


Tom, I think they pass through the top close to the fuel filter but I'll double check and get back to you with a photo...


People prefer the c44 cage to the OMP the fit is much better around the front end and main hoop, the front half of the c12 is quite similar to the OMP.


Allan, I did notice the SD cage came out much easier and there was better clearance at the front where the bar crosses the top of the windscreen... I'll be in touch regarding drop pins for the 5/8" rose joints we talked about, thanks...

Share this post


Link to post
Share on other sites
allanallen

Yeah the c12 will do, the C44s don't come out so easy!


No worries Malc, look forward to hearing from you.

Share this post


Link to post
Share on other sites
Mac Crash

Hi Colin, how are the fuel lines passed through the front bulkhead? Are they fed through the rectangular grommet near the top? Or dedicated bulkhead fittings? I'll be running internal fuel and brake lines in the near future and I'd like to see how others have run them.

Cheers


Tom,


A few photos attached showing how the fuel lines are run through the bulkhead.


Fuel rail...

56d15dd0-32f1-4975-a806-66f9be7a42a4_zps


Filter area...

Fuel%20filter_zpsxecdkbe9.jpg


Engine bulkhead...

Engine%20bulkhead_zpswafuvrfx.jpg


Cabin bulkhead...

Cabin%20bulkhead_zpslqowegfy.jpg


The brake lines are Goodridge flexi-hoses from the calipers and rear drums with hard lines under the car, the plan is to replace all the existing copper with braided lines and re-route them inside the car with a lever type bias valve, a hydraulic hand brake will also be added as I'm sure this will be needed. Not sure about brake servo yet, car is original on 1.6 discs & drums but will be running 1.9 running gear and brakes on the front with upgraded pads.


Is it really a good idea to run fuel hoses inside a car? for rallying it is standard practice for obvious reasons.... don't want to think about it too much, but bought myself some nomex underwear anyway...

Share this post


Link to post
Share on other sites
dobboy

Big thanks to Mac, i collected my new seats and part of Malcs cage yesterday.


Good luck with the car Mac, looks a great base for what you're doing, hopefully see you at KH if not before.

Share this post


Link to post
Share on other sites
Mac Crash

These arrived over the weekend...

C12%20Fitting%20Kit_zpsio4wkr5g.jpg

New fitting kit for the C12/44 cage, next job is to remove and set aside the fuel tank before any safe welding can be done.


Shell was previously fitted with OMP cage which has shorter front legs than the SD cage which means the old front mounts will need to be cut out and dressed before we can weld the new sandwich mounts in for the new cage, not sure how best to do this, at the moment I'm thinking 4" grinder with diamond blade, don't mind sacrificing a few blades for this work as we have plenty of them laying about, but thinking of all the flying sparks... might there be a better method?

Front%20Leg%20Mount_zps6pqz4ku8.jpg


Some other parts gathering...

1.9%20Hubs%20Rally_zpshuv94eai.jpg

1.9 hubs and brakes with M1144 pads and PTS stud conversion... the front suspension will comprise of PTS Bilsteins with long top spindle gravel inserts & springs, AB Motorsport rosejointed top mounts, running gear will be 309 shafts and camber will be achieved through rosejointed bottom arms, hopefully 1.5 degrees without problems.


A beam axle in very good serviceable condition has been sourced, shown here stripped down.

Rally%20beam%20strip%20down_zps1xjn8hdw.

This beam came with 20mm PTS torsion bars, hard nylon mounts and standard 19mm ARB.

20mm%20Forest%20Bars%20205%20PTS_zpshqlf

Beam will use 23mm torsion bars and 25mm ARB with Group A Bilstein dampers, 1038's are available but will be unlikely to cope with the thicker bars.


The size difference is very visible and scary...

23mm%20TB%20amp%2025.4mm%20ARB%20205_zps


Built the beam back up, dry assembly, just to be familiar with it, it's nice how it all goes together easily when it is clean, new bars will be painted prior to fitment.

205%20Beam%20Rally_zpsczunutgu.jpg


Having no previous experience of beams, I think I must have read every beam article and thread on this forum several times at least... as invaluable as some of these articles are, sometimes having something physical in your hands is the only way to fully understand something mechanical, having a beam assembly stripped on the floor in front of me has given me this... might seem silly to some, but things like the offset washer and it's locating groove/seat, the ARB inside the crosstube having different sized ends, as do the torsion bars, it all now makes sense to me... still don't fully understand the vernier effect of the torsion bars but I'm closer than I was before, heh heh... so, dummy shock required to set the ride height.


Any information on a ball park or starting measurement between damper centres to achieve the correct ride height?


don't want the car lowered, weight wise the rear of the car should be a little heavier than standard due to the extra safety equipment, interior trim and rear seats have been removed but can't see that stuff weighing much.

  • Like 1

Share this post


Link to post
Share on other sites
Mac Crash

Cut out the existing OMP plates for the front cage mounts and offered up the new C12 plates for the front legs of the SD cage.

IMG-20160206-02164_zpsqq96rf41.jpg

IMG-20160207-02190_zpst03l86c8.jpg

Rustproofing and painting to do prior to welding in...


Next was removal of fuel tank guards...

IMG-20160207-02167_zpssvh6jcdk.jpg

Then the fuel tank itself... which was 1/4 full of fuel, made a mental note to remove the fuel a few weeks ago but forgot... also forgot about the filler and breathers so was a little awkward to balance the weight at height until ready for removal...

IMG-20160207-02172_zps7yabye7v.jpg


IMG-20160207-02177_zpsaz86ligi.jpg


Broke the delivery spigot off the fuel pump.... prior to tank removal, note made...

IMG-20160207-02188_zpsslwqzkhg.jpg


Happy to see floor area concealed by the tank to be in good order with only light surface rust, no holes, all good, but rustproofing and paint required.

IMG-20160207-02179_zpsbmp2fiae.jpg


Cage trail fitted and new plates ready to be welded in, lots to do, as always, never feels like there is enough time...

IMG-20160207-02186_zpscal3j437.jpg

Share this post


Link to post
Share on other sites
Anthony

Any information on a ball park or starting measurement between damper centres to achieve the correct ride height?


don't want the car lowered, weight wise the rear of the car should be a little heavier than standard due to the extra safety equipment, interior trim and rear seats have been removed but can't see that stuff weighing much.

Try somewhere around 300mm or so with 23mm torsion bars if you want it standard-ish height. That's a guess, but shouldn't be a million miles out I don't think.

Share this post


Link to post
Share on other sites
TAG

Have you decided what spring rate you will be using on the front to balance up with the 23mm torsion bars?

Share this post


Link to post
Share on other sites
Mac Crash

Try somewhere around 300mm or so with 23mm torsion bars if you want it standard-ish height. That's a guess, but shouldn't be a million miles out I don't think.


Thanks Anthony, I'll go with that and see where we are from there...


Have you decided what spring rate you will be using on the front to balance up with the 23mm torsion bars?


Tom, I have Bilstein gravel/forest inserts and springs for the front which will work with 21mm bars, may have to find tarmac stuff though for the bigger bars...

Share this post


Link to post
Share on other sites
And

Hi, I am new on here but, I have been running 225ibs springs on the front of mine with gravel dampers (200/160) for years only just gone to 300/180 inserts for Tarmac, the rear has been on 23mm bars with the group A damper the hole time, I have also tryed the 1082 bilsten dampers on the rear with them on the IoM worked ok ish but just a bit hard for over there I should have had 21mm bars and 200ibs springs. The 1082 rears are from my gravel spec that I run on 20mm bars with 170lbs springs, really depends on were you are hoping to use the car tho

Share this post


Link to post
Share on other sites
welshpug

pts tarmac spec was 225 lb front spring with 21mm rear bars.


on my zx I'm using 285 with 23mm bars, not quite a direct comparison but quite similar front to rear balance, could probably go a bit more on the front spring with different tyres, I don't feel that the group A 205 tar rear damper keeps up so well with a 23mm bar.

Share this post


Link to post
Share on other sites
allanallen

I personally think 225 is too high to match 21mm bars, the 170 mentioned previously is more like it. You need larger diameter/tall springs to go that low on coilovers though.

Share this post


Link to post
Share on other sites
Mac Crash

Andy, WP, Allan, thanks for your input, it's appreciated...


If I have to buy tarmac inserts then so be it... at least I have the legs and mounts etc... contemplated for ages before deciding on 23mm bars, if you've ever opened the tail gate and pushed your weight down on standard 205 torsion bars then it is easy to see that 19mm bars are not up to the job. I'm aiming to make the rear of the car as stiff as possible, with the 25mm rear arb, this will bring much more control over the front, then it's just a case of balancing the spring rates to match.... or as close as.... but I'm thinking sometimes what is technically on paper doesn't always work best, i.e. standard 205 struts and TB's are soft in comparison with PTS stuff but are fairly balanced... I was hoping 23mm bars with gravel bilsteins might just work, on paper not, but yet Andy has found that they do? or aren't far away.... unless anyone wants to swap gravel bilsteins for tarmac? :smilie with shuffling feet:

Share this post


Link to post
Share on other sites
And

Worked on the IoM just was a bit iffy on druidale up to brandywell cottage then good after that but unless you go 3 way then there is not much you can do? Turreting is a no then pushrod maybe? but reading the regs then that could be a no too but then wording looks to have changed to me now but mine on 15in wheels is the pts 1300 ride hight 23mm is surprisingly soft on stage tho pts spec was 20mm tbs for gravel with 185ibs Spring and 23mm tbs and 225lbs springs from the manual for the gti's

Share this post


Link to post
Share on other sites
Mac Crash

Some parts gathering and a wee bit more done, few hours on Sunday spent...


SS Magnex 4-1 manifold from Bobbafett on here arrived, thanks...

Magnex20SS20Manifold_zpsj74ccowh.jpg


Removed OE manifold, first one I've seen for a while with no cracks or welding.

OE20Ex20Manifold_zpsdu6oxvny.jpg


Replacement fuel pump arrived from Anthony, on inspection, the fine mesh filter cartridge that the pump sits in had a few splits, so carefully stripped the pumps down and found the replacement also had the rubber locating tabs removed at some time in the past, they can make removal from the tank a little tricky but not difficult so not sure why someone has done this, note: rubber surround on my pump feels very soft and manipulative, almost like neoprene compared to Anthony's one which has hardened and is almost like plastic, I'm thinking this is because mines has been living submerged in fuel and the other has been dry stored... the fine mesh from the bottom of the pump casing was also missing so decided to use my own pump but with the plastic housing from Anthony's, the other pump is now a spare, both French BOSCH, fine with that.


Fuel20pump20assy20stripped20down_zps2upj


Defective%20mesh_zps0ylg0iq6.jpg


cut%20down%20rubber%20shroud_zpsod3w7jmk


Missing%20mesh%20filter_zpswlx3zlgw.jpg


Fuel clips... can see how they work but is there a special tool for reconnecting them? especially within the confines of a pump housing, struggling with this...


At the moment, the list of jobs to do is getting bigger, but nothing but time is the main issue.

Share this post


Link to post
Share on other sites

Please sign in to comment

You will be able to leave a comment after signing in


Sign In Now

×