Jump to content
  • Welcome to 205GTIDrivers.com!

    Hello dear visitor! Feel free to browse but we invite you to register completely free of charge in order to enjoy the full functionality of the website.

mrfirepro

[Car_Restoration] My 1989 205 1.9 Gti Restoration Project

Recommended Posts

mrfirepro

Rear beam stripped.


Wurzels guide was fantastic, just needed the seperation tool from Tom Fenton (which worked a treat) also was a bit over enthusiastic and managed to gouge a few lumps out of the beam whilst removing the outer bearings.


Also managed to make a tools to remove the inner bearings was quite easy in the end.


Have decided to replace both shafts as there were signs of wear.

post-24116-0-06948400-1384560410_thumb.jpg

Share this post


Link to post
Share on other sites
mrfirepro

Have also stripped the steering rack

post-24116-0-57026300-1384560823_thumb.jpg

Share this post


Link to post
Share on other sites
mrfirepro

1. New shafts pressed into arms


2. Deox-c'd front suspension members, brake parts, and lots of bolts and brackets


3. Deox-c gel'd trailing arms, rear beam, and front engine mount


4. Hydrate 80 to all above


5. Primed, rear beam & trailing arms


6. Shell going for dipping in two weeks time


post-24116-0-11391900-1385251022_thumb.jpeg

Share this post


Link to post
Share on other sites
mrfirepro

only Hydrate 80 (not dry yet, goes black)

post-24116-0-97787600-1385251208_thumb.jpeg

Share this post


Link to post
Share on other sites
mrfirepro

1. Engine gear box seperated

2. Injectors removed ready for service

3. Parts ready to be sent for plating

4. Ancillary engine parts now all removed

5. Rear brake calipers now rebuilt and resparayed

Share this post


Link to post
Share on other sites
james_pug

Good work, looks like it'll nice when it's done. Good to see someone local.

Share this post


Link to post
Share on other sites
mrfirepro

Thanks James,


Whats the scene like down here, not really found anyone local.


I bought this a few months ago on a bit of a nostalga trip and now it has taken over my life, I think it's going to be some time until done, but am really enjoying it.


And despite some really stupid questions I have asked on here (as they turned out) no one has told me to sling my hook.


If ever your near feel free to pop in, I'm about 20 minutes from Leeds Castle

Share this post


Link to post
Share on other sites
james_pug

There aren't that many around here there use to be meets occasionally near Brighton but there wasn't any this year, I've got 3 if you get stuck for parts I've got quite a few spares.


projects can take along time I think my convertible has been off the road nearly 5 years now! I'm sure yours won't take that long.

Edited by james_pug

Share this post


Link to post
Share on other sites
mrfirepro

There's so much, everywhere I look I can find things I need.


The plan between now and Xmas is.


The shell is being picked up on Tuesday to be dipped, which will give me some space to tidy up, as my garage looks like a 205 has exploded in it. The car will be back before Xmas and should then go to the body shop, providing I get a shell back and not a tea bag that is :o


Whilst the car is away I plan to


Rebuild front subframe, brakes, shocks, steering

Finish the beam refurb

Rebuild master cylinder and servo

Get all other parts of to the electroplaters

Rebuild & refurb engine and gearbox


this little lot should keep me off the streets for a while

Share this post


Link to post
Share on other sites
mrfirepro

Had a few days off so a little progress..


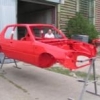
The shell, doors, bonnet, tailgate and subframe went of the envirostrip today to be dipped, treated and primed, should be back in about 4 weeks.


Head and block now stripped, everything looks in remarkable condition, shells, liners and crank all look good so hopefully a few seals, rings and tidy up should see the engine back together.


Just gone over 1000 pics and another 300 to upload.


More at the weekend


Just a thought as everything will be fresh...


Should I keep it the same colour?????

Share this post


Link to post
Share on other sites
mrfirepro

update,


a bit frustrating as all nuts/bolts brackets have gone off the Avon Electroplaters so cant really finish anything.


front hubs now, rust removed, primed and painted, with new bearings


P1020875_666x500.jpeg


Steering rack ready to go back together


P1020801_666x500.jpeg


Rear Brakes nearly finished


P1020816_666x500.jpeg


Tailing arms, de rusted, primed and painted with new bearings


P1020822_666x500.jpeg


Beam nearly finished with new bearings, bushes and seals


P1020843_666x500.jpeg


Front struts stripped down for re-build


P1020652_666x500.jpeg


Xmas jobs


Recondition/paint servo, new master cylinder, re-assemble all brakes, re-assemble front struts, brakes and hubs.

Rebuild Engine

Edited by mrfirepro

Share this post


Link to post
Share on other sites
timoth123

Good work mate!


Looks like your doing the same as me, excluding getting it dipped. I had mine baremetalled by hand. Picked it up from the body shop all freshly painted a week before goin to the Falklands. Back at the start of jan and can't wait to get stuck into it.

Share this post


Link to post
Share on other sites
mrfirepro

Hi Tim,


Got any pics, are you running a thread.


Did you make the spit yourself, as that's one thing I will need when I get it back.


Really want to get to the point of having at least one job fully completed (hopefully front subframe).


Are you keeping yours stock?

Share this post


Link to post
Share on other sites
mrfirepro

Quick update...


Mostly been blasting parts for either painting or powder coating


Engine - All parts (liners, rings, seals, gaskets, shells) all ordered for rebuild

Gearbox - Still not decided what to do as I need a little help here


Shell - Is due back from the dippers on 2 Feb (hope it's not a tea bag)


25 Kg of parts expected back from Avon Electroplaters tomorrow, which means I can finish beam and steering rack :) :) :) at last


More photos to follow shortly.....

Share this post


Link to post
Share on other sites
timoth123

Hi Tim,


Got any pics, are you running a thread.


Did you make the spit yourself, as that's one thing I will need when I get it back.


Really want to get to the point of having at least one job fully completed (hopefully front subframe).


Are you keeping yours stock?

Hello mate,


Only just realised you replied to me there.


Yeh I've got a thread running, here's the link....

http://forum.205gtidrivers.com/index.php?showtopic=155815


Yeh I made the spit myself. I bought a kit from mk2mania then made up the brackets to fix it to the car.

Made life a million times easier!!

I've finished with mine though if your interested?


Funnily enough I sent all of my bits to be plated to avon electroplating too! Hopefully get them back next week.


Yeh keeping it as stock as I possibly can.

Out of interest, how are you cleaning up your engine?

Share this post


Link to post
Share on other sites
Darrens205GTI

Great thread Paul, keep up the good work


Darren

Share this post


Link to post
Share on other sites
mrfirepro

Tim,


Would be really interested in your spit as my car was dipped today and here are the very first pics hot of the press

image2.jpeg


and all my stuff from Avon arrived today, which made me think for the first time "how on earth am I going to put this back together"


You'll see what I mean when you look....


P1030041_666x500.jpeg


and here


P1030040_666x500.jpeg


This lot should keep me out of trouble for a little while, I also think my new block, ground and balanced crank and skimmed head should be back with me tomorrow as well, OH and new liners, shells, gaskets etc etc to to rebuild the engine.

Edited by mrfirepro

Share this post


Link to post
Share on other sites
timoth123

Wow, looks very different now!! Have they said when your getting it back?


Plating looks great too! One question, I held back on sending them the long gear rod as I wasn't sure what would happen to the plastic bush in the ball joint end. Did you manage to remove it?


As for the spit mate, see your PM.


Keep at it mate! She's gonna be lovely!! Good work!

Share this post


Link to post
Share on other sites
mrfirepro

I was worried about a few of the plastic parts and still am, I thought I would give it a try as I have a few spares. Will see what it's like when fitted. Also I got some of the bronze bushes on here from GTI6BOY http://forum.205gtidrivers.com/index.php?showtopic=149679


Have uploaded more pics today as the stripping process has been completed.


My biggest worry was that I would get a tea bag back. As you will see in the pics there is only two places that are perforated due to the rust, which is an absolute result.


To be totally happy I will need to inspect the whole shell but if these pictures are anything to go by it has turned out fine.

Share this post


Link to post
Share on other sites
mrfirepro

After a week of trying to get the new block from N Wales to Kent, finally managed it (thanks UPS, no thanks Parcel force and Yodel), so hopefully can rebuild the engine this weekend. (assuming I don't break anything else :blush: )


Got the first photos back from the dippers of the car in primer, ready to be delivered to the body shop, next week. Decided to use the same body shop as timoth123 as they did a good job for him.


photo11-1.jpg


Sent second lot of parts of to be plated.


Head skimmed and repaired, valves ground in and fully assembled.


P1030093_375x500.jpeg


You'll all know this feeling, have upset the missus, what started in the garage, has spread to the kitchen (engine build and storage) and now into the shower cubicle of main bathroom (make shift spray booth) so might be sleeping in the garage soon enough :D

Edited by mrfirepro

Share this post


Link to post
Share on other sites
mrfirepro

finished the PAS rack as well


P1030124_666x500.jpg


Inlet manifold


P1030230_666x500.jpg


Engine block painted and new liners


P1030269_666x500.jpg

Edited by mrfirepro

Share this post


Link to post
Share on other sites
Anthony

Wow, that's a lot of parts you had plated!


Out of interest, are you sure that the fuel pressure regulator would survive the dipping and plating process? I had assumed that it (and anything else that isn't just metal) wouldn't but I can see that you've had yours done.


Good progress though and looks like you're doing an extremely thorough job :)

Share this post


Link to post
Share on other sites
mrfirepro

Wow, that's a lot of parts you had plated!


Out of interest, are you sure that the fuel pressure regulator would survive the dipping and plating process? I had assumed that it (and anything else that isn't just metal) wouldn't but I can see that you've had yours done.


Good progress though and looks like you're doing an extremely thorough job :)

In my haste to get things to the platers, I really didn't think about that. Since their now back was going to test it as there is a thread on this recently. I'm not sure how they work.


I have ordered another one anyway as there is some severe corrosion on the side of the unit.


I also have the same sort of issue with some of the gear linkages and nylocs where the bushings are plastic


Thanks for you kind words, also thanks for your advise on the cylinder protrusion I messed around with the liners for a good 90 mins. before I resorted to my question

Share this post


Link to post
Share on other sites
mrfirepro

I have posted lots of other threads recently with my engine rebuild saga and not updated progress here....


Whilst the shell is away at the dippers and body shop I thought I would do a engine rebuild...


Block one - once the liners had been removed had to ask opinions here http://forum.205gtidrivers.com/index.php?showtopic=156355&hl= the outcome was goodbye block one


Block two - Thanks to Jamie_1992 who donated the second block, all I had to do was pick it up, once cleaned up there was some damage so goodbye block two


Block Three - Bought from a Guy in N Wales, after three separate carriers declined to pick it up (it got slightly damaged in transit) I finally got it home, cleaned, painted and rebuilt only to find one of the crank journals were out of tolerance (see this http://forum.205gtidrivers.com/index.php?showtopic=156806&hl=) and one of the head threads was knackered http://forum.205gtidrivers.com/index.php?showtopic=156843&hl= Due to the minor damage from the courier I have decided to not repair the thread albeit that this does seem the best option (Helicoil).


Block Four - Pick up off eBay from a guy in Essex, have checked all the threads, run a tap over them and now just about to prepare this block. Need to get my crank sorted first, then order new parts, then hopefully be able to rebuild without problems.


I found it very difficult to get the No1 bearing cap oil seals (Hockey Sticks??) my thread on that was here http://forum.205gtidrivers.com/index.php?showtopic=156790&hl= I am wondering how to use sealant and lubricant at the same time, now I have taken No1 cap off I can see that the sealer was not stuck :unsure:, how is it best to do this in future?


Hockey stick seal


P1030294_666x500.jpg


Block one


P1030318_666x500.jpg


Block 2


P1030317_666x500.jpg


My shell was delivered to the body shop today and all being well I should have the shell back in around 6 weeks.


I am now waiting for parts back from the platers and powder coater so that I can finish the ream beam, from sub frame and suspension.

Edited by mrfirepro

Share this post


Link to post
Share on other sites

Please sign in to comment

You will be able to leave a comment after signing in


Sign In Now

×