Jump to content
  • Welcome to 205GTIDrivers.com!

    Hello dear visitor! Feel free to browse but we invite you to register completely free of charge in order to enjoy the full functionality of the website.

Sign in to follow this  
mowflow

[Car_Overhaul] An Idiots Adventures. 205 Destruction

Recommended Posts

mowflow

I started this project blog on the PSC website but thought i'd share it here as well as I will need as much shared knowledge and help as possible.


Just to take things up to where they are now i will add what I have posted so far in this thread and will then run the 2 threads.


First posted 19 April 2013


I'm yet another one of those sad old gits that had a 205 GTi when I was young and have now foolishly bought one as a project. I say foolishly because i've never even looked at a Hanes manual since I owned my last 205 around 18 years ago.

I've spent months looking. Got gazzumped several times, looked at a few dogs and found a few that turned out to be insurance write offs along with cars with mismatched engines etc etc. Some of those things wouldn't bother me if stories and some history had backed up but in most cases it was well hidden.

Anyway, i got talking to some guy who had his car on ebay. It looked clean, had history and the guy came across okay on the phone. Checks showed everything was fine, previous owner had kept the car 10 years and kept history. The car was listed in the wrong section. Not under cars or anything even slightly related to cars so it never sold. I had a few more calls and got a few more pics sent through from the owner. Eventually, in a moment of stupidity/bravery I decided to make the 300 mile trip to go take a look and most likely buy the car.

I flew from Glasgow to Birmingham on Sunday. Checked the car over. It was a bit rougher than i expected. Few small bits of surface rust on the body. From memory no worse than the one I sold all those years ago. 2 issues. The N/S inner wing had rusted through and the oil filler pipe had "melted" according to the owner (I should probably have just got back on the plane at this point, the guy knew even less than me). The inner wing can be welded so it wasn't a deal breaker for me and the oil filler pipe actually just looks like it's perished along with all the other oil pipes. So not being a fan of flying I decided to take the car, haggled the price down a bit more as it wasn't exactly as expected then set off on my merry way, 300 miles back up the M6.

Much to my amazement the car drove like a dream and I did the journey in one hit and one tank. All gauges stayed where they were, nothing fell of or burst into flames. It was a very noisey journey due to a stupid back box on the car but none the less I was amazed and very happy that I got home under my own steam.

First day having a proper poke around the car today. It leaks like a sieve. Found 2 leaks in the boot and need to drop the roof lining where I suspect there is another. As such all the soundproofing is like compost but thankfully I've only found slight surface rust under the back seats and boot floor. Under side of the car looks solid and from running my hand about under the carpet the footwells seem fine (carpet not fully out yet as I can't get the 2 torx screws in the seatbelt side runners out, oddly enough I remember having the same problem in my old car. broke a bit in one of the screws while trying so spent the afternoon drilling that out).

I have however made a horrible discover that I somehow never noticed yesterday. The N/S chassis leg is rusting. It's not rusted through nor is it turning to dust when I touch anywhere but I can't tell how bad it really is due to being an idiot. I know enough to know that a rotten chassis isn't good, here my knowledge ends. I also know a repair is well and truly beyond me and don't have thousands to throw at the car for the one repair. I'm really starting to get that "oh ****" feeling now.

A fool and his money as they say.

Some pics from the original advert

KGrHqNHJEFEN1l02ggBRIgml6uK60_58_zps14e4da11.jpg


T2eC16FHJGwE9nySeEVBRIglvCWg60_58_zps02a6a3cc.jpg


Now the bad.


Said this had melted but it seems fine after a clean

Oilfiller1_zpsbe02b83b.jpg


This pipe was like an old sock

Oilefillerpipe_zps89fd08e3.jpg


offside wing not so bad

Wingrust_zps6d41eb13.jpg


nearside, bad.

Winghole1_zps8e2a5940.jpg


The hole from below

Winghole2_zps07b641d4.jpg


and the chassis leg above the gearbox looking up

Chassisleg1_zps5a42bb1f.jpg


viewed from the wheel arch

Chassisleg4_zps9b7fb379.jpg

Share this post


Link to post
Share on other sites
mowflow

First posted 30 April 2013


Well another hour grabbed on the car tonight. Still can't get those bloody seats out. It's the 2 bolts near the seatbelts at the rear that are the problem. I know they go right through the floor and come out at the centre silencer so I got underneath the car and gave them a half hearted wire brush and a good dousing of WD40. Managed to get them all turning after waiting a while but they quickly seized again and I could see the torx bit twisting (new one which I bought today after snapping the last on in one of these bloody bolts). That bit set will be going back to Machine Mart tomorrow. Lifetime warranty on toffee tools. Brave.

Anyway, On a more positive note. While under the car I had a nose about and all looks well. Could be rotten beneath the under seal but ignorance is bliss so please don't ruin this moment of glory. Sub frame should be good as the oil all over it should be preserving it smilenew.gif

I also pulled the carpets up (around the bloody seats that i cant get out so not exactly ideal). No rust to report. Feel a bit like I've won the Euro millions. This was despite the sound deadening being soaked so even more amazing. I know the boot is leaking as some tool has fitted a washer jet that is completely the wrong shape and size. New one ordered. The drain is also draining into the boot so need to figure that fix out although it seems to just be a terrible design flaw. I'll drop the roof lining next and see what's what with the drains up there.

Share this post


Link to post
Share on other sites
mowflow

First posted 06 May 2013


First weekend down and another few steps backwards. Finally managed to get those seats out (thanks to ***'s advice. I would however like to add that it's best to let the bolts cool before removing that last little bit by hand). The floor isn't completely rust free but it's solid and only in need of a little welding. I did panic when I saw the gear surround thing as it looked like it had been fitted to the titanic. Seems it rusted worse due to the perfect mix of air and water at this area. I think the rest of the floor was so water logged that the sound deadening formed an air tight barrier.

Some pics.

20130504_134033_zps161cc2ae.jpg


20130504_134136_zps413cd211.jpg


20130504_134052_zpsac676e96.jpg


My biggest issue at the moment is leaks and the finding and curing there of. At the moment I'm seriously considering parking the car on the lawn and just telling everyone it's a weird French hot tub. I have every leak known to man apart from sunroof issues (because the vacuum is fecked and it's jammed shut). The boot pours water in on the passanger side via the drain. Fitted the proper washer jet (some fud had fitted one that didn't even cover the hole), sealed it, sealed the wee hole near the lock (what the hell is that for?), spoiler off and sealed that but low and behold I'm still getting water in the same place.

Rear quarter windows leak on both sides. Unlike the whole of the UK it pissed down nearly continuously this weekend so with the car parked on the drive there was no chance of removing and fixing.

The worst has to be the bulkhead leaks though. Don't get me wrong, the torrent from them isn't bad, it's merely a dribble on both sides but they are by far the most confusing. I'm pretty sure one is the window seal as I noticed some w***spanner has stuffed a load of silica gel packs down the back of the dash. I also have a few little spiders of rust starting near the top edge so I imagine water will get in there and the rusty trail of water at the bottom edge on the inside and out would suggest that is where it's leaking. This seems to form a little river down the corner where the bulkhead meets the arch/wing in the footwell.

Share this post


Link to post
Share on other sites
mowflow

First posted 5 June 2013


Been a few weeks since an update...... and very little has happened in that time.

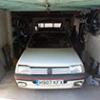
Got the garage sorted, even gave it a half arsed lick of paint. Car went in and slightly more space than I thought thankfully.

So far with the car in the garage i've managed to attack the inner boot floor with a angle grinder and flap wheel thus creating some nice new holes in the floor where rust used to be. Had a good look around underneath the car and started removing the exhaust and rear bumper/valance. In my haste I never bothered reading any guides so sheared most of the bolts (which i expected) and made a complete arse of the corner T bolt thing ruining the bumper and turning the wee rotten bracket to a pile of dust. Pisser about the bumper but oh well.

In further news the learning of welding is going well. Got a little zinc fever thanks to Arnold Clark selling me some contraband galvanised sheet disguised as zintec (Just strengthens my hatred for AC further). I also managed to set fire to my trousers on Sunday. That was interesting. All things considered i'd say it's going quite well.

Dull diary entry but they say a picture speaks a thousand words. Well not this one. Broken car in garage.


20130531_070641_zps5f923fd0.jpg


First posted 7 June 2013


After looking at the front last night I think i'll be grinding all remaining bumper bolts off. I've seen the price of them but thankfully it will be ages before I get round to putting the bumpers back on so i'll have plenty of time to rob the kids piggy banks while they sleep. In the meantime I arranged some replacement bump brackets as the old ones exploded in a little brown cloud when i poked them with my finger.

I plan on whipping the rear beam off and dropping the tank this weekend so no doubt there will be a lot more of the car destroyed this weekend along with the potential for a petrol explosion (tank is empty but still). The beam isn't seized but it moans like a high priced whore if you go near the back end so i'm assuming it can't be far off the completely f*cked stage. Plan is to rebuild this while i'm also stripping the underside in the hope that one works as a break from the frustration of the other.

Edited by mowflow

Share this post


Link to post
Share on other sites
calvinhorse

Looks really smart, the bad bits don't look too bad!

Share this post


Link to post
Share on other sites
mowflow

First posted 18 July 2013


I'm still alive. Just thought id confirm that before I got into the details about how I've managed it.

Work on the car is moving as slowly as expected. Back when the car shaped aquarium was sat on my drive and i was making a genuine effort to "decorate" the garage so i could somehow convert it from a hot tub on wheels back into a 1990s icon I made a comment in jest to my wife that the moment I got the car in the garage we would hit a heat wave……… so you can thank me for fixing the weather.

As such i have probably… no, make that definitely spent more time sat in the garden sipping cold beer wondering how hot it MIGHT be in the garage rather than actually doing any work. I even went on holiday to sunnier climes for a week, I will thinly veil this as a training exercise in an attempt to acclimatise myself to the heat in the garage.

So what's been done since the last time?

I believe in my last post I had destroyed my bumper and only had half of it off. Well I got it off and didn't have to cut or destroy anything else. I didn't even take the claw hammer out of the tool box.

Removed the exhaust from the manifold back. It's not the easiest to get in their is it?

TOP TIP: (this is my new thing, i'm going to throw these little nuggets of wisdom in for future idiots) DO NOT lye directly under the bend of the down pipe looking up when you spray the bolts with WD40. The down pipe was strategically designed by Peugeots top designer to create a fast flowing rusty WD40 river which runs directly into your eyes.

Dropped the beam. A surprisingly easy job, especially when you just cut all the brake lines with a stanley knife.

Dropped the fuel tank. I was a bit worried about this with the potential for bolt breakage and the potential for an explosion (I bought a fire extinguisher after the trouser incident). The studs on my car looked like twiglets. Bit of a clean up with a wire brush, some WD40 and a non flame throwing heat gun and the first nut was off. Second one turned out someone even less adept than myself had had a go before which meant the nut looked more like a raisin impaled on said twiglet. After several days of looking at it and rummaging about in the tool box I finally got it off and dropped the tank.

TOP TIP: A quarter of a tank of fuel is waaaaayyyy more fuel than you think. Decant any remaining fuel in an area that you don't care about being destroyed by a fire ball. I used my neighbours driveway.

So with most of the under garments now removed i could set about the crusty underside. Been on this job for what feels like forever now and I've now got most of the rear section of the underside cleared of whatever the hell that stuff is. It's a very time consuming dirty job and I've been wearing a hat, goggles, face mask and coveralls with the neck tied shut in an attempt to stop the resulting (possibly toxic) dust getting everywhere. Being a bit claustrophobic it's not much fun and lately i've been having nightmares about being found dead under the car all trusted up like this and my loved ones being told by the authorities that it was some kind of Michael Hutchins style strangle **** gone wrong.

A first skite over of the main area. You can see that I need to go over it "in detail" with a smaller brush. I think it might be flash rusting but to be honest with you i don't even know what that means, it's a phrase i read somewhere. I don't want to be spraying anything on until it's all totally clear.


20130718_075142_zpse4302850.jpg


20130718_075216_zpse5a00e3a.jpg


20130718_075223_zpsb49518e1.jpg


The biggest challenge with this job is going to be getting to some areas. between the wheel arch there is a particularly deep and slightly rotten area that I have no idea how to clean out. Suggestions welcome

20130718_075234_zps7143a4d4.jpg


As a break from the sensory depravation chamber i've been dismantling the beam. I though I was an unstoppable force armed with my can of WD40 and my blow torch. That was until i got to removing the torsion bars themselves. Thankfully i managed to buy one of Mr Fentons pullers for this job. What a tool that is. The amount of force i put into getting those bars out was scary, I'm amazed that such force could be put through that M8 stud.

So first side released, the shaft comes out and it's absolutely spotless with a perfect bearing like it was just put together yesterday. I think "great, well this has been a completely pointless exercise".

20130716_215051_zps49b5153a.jpg


Remove the other side and am met with this

20130716_215034_zps678d8dbe.jpg


Some of the bearing

20130716_215021_zpsaf6af04e.jpg


The rest of the bearing

20130718_075446_zps9490086b.jpg


So that's where i'm at right now.

I'll keep plodding on with the underside and the beam, slowly working my way towards this doom of welding. I'm also trying to work out what to coat the underside with at the moment. I'm think an epoxy mastic (what they use on steel hull boats) onto the bare steel, tiger seal the seams then stonechip then I don't know what to do to make it body colour. No compressor so options are limited.

Share this post


Link to post
Share on other sites
Anthony

Before you go any further with the beam, take a look at the tube on the drivers side - judging by the state of the bearing, I would suspect that the tube is going to have been worn ovalled and is thus scrap unless you've a friendly engineering firm that can machine it out and put an insert in.


I've used Epoxy Mastic on a couple of cars and - so far at least - it appears to be doing its job, although the oldest was only done 3 years or so back and thus it's a bit early to draw any real conclusions about its effectiveness. It was easy enough to apply with a brush though, and it goes much further than you think from a comparitively small amount.

Share this post


Link to post
Share on other sites
Davy

That picture of the underseal all cleaned off is the defination of 'perseverance'!! Well done.


Water leaks can be so frustating! The rubber backed type carpet is also very good at hiding the sneaky b***ard stuff thats made it the whole way down behind panels etc to the sponge like underlay! I wonder how many people there are who dont realise there underlays hanging onto about 20kgs of water under their feet.

Took me ages to find the cause of a wet boot floor on another 205. It seemed to be coming in at the boot lid hinges, but turned out to be sunroof related, nothing to do with drains, but the fact that someone had tried to remove the rear most rivnut type stud on the sunroof rail but it had sheared, so they cunningly bored and self tappered beside the original hole and put the trim back on. The heads of the original studs have a seal on them, so without it the water was trickling in between the double skin, running round to the boot hinge and dribbling out there!...

Definately worth taking the preventative measure of removing, cleaning and sealing the rear quarter rubbers.

I've also noticed on mine that the wind screen rubber has shrunk slightly and was lifting a little. There's a secondary seal to this rubber, and if it shrinks or lifts at all, then water can make its way to the bottom where it'll build up and trickle in and down the bulkhead.


In general the body work looks good, just the few most common areas. The 'brown side' of the rear beam looks pretty bad tho. I hope you get away with a new shaft and set of bearings, tho wouldnt get my hopes up! With it being that worn, were you able to notice any camber on that wheel by any chance?

Share this post


Link to post
Share on other sites
GLPoomobile

I'm not normally keen on project threads that are very 'wordy', preferring some good pictures with a bit of useful accompanying blurb. But your humour sets a perfect tone and makes me want to keep reading :-)


Get yourself some Plusgas for stubborn nuts/bolts. Much better than WD40. There's probably other similarly effective products available, but the message is, don't rely on WD40 as that's not what it was primarily designed for, and whilst it will work to a degree, something like Plusgas will make these jobs easier.


If you haven't already, check out Bilt Hambers products for rust treatment.

Share this post


Link to post
Share on other sites
Davy

..P.S. There's loads of opinions out there about underside protection and finish and I dont have enough long term experience of different methods to advise or make a worthwhile comparison.

The only thing I can say is that, apart from a mint original underside (creamy/yellowy underseal and all), then the next best thing in my opinion is a white car with a white gloss underside! Looks lush with all the different bits and pieces to contrast! Any other colour of car painted white underneath doesnt pull it off as well, and can attract uneducated, smart arsed comments like "thats a white car thats been resprayed!"


Good luck.

Share this post


Link to post
Share on other sites
mowflow

Cheers, i'll have a good look at that end of the beam before i go wasting valuable time on it. There was no negative camber and that side did actually move quite freely with only minimal squeaking despite my description so not sure if that makes it any more promising.


At the moment i'm pretending the leaks aren't there. I find it easier to sleep at night if i think about this project 1 bolt at a time as the idea of rebuilding a whole car worries me although this does appear to be what I will end up doing.


I've read about Plusgas and will get some but at the moment my tool expenditure is more than the household food bill so I'll kill this can of WD40 and replace with the good stuff.


I've recently bought some of the Bilt Hamber hydrate 80 and deox gel. Only used it on a few things in the garden at the moment but seems good. I was going to get the deox C stuff as well but I read somewhere that the deox products are more or less citric acid with a few added things so i bought a kg of citric acid for about £2 to try that out. I thought about trying the electrolysis technique but last time I experimented with electricity I blew all the sockets in the house and it took ages for the hair to grow back.

Edited by mowflow

Share this post


Link to post
Share on other sites
mowflow

Can anyone tell me if there is a scientific way of checking if the beam is ovalled? My eyes are telling me it's still round but i'm not sure i trust them.

Share this post


Link to post
Share on other sites
Anthony

Normally you can tell easily enough by eye - look for evidence of pitting/damage when the bearing is removed, the inner lip being worn/missing and the thickness of the tube casting being thinner on the outer edge. The ovalling/wear will have happened at the top of the tube.


If you're not sure, measuring it with a set of callipers will confirm that all is well or otherwise.

Share this post


Link to post
Share on other sites
Paul_13

Post a picture up and we'll tell you whether you need to go hunting for a beam tube

Share this post


Link to post
Share on other sites
mowflow

Baws! The tube is buggered. With the seal out even my untrained lying bastard eyes could see it was egg shaped.


Don't trust eBay beams and 205s are like white unicorns in the scrappiest up here. Buggeration.

Share this post


Link to post
Share on other sites
Davy

Bad luck there mowflow, tho it's not surprising considering how bad it looked and how much it had worn through the outer bearing.


Would be interiesting to see how the sleeving (mentioned above) could work. Have you any machine shops near by to take it too for advice / quotes? I've a badly worn beam on a future project of my own and have wondered if welding the worn area and machining it back down would be a possibility, but if your beam doesnt need to be excessively machined to get it 'back to round', then this sleeving method might leave you with a better surface finish for the bearing rollers to run on.


Also, as far as I'm aware, your not limited to GTi beam tubes. Base model tubes will work fine. They dont increase in diameter in the middle like the GTi ones do (I think base models are a constant diameter from one side to the other). It might not look 100% original but if that didnt bother you then it would open your options up a bit.

Share this post


Link to post
Share on other sites
mowflow

I've seen similar sleeves used in bike bottom brackets before so understand how it works. I dare say there are good machine shops in Glasgow that could so it without to much of a builders sigh, I don;t know of any though.


My old man rebuilds classic British motorbikes for a living so is no stranger to rusty worn out parts. i'll take it to him and see what he makes of it. He may even be able to do something with it on the lathe. It wouldn't really matter if he had a go and made it worse as it's nothing more than a paper weight as it stands.

Share this post


Link to post
Share on other sites
mowflow

Update time. I'm sure you've all been checking back here almost daily just waiting for this moment.


The big hold up has been welding. I couldn't weld and there is firm evidence that I still can't. I spent ages reading all the theory, getting advice from the mig welding forum and practicing on various sheets until I felt confident that i would not destroy the car. All I can say is but welding 2 sheets of virgin 1mm steel on a well lit bench is f*** all like trying to weld an odd shaped hole made of midges baw hair thin French steel in an awkward corner while suspended upside down holding an inspection lamp in your teeth.


I actually used 1 whole big tank of gas just doing my first repair. It would go well for a bit then i would blow a fecking massive hole, fill it with weld, grind it back, fill it with more weld, grind it back, repeat, repeat, repeat, get f***ed off then cut the whole thing out and start again. Eventually I got there and went on to repair all the rusty bits that I deemed structurally unsound by replacing them with my structurally unsound welds. So I now have a solid boot floor, under rear seat area and actual bumper brackets instead of crusty holes.


The underside had been stripped to some extent so i went over this more thoroughly following advice from Surgie. Cleaned it all down with several passes of degreaser followed by panel wipe then applied 3 coats of Jotumastic 87 using a brush.


This is where I'm at now.


20131003_080555_zps0a77a58b.jpg


20131003_080538_zps875b1173.jpg


I've stripped the floor inside and have 1 more small patch to weld in near the handbrake. Inside will then get hit with several coats of rattle can epoxy primer and a top coat. Meanwhile I'm going to start stripping the front. I'm hoping it's going to be easier as it doesn't appear to have all the nooks and crannies of the rear and there doesn't seem to be 3 inches of underseal covering most parts.


I've now got a bet on with my neighbour that i can get this back on the road before he can get his 944 back on the road. It's been in his garage 7 years and has taken him 3 months to remove a bolt from one of the brake callipers so I fancy my chances here.

Share this post


Link to post
Share on other sites
TT205

Keep at it, you're doing great!!

Share this post


Link to post
Share on other sites
jord294

Baws! The tube is buggered. With the seal out even my untrained lying bastard eyes could see it was egg shaped.


Don't trust eBay beams and 205s are like white unicorns in the scrappiest up here. Buggeration.


couple of guys on here sell beams through ebay. which i would say, you can trust :)

Share this post


Link to post
Share on other sites
mowflow

I've not forgotten what you said about beams to me and i will certainly contact you when I get round to building mine. I've kind of put it on a the back burner until i sort all the rust out.

Share this post


Link to post
Share on other sites
Davy

Well done! Just been through a similar experience with the underside myself, tho I didnt remove all the underseal. Takes patience!


Feel your pain with the paper thin tin welding too.


Keep up the good work!

Share this post


Link to post
Share on other sites
Tom Fenton

Hats off to you buddy it looks an excellent job, well done. I'm also going through the same pain at the moment, see pic...

FFE41291-6F70-41D3-AFF0-BCCAFD247873-159

Share this post


Link to post
Share on other sites
Bogsye

Enjoying your thread :)


What did you use to strip the underseal off? Was it just a wire cup brush? Got this to do once I get the tank off.

I've got a near full tank of stale fuel to dispose of, so if that goes remarkably wrong you should see the flame front pass by Gourock.

Share this post


Link to post
Share on other sites
mowflow

Tom, parts of that floor look remarkably new, like they have not had a wire wheel anywhere near them.


Bogye, won't be long to bonfire night, dispose of the fuel then. Top tip, rag in the filler hole of the tank, drag to most hated neighbours lawn, pour. ;)


I mainly used one of the flat twist knot wire brushes on a grinder to get the worst off. I then went down to various shapes and sizes of the thin wire brushes in a drill along with a 20mm cup style twist not for all the really clogged up hard to reach areas. After that it was a hand job with paint prep pads bought from Halfords.


It's a filthy, long, soul destroying job but the results are hugely satisfying. I got the metal much cleaner than in my previous pics but I never took pics due to being in a huff with the whole process.

Share this post


Link to post
Share on other sites

Please sign in to comment

You will be able to leave a comment after signing in


Sign In Now
Sign in to follow this  

×