Jump to content
  • Welcome to 205GTIDrivers.com!

    Hello dear visitor! Feel free to browse but we invite you to register completely free of charge in order to enjoy the full functionality of the website.

dale205mills

[Car_Overhaul] 205 Gti Front Panel Replacement And Underside Restore W

Recommended Posts

dale205mills

Hi Guys


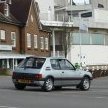
Some people on here no the topaz 205 that I brought off piston heads last year. The plan for it was to have a cheap 205 to drive about in but it sat in my yard for nearly a year with no engine, as the engine in it was on its last legs so a spare of mine was thrown in it and I put it in for mot at the start of this year and taxed it but with electrical gremlins that it had it would run and drive and just die, I have had the engine loom out of it and checked the wiring threw and threw a few times and replaced lots of bits but I drawed the line on how much money I would spend on it and decided it needed one of my gti6 engines put in it and with that idea it was put in my workshop for the fun to start.


I have had to put a new front panel onto and rebuild the inner wings as it was what you could call rotten, I have all so re stone chipped the underside and rebuilt the rear bumper mounts and the plan is to re fresh all of the running gear like I have done on my other 205.


How the car was.


430174_10150715283758255_657223254_1101164765_10150715283443255_657223254_110117â€422612_10150719097203255_657223254_11023â€419191_10150719098123255_657223254_11023â€428145_10150719098748255_657223254_11023â€424225_10150719096558255_657223254_11023â€429561_10150719096358255_657223254_11023​‹‹‹‹‹‹

  • Like 1

Share this post


Link to post
Share on other sites
dale205mills

429371_10150719094878255_657223254_11023â€428117_10150719098938255_657223254_11023â€420281_10150719096103255_657223254_11023â€418397_10150719097948255_657223254_11023â€427758_10150719097063255_657223254_11023â€416857_10150719095388255_657223254_11023â€419546_10150719095138255_1595793027_n.jpâ€423127_10150719094978255_657223254_11023â€419602_10150719095588255_657223254_11023â€432158_10150719095763255_657223254_11023â€432334_10150719095958255_657223254_11023​‹‹‹‹‹‹‹‹‹‹

Share this post


Link to post
Share on other sites
dale205mills

I put a mot on it and tax and gave it a full mop and polish and died the trim ready to drive it and this is were it all went wrong.


topaz20137.jpgâ€topaz20131.jpgâ€topaz20133.jpgâ€topaz20134.jpgâ€topaz2013.jpgâ€topaz20132.jpgâ€topaz20136.jpgâ€topaz20135.jpgâ€topaz20138.jpgâ€topaz20139.jpg​‹‹‹‹‹‹‹‹‹

Share this post


Link to post
Share on other sites
dale205mills

The car has had a cheap paint job but it do polish up well but it was cheap and we all no a cheap 205 means that there will be problems but I didn't no I brought a rot box, well that's what I like to tell my self. this is the photos of front panel removal and replacement and inner wings repair.

repairs1_zps480d3d77.jpgrepairs4_zpsb3e5047c.jpgâ€repairs13_zpsd76cba4c.jpgrepairs2_zps0fc1d833.jpgâ€repairs5_zps29008912.jpg‹‹

Share this post


Link to post
Share on other sites
dale205mills

repairs14_zpsd4f4c4a9.jpgrepairs3_zpsac4f88af.jpgâ€newpanel4_zps49013d84.jpgjunephotos4_zps01b6556c.jpgâ€newpanel5_zps7c3e4990.jpgâ€newpanel2_zpsa183d2a2.jpgjunephotos3_zps1c5bb34e.jpgâ€newpanel1_zps1b0e03ce.jpgjunephotos1_zps85a07626.jpg​‹‹‹‹

Share this post


Link to post
Share on other sites
dale205mills

junephotos2_zps8a6cb4f6.jpgfrontpanelallwelded5_zpseffd53e5.jpgâ€frontpanelallwelded1_zps691b74f5.jpgfrontpanelallwelded4_zps7b437efe.jpgâ€frontpanelallwelded3_zps747ffd72.jpgfrontpanelallwelded2_zpsdd7017a1.jpgâ€newpanel7_zps1f3f21c8.jpgnewpanel9_zps474f4722.jpgâ€newpanel3_zps9a2d86d2.jpg‹‹‹‹

Share this post


Link to post
Share on other sites
dale205mills

Panel work all done and is ready for sealer and primer and paint, the engine bay is going to be painted in 2k black as that will blend in with the black underside, now I no this wont be every ones cup of tea but I am doing something different with the topaz.

junephotos9_zps0849655d.jpgjunephotos11_zps83116a38.jpgâ€junephotos10_zpsddd7d7f6.jpgjunephotos8_zps76917f87.jpgâ€junephotos6_zps8ab0b5d8.jpgjunephotos7_zps2b1b10b0.jpgâ€junephotos5_zps3ae9f1b7.jpg‹‹‹

Edited by dale205mills

Share this post


Link to post
Share on other sites
dale205mills

I have all so gave the underside its first coat of stone chip, should look good with all its painted parts.

maystonechippping2052_zpsc4e2d27d.jpgmaystonechippping2051_zpsc2292e2a.jpgâ€maystonechippping2054_zps46851a8c.jpgmaystonechippping2055_zps99a7e8d1.jpgâ€maystonechippping2053_zpsb07327af.jpg734090_10151550677138255_709544617_n.jpgâ€549998_10151550677053255_989200306_n.jpg483789_10151550677158255_1302710171_n.jpâ€64699_10151550677183255_85592788_n.jpg67090_10151550677283255_332001135_n.jpgâ€580118_10151550677223255_127601199_n.jpg482309_10151550677083255_715711275_n.jpgâ€repairs6_zps2f28de1c.jpg‹‹‹‹‹‹

Share this post


Link to post
Share on other sites
dale205mills

I have all so been painting a few bits for the gti6 engine and a 8 valve engine.

529838_10150766981468255_298426013_n.jpg541685_10150766978438255_1925656354_n.jpâ€533346_10150766980713255_1087824047_n.jp530671_10150766981003255_154802219_n.jpgâ€528446_10150766982308255_459054903_n.jpg553706_10150766979258255_622191000_n.jpgâ€524634_10150766981803255_1027058278_n.jp557204_10150766982578255_734820157_n.jpgâ€552132_10150766978848255_1794446030_n.jp540313_10150766979813255_1922448190_n.jpâ€541190_10150766977823255_303399653_n.jpgmanifold4.jpgâ€523066_10150766984203255_1457754989_n.jp423365_10150766983158255_1591736932_n.jpâ€541150_10150766983603255_927320230_n.jpg‹‹‹‹‹‹‹

Share this post


Link to post
Share on other sites
Juttie205

some nice progress there

Share this post


Link to post
Share on other sites
dale205mills

Thank you for the kind words, I have had enough of looking at it and taken up space in my workshop as I have got a non sunroof body shell to go in its place and build something special.

Share this post


Link to post
Share on other sites
Juttie205

sounds like a plan my restoration has slowed down ti a crawl at mo

Share this post


Link to post
Share on other sites
Batfink

are they pattern panels? What was the fitment like. I'm tempted to do this to my 205.

Share this post


Link to post
Share on other sites
dale205mills

are they pattern panels? What was the fitment like. I'm tempted to do this to my 205.

yes it is, the panel was not a bad fit but it was not like one from Peugeot and I had the problem of keeping the wings on and a rotten front end :( once I have been in there with the sealant gun to feel the gaps it should be fine but I don't think I would do it to a 205 if I was building a concourse one as I would look for a clean shell that needs paint and no panel work and go from there, it was my first try on one so the next mite be easier but it is a bit upsetting to see a 205 with no front end on ;)

Share this post


Link to post
Share on other sites
Ramigojag

Shame about that from the original pictures it looked quite nice, still nice work

Share this post


Link to post
Share on other sites
dale205mills

Shame about that from the original pictures it looked quite nice, still nice work

I could of left it as it was but I will have my little boy with me and putting the gti6 engine in it, I just wanted a solid 205, that wouldn't grumble if I get a bit keen :D she will look good again.

Share this post


Link to post
Share on other sites
dale205mills

Etch primer on filler, got to seal panels and high build the engine bay.

etchprimerandfiller4_zpsa9713797.jpgâ€etchprimerandfiller1_zpsf2091cf4.jpgâ€etchprimerandfiller2_zps08a35aa0.jpg​‹‹

Share this post


Link to post
Share on other sites
dale205mills

Some Sundays are spent having a day off and relaxing, mine is not when the wife and son are out of the way and I am on call for work, which means I have to be close to the work van ready to go into work if there is a problem with are waste water treatment centers and I look after the ones in Hampshire. I have just gave my engine bay and few coats off high build primer, I will leave it for a week to see if it settles and hardens, then I will stone chip and paint.


highbuild11_zps71d081a9.jpghighbuild12_zpscd3aa456.jpgâ€highbuild13_zps8c4bd6a3.jpghighbuild14_zpsa9c201b6.jpgâ€highbuild15_zpsb2405690.jpghighbuild16_zps4e0c8ff9.jpgâ€highbuild17_zpsa34246a8.jpg‹‹‹

Share this post


Link to post
Share on other sites
dale205mills

Rear beam painted in glow in the dark yellow.

rearbeampainted_zpsbdd6face.jpg

  • Like 1

Share this post


Link to post
Share on other sites
BusEngineer

Looks excellent so far

Share this post


Link to post
Share on other sites
dale205mills

Thank you, it will look good when it is finished and being driven.

Share this post


Link to post
Share on other sites
Pugleyrich

You've done a really good job on those wings Dale. Wish you could do mine! I look forward to seeing this once it is done.

Share this post


Link to post
Share on other sites
Robbiedundy

What make of silver paint did you use for the engine mounts, inlet manifold etc? I bought some silver vht paint but it's way too shiney..


Cheers!

Share this post


Link to post
Share on other sites
Dizzee stuff

The front end of my 205 looked about the same, but I managed to make a very nice repair panel for the inner wing. keep up the good work.

Share this post


Link to post
Share on other sites
dale205mills

What make of silver paint did you use for the engine mounts, inlet manifold etc? I bought some silver vht paint but it's way too shiney..


Cheers!

It was alloy wheel silver base coat and I used a paint gun.

Share this post


Link to post
Share on other sites

Please sign in to comment

You will be able to leave a comment after signing in


Sign In Now

×