Jump to content
  • Welcome to 205GTIDrivers.com!

    Hello dear visitor! Feel free to browse but we invite you to register completely free of charge in order to enjoy the full functionality of the website.

Juttie205

[Car_Restoration] Dimma Restoration

Recommended Posts

welshpug

It aint no BL/Ford/GM/BMW/Mercedes product! and you see the work that goes into them when they get so far beyond most scrapped pugs ;)

Share this post


Link to post
Share on other sites
Juttie205

Spent a few hours this morning stripping engine ready for removal all thats left is engine mounts and driveshafts just got to pick up engine crane from my dads in week and it will be out.

I attacked the rotton inner arch with the wire wheel to see how far rot had gone managed to fine good metal also looks like its had a repair here in its time and not done well.

You can see creative repair with plate held in with screws shocking some people need shooting


PB180057.jpg

PB180056.jpg

PB180058.jpg


Then ran a quick marker line what I belive will need cutting out and new section made.


PB180061.jpg

PB180059.jpg

PB180060.jpg


Hoping within next few days will have engine out picking up some corners from cameron at weekend and will order headlight panel on payday then can start cutting rot out and repairing the poor girl.

Share this post


Link to post
Share on other sites
james_pug

looks like you've got alot of work and welding ahead, good to see this dimma getting restored i've got quite a few pictures of it from pugfest a few years ago.

Edited by james_pug

Share this post


Link to post
Share on other sites
Juttie205

Yep looking forward to getting it back to it former glory still not decided yet to keep car red or change to another peugeot colour.

Share this post


Link to post
Share on other sites
farmer

yup if i can get what you asked for be as good as gold


where in scotland you buy it ?

Edited by farmer

Share this post


Link to post
Share on other sites
Juttie205

Corran ferry


Yeah if you can get bits and for gd price will be like new.

  • Like 1

Share this post


Link to post
Share on other sites
aggyj

looking like your making good progress mate. from dereham not to far from me im from sutton bridge ;)


Share this post


Link to post
Share on other sites
Kev-G

It would be far easier to get a base model shell + transfer over the kit?


Given that it's a Dimma esp., there is no real need/benefit in keeping the original (particularly in the condition it's in).


I'd definitely like to see behind the arches....Any Dimma's I've seen with the kit removed look like they were modified with the blunt side of an axe!!


If that's the car I'm thinking of (previous thread's on here showing it getting re-commisioned a couple of years back?), then I'm shocked at the state of it....Blatant bodgery at it's worst.


:(

  • Like 1

Share this post


Link to post
Share on other sites
Juttie205

Why reshell thats why so many cars get scrapped this is not beyond saving just needs some tlc once fronts sorted remove kit fit new sills and rear arches shell should be good.

  • Like 1

Share this post


Link to post
Share on other sites
Daniel306

DSC00845.jpg


This is what mine was like, but its been off the road since 2004. iv got a new Non sunroof shell for it as this one really is too far gone

Share this post


Link to post
Share on other sites
Juttie205

How did you remove the kit if you dont mind me asking.


Has that quarter panel got any paint on it?

Edited by Juttie205

Share this post


Link to post
Share on other sites
Daniel306

Paint scraper, hacksaw blade and a wide sharp chizzel for some harder parts. because its mostly rust it was not to bad

Edited by Daniel306

Share this post


Link to post
Share on other sites
Juttie205

Thanks that panel does not look painted?

Share this post


Link to post
Share on other sites
Daniel306

It was a silver car original, When they fitted the kit they must have removed the paint so that the kit could be bonded to steel. Im also sure the car has been smashed as some point before the kit was fitted

Edited by Daniel306
  • Like 1

Share this post


Link to post
Share on other sites
Juttie205

Lets hope mines not as bad but if it is will sort it

Share this post


Link to post
Share on other sites
Daniel306

This one had cracked down the boot so watter was getting in, must just have worked it's way round over the years. its a original TT with a new turbo still in the box in the boot. only problem is it had Image split wheels and i could only find two of the original wheels

  • Like 1

Share this post


Link to post
Share on other sites
Juttie205

Back of my kit prob best bit no cracks and can feel up in arch all feels solid so fingers crossed.

Share this post


Link to post
Share on other sites
Juttie205

Mines nothing like that so fingers crossed

Share this post


Link to post
Share on other sites
Juttie205

Not done too much else to it yet apart from remove engine and front seats and started to remove sunroof so I can measure up to see if a vacum sunroof can be fitted.


I started to clean up rotten inner wing to see where im going to cut out and as im picking up 2 good corners from cameron next weekend im more than likly going to drill out spot welds of inner wings remove completly and fit replacement ones from cameron's corners


These are the corners im going to pick up will strip clean up and carry out any welding that needs doing.


DSC02674.jpg


These dont look too bad so should be a good base for repair new headlight panel ordered aswell.


Heres a couple of pics of inner arch that will be removed as you can see will have to remove engine mount and drill spots around strut to removed complete panel.


PB250044.jpg

PB250045.jpg

Share this post


Link to post
Share on other sites
vtifan

i think if your sills need replacing you will find that the rot has spread through the inner sills and triangular fillet panel next to tank,its amazing what the pug sealer holds together :D

Share this post


Link to post
Share on other sites
Carbs4me

I thought my inner wings where bad... but then i seen this!

Share this post


Link to post
Share on other sites
Juttie205

Managed to get drivers side skirt of this sill needs replacing next up remove passenger then remove quarters to see what they are hiding

Share this post


Link to post
Share on other sites
Juttie205

Little update....


Drivers side sideskirt removed to show sill rotten.

PB300050.jpg


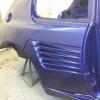
Then I started the task of removing the rear quarter kit at first I thought this was going to be a little daunting but once i rubbed down to expose all pot rivits I drilled them all out then set on removing filler that blended kit on.

I used various scrapers hack saw blades and a dremel with a cutting disc on worked wonders and bingo after a couple of nights the quarter was removed didnt even crack it well chuffed.


I was'nt looking forward to what it was hiding due to the state of the sill and inner wings and headlight panel but low and behold someone must be looking out for me as there is only little amounts of surface rust which will be treated.


PB300056.jpg

PB300057.jpg

PB300051.jpg

PB300052.jpg

PB300055.jpg


Im picking up some inner wings on sunday headlight panel allready here i'm on holiday next week so plan is to remove passenger sideskirt and quarter i'm hoping quarter will be as good as drivers side if sill gone which I belive it is will order new sills then welding can begin then will start to prep bodykit ready for refitting once all bodywork down can start on full restoration of all other parts.

Share this post


Link to post
Share on other sites

Please sign in to comment

You will be able to leave a comment after signing in


Sign In Now

×