Jump to content
  • Welcome to 205GTIDrivers.com!

    Hello dear visitor! Feel free to browse but we invite you to register completely free of charge in order to enjoy the full functionality of the website.

Sign in to follow this  
dicky20014

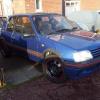
[car_upgrade] My Dream 205 - Mi16 On Bodies

Recommended Posts

craig_007

Hi Rich,


Just came across this.


Good to see your enjoying the engine and your Miami 205 should be some weapon as well as being really tidy.


I'll keep an eye on this.

Share this post


Link to post
Share on other sites
dicky20014

Cheers Craig, dont worry your engine is in good hands! (I think!)


Bit of an update, New backplate made and some other new bits

post-9558-0-42579400-1339589771_thumb.jpg

Share this post


Link to post
Share on other sites
dicky20014

Got some black covers for the wheel bolts, i was going to get some new ones from peugeot but for £90 a set I think ill give it a miss! These should cover my tatty ones up nicely

post-9558-0-86454800-1339589976_thumb.jpg

Edited by dicky20014

Share this post


Link to post
Share on other sites
dicky20014

New bilstein suspension and eibach springs fitted

post-9558-0-75713200-1339590067_thumb.jpg

Share this post


Link to post
Share on other sites
dicky20014

New back plate fitted and a couple of other jobs done :)

post-9558-0-55064700-1339592596_thumb.jpg

Share this post


Link to post
Share on other sites
dicky20014

Catch tank, just need a pipe to the oil filler tower, oh Ive bought a full new set of BBM hoses for reliablity as well, some of the old ones were looking a little past it

post-9558-0-16714200-1339592707_thumb.jpg

Edited by dicky20014

Share this post


Link to post
Share on other sites
dicky20014

Bit of variation on the standard centre cap, painted them charcoal grey, lion red then lacquered over it, what do you think? Should go well with the wheels hopefully

post-9558-0-30672600-1339592816_thumb.jpg

Share this post


Link to post
Share on other sites
dicky20014

Havent updated this in a while, nearly finished now, lots of smaller bits done, wiring pretty much complete now and interior starting to look more like it should


post-9558-0-98238600-1340312933.jpg


dual gauge fitted


post-9558-0-72506700-1340313017.jpg

Edited by dicky20014

Share this post


Link to post
Share on other sites
dicky20014

Wiring tidied up (mostly) and tucked away better


post-9558-0-10297300-1340313162.jpg


Slam panel trimmed to fit around filter, its pretty snug in there!post-9558-0-70268900-1340313292.jpg

Share this post


Link to post
Share on other sites
dicky20014

found that when i shut the bonnet, it struggled to shut properly because the slam panel isnt as sturdy as it used to be! So started looking into making a support bracket for it, this is roughly it, just needs the ends welding and painting up!


post-9558-0-11827600-1340313352.jpg


post-9558-0-08061500-1340313371.jpg

Share this post


Link to post
Share on other sites
dicky20014

Slampanel painted up and trial fit of parts including rough placement of radiator


post-9558-0-72586100-1340314214_thumb.jpg

Share this post


Link to post
Share on other sites
dicky20014

Top view

post-9558-0-93694700-1340314414_thumb.jpg

Share this post


Link to post
Share on other sites
Simes

Looking good.

I'd consider bonnet pins, at least that's what I went for.

The slam panel's rigidity comes from the rad in standard position.

Edited by Simes

Share this post


Link to post
Share on other sites
allye

Looking good.

I'd consider bonnet pins, at least that's what I went for.

The slam panel's rigidity comes from the rad in standard position.


Unfortunately this is exactly what I did, rather not and didn't have the budget for aero catches at the time. Although old school bonnet pins are retro motor sport!


Also this is looking sexy mate! Very thorough.

Edited by allye

Share this post


Link to post
Share on other sites

Please sign in to comment

You will be able to leave a comment after signing in


Sign In Now
Sign in to follow this  

×