Jump to content
  • Welcome to 205GTIDrivers.com!

    Hello dear visitor! Feel free to browse but we invite you to register completely free of charge in order to enjoy the full functionality of the website.

Sign in to follow this  
woodymi16

[car_upgrade] 1.9 Gti Restoration

Recommended Posts

woodymi16

Hello, I have been meaning to start this thread for ages.........well you've heard it all before so I'll just get on with it.

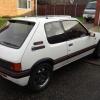
I bought a prestine 205 1.9 Gti about ten years ago and loved it. The looks, handling etc, etc. Then changes in work, commuting, house moving meant it got left untouched (uncared for) for some time. Then after lending it to my son with the strict instructions not to "mess with it" I managed to get her back. This all happened in dec 2010. anyway long story short as they say, I thought I would spruce the old girl up a little. Well anyone reading this will recognise my overwhelming need to just take each step of the tidying up process a little to far, so as a picture paints a story better than my ramblings here she is.


A bit grubby but an afternoon with the jet wash took off most of the crud


Anyway these pics are a fast forward sort of catch up so to speak and having sent her to have the underside and engine bay media blasted, zinc primed undersealed then top coat for the bay I ended up with this


More to follow

Edited by woodymi16

Share this post


Link to post
Share on other sites
harryskid

Starting to look good. Is this a road going car or is it track day?

Share this post


Link to post
Share on other sites
woodymi16

I plan to keep it road friendly, MOT'd and usable. But I have Snetterton race track close which I've taken my bike too a few times for track days so I'll probably end up there with the pug at some time.

Share this post


Link to post
Share on other sites
woodymi16

Here are a few more pics of progress so far


Share this post


Link to post
Share on other sites
woodymi16

I bought a mi16v off the 'tinternet, it came with all the ancillaries including a gearbox. I stripped the engine and took the head, block crank etc to a fairly local machine shop/engine tuner and had some mild gas flowing done on the head, seats recut and all new guides. The flywheel, pistons, rods and crank I had balanced. They also sized up the crank and supplied all my new shells and gaskets. I had one liner worn close to the limits so replaced all four liners as well.


Some more pics to get the thread up to date


Clean, strip, machine work, clean, media blast, clean, oil, rebuild, miss a bit, scratch head, rebuild, paint and this ended up on the engine stand.


Right thats me up to date, I'll be home next week and will pick up the subframe after powder coating. Next job is make and fit all new brake pipes and strip the front shocks.

Share this post


Link to post
Share on other sites
205BigTosh

great stuff there mate, looking back at mine i wished i had done that to my engine, looks brilliant, great work.

Share this post


Link to post
Share on other sites
ally7th

thats going to look stunning when its back together, painting the engine makes all the difference B)

Share this post


Link to post
Share on other sites
harryskid

What paint did you use on the block, it looks great?

Share this post


Link to post
Share on other sites
Miles

Good stuff, One thing I would ditch the metal pipe on the back as it's only needed in the 405 and most people now don;t fit the 2 stage stat for it to work as it should either, makes the engine bay neater too

Share this post


Link to post
Share on other sites
woodymi16

What paint did you use on the block, it looks great?

Good old Halfords high temp brush on. It was a bit of a ball ache but worth it.

Share this post


Link to post
Share on other sites
woodymi16

Picked up some various parts after powder coating, subframe roll bar and solid fuel pipes.


Pressed a new poly bush into the engine rear link


and into the TCAs


Got some new bolts etc from a local supplier


Some of it back on


Started fitting the TCAs but they require some time and energy as there more than a snug fit. But will be worth the effort when I can squeeze them on.

Share this post


Link to post
Share on other sites
woodymi16

I've been putting the wiring work off but have finally made a start. I needed to de-loom the the old management wiring, It was a bit fiddly and time consuming but It all came out eventually.

Out with old


In with the new


Share this post


Link to post
Share on other sites
harryskid

Was the powder coating expensive, looks a good job!

Share this post


Link to post
Share on other sites
woodymi16

Was the powder coating expensive, looks a good job!


No not expensive at all, I use this company


My link


They are super helpful, have a huge range of colours and techniques to achieve anything you want. Downside of being very good is the turn around time is two weeks.

I'm waiting for the hubs and servo bulkhead mounting and some odds and sods. I'll post some more pics when I get them back.

  • Like 1

Share this post


Link to post
Share on other sites
harryskid

Thanks mate i'll give them a try!. Keep up the good work.

Share this post


Link to post
Share on other sites
irmscher

Doing a nice job any more progress :)

Share this post


Link to post
Share on other sites
woodymi16

Doing a nice job any more progress :)


Yep picked up the brake servo mount, front hubs and shock tops from the paint shop today. (no pics yet). I've stripped all the plastic tubing off the remaining wiring so I can check for any necessary repairs. I will clean all the cabling as I go and refit the tubing as I remount all the electrics.


Next job will be to refit the master cylinder, servo and bracket back on to the bulkhead and start fitting the new brake lines and finish the pipe ends. I left all the brake pipes 10mm long at each end so I can get them sized up on a dummy fit.


Pics to follow.

Share this post


Link to post
Share on other sites
woodymi16

More parts back from powder coating


Cleaned up the hubs and dropped them off at my local garage (who have a 15 ton press) to get the bearings fitted.


Rubbed the servo down and painted it.


Cleaned, lubed and assembled the pedals and got that fitted.


Stripped the master cylinder and It looked past it's best so ordered a new one.


That's me done for a couple of weeks got the phone call to go back to work in the morning.


More updates to follow as and when.

Share this post


Link to post
Share on other sites
Alan77

"That's me done for a couple of weeks got the phone call to go back to work in the morning."


that sounds like you work offshore....


nice attention to detail, i like the fuel lines and spare carrier.

Share this post


Link to post
Share on other sites
woodymi16

Made some good progress, fitted all the new front brake pipes.


Flywheel and new clutch fitted


Engine and gearbox before and after


The new mounts feel really solid


Need to get some clearance on the master cylinder


Iit's nice to see some progress, next on the list are the throttle bodies.

Share this post


Link to post
Share on other sites
allye

Managed to completely miss this build :o Going to be minty mint when its done. Looks great :)

Share this post


Link to post
Share on other sites
woodymi16

Unpacked some shiny bits today, and got to work piecing it all together


The throttle linkage is a work of art but with no detailed instructions it was a mission to get it put together and working


More wiring next, not my favourite bit


Share this post


Link to post
Share on other sites
woodymi16

Hi update time, I've been away with work again for ages but here goes.


I originally bought some second hand shocks but after testing them, one had no oil in it so I bought some new ones.


assembled with new Eibach springs


I put it all together with new track rod ends and drop links. New longer braided hoses, discs and refurbed calipers from 306Gti.


I stripped and lubed the drive shafts and replaced a couple of boots.


I put some oil in the gearbox to check for leaks and funny old thing it leaked. It was coming out from the nearside diff seal because the drive shaft was not pushing in far enough.

The culprit


I had a spare in an old shaft so an easy fix.


Next I marked the master cylinder to get some clearance on the cam cover


I had an adaptor kit for the servo vacuum take off so had to drill and tap the inlet manifold.


I started stripping the rear brakes got some new calipers discs etc


Thats me done again until I get home next, thanks for reading, all comments appreciated.

Share this post


Link to post
Share on other sites

Please sign in to comment

You will be able to leave a comment after signing in


Sign In Now
Sign in to follow this  

×