Jump to content
  • Welcome to 205GTIDrivers.com!

    Hello dear visitor! Feel free to browse but we invite you to register completely free of charge in order to enjoy the full functionality of the website.

Sign in to follow this  
RallyeP6

Weber Dcom Vacuum Advance

Recommended Posts

RallyeP6

I have been trying to work out why my car has been pinking and lost power. Thought the vacuum advance capsule was at fault but its fine then noticed i had no vacuum from the carb.

Eventually took both off to check if it was blocked and found vacuum connection to be clear, except that the hole that comes through the barrel is on the other side of the throttle plate.

That is to say on the air intake side.

So with the carbs set up nicely, idling smoothly about 900 Rpm, the throttle butterflies are nearly closed and i don't have any vacuum (using my Carbtune), even if i blip the throttle it doesn't change.


The engine is an original TU24.


Any ideas anyone.

Share this post


Link to post
Share on other sites
205Rallee

I have been trying to work out why my car has been pinking and lost power. Thought the vacuum advance capsule was at fault but its fine then noticed i had no vacuum from the carb.

Eventually took both off to check if it was blocked and found vacuum connection to be clear, except that the hole that comes through the barrel is on the other side of the throttle plate.

That is to say on the air intake side.

So with the carbs set up nicely, idling smoothly about 900 Rpm, the throttle butterflies are nearly closed and i don't have any vacuum (using my Carbtune), even if i blip the throttle it doesn't change.


The engine is an original TU24.


Any ideas anyone.


I know it doesn't answer your question, but I took my TU24 rallye for a rolling road tune years ago and they disconnected the vacuum advance and it ran perfectly. Doesn't matter now as it's on Omex (ignition only) :)

Share this post


Link to post
Share on other sites
trogboy

What take offs are you connecting too?


I've knocked up a quick paint effort showing the locations of the take offs that I know of. The large diameter one on the barrel closest to the timing belt end of the engine does come in on the venturi side of the butterflies, but the other four drillings come in on the engine side allowing you to see the full vacuum at idle.


DCOMpic.jpg


Ad

Share this post


Link to post
Share on other sites
RallyeP6

Thanks for the detailed picture Ad, yes its the vacuum pipe connection to the left of your picture.

Like you said the one closest to the timing belt. This is the original vacuum advance port that would go to the red thermostatic valve by the distributor, which is not connected up on mine as the temperature never goes that low here. So i connected it directly to the vacuum capsule, through the little one way valve.

The other 4 on top are blocked off, i use these only when balancing the two carbs.


Rouben.

Share this post


Link to post
Share on other sites
trogboy

The original set up uses one of the four pipes on the top too but I can't remember which one! It was connected into the other pipe via a tee-piece between the dizzy and the one way valve IIRC. Of course I might have that wrong - it's been a long time.


I'm pretty sure that you shouldn't have the one way valve in on it's own as you describe as the dizzy would only ever see increasing vaccum (or no vacuum depending on which way you fit the valve).


Christopher on here gave me a scanned copy of a very useful excerpt from a french 205 manual that refers to all of the TU24 specific bits. Much more detail than you get haynes for example - like float settings and a hole heap of other guff. Any how that has a diagram showing the original setup.


With a bit of luck he'll see this and come up trumps for you too. If not then it's definitely worth a PM.


Ad

Share this post


Link to post
Share on other sites
RallyeP6

So yesterday i checked the one way valve, after reading your post you got me wondering weather the vacuum was advancing the distributor all the time, but it doesn't, so that parts ok.

Tried to check the ignition timing with my timing gun then noticed the metal timing plate with the two markers on it is wider than the width of the flywheel. So i cat see the TDC timing mark on the flywheel. (if you can understand that).

There was a little mark just near the clutch cover which seemed to lign up so i used that. So i retarded the ignition a bit to 4deg BTDC and the pinking has mostly gone, still need a bit of tweeking though to get it spot on.

As to the web site, it is 'la205rallye', in French but with lots of info and pictures, that's i think where i got the drawings for the original vacuum pipe set up, with the timing advance curves too.


Rouben.

Share this post


Link to post
Share on other sites
christopher

I don't think it males a great deal of difference where the vacum takeoff is used. I run my rallye with the temperature switch disconnected. I only have one vacum pipe connected. All others are blocked off. I use the one of four ones on the top, not the one on the side. This is connected directly to the vacum advance on the carb.


I have no problems even in the Danish cold weather.


You dont have an air leak somewhere do you?


A bit odd you dont have a vacum. You should be able to feel it suck if you put your finger over the pipe.


I use a motorcycle balancer to check the balance, and set the timing by Ear!

Edited by christopher

Share this post


Link to post
Share on other sites
WeberTa22

I know this thread is a bit of a dead horse now, but in case anyone comes here from google like I did, thought I'd share what I did with mine.

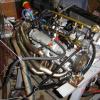
So at first I had my vac advance being taken off that single larger take off, because it looked right, but when running the car, it was absolutely disgusting with the timing, so I did a little digging, and found that originally from factory, these DCOM's had a balance tube which came off the individual vacuum take-offs, which went to the dizzy. Here's an image of what I did to re-create that effect.

14523115_10154492815329259_8241904569373


It's just vacuum pipe with connections, and a cheap little fuel filter to act as a chamber to absorb any resonance, then from there I put it to the vacuum advance canister. The tee is where I later added a vacuum gauge in the cabin.


I hope this helps someone.

Edited by WeberTa22

Share this post


Link to post
Share on other sites

Please sign in to comment

You will be able to leave a comment after signing in


Sign In Now
Sign in to follow this  

×