Jump to content
  • Welcome to 205GTIDrivers.com!

    Hello dear visitor! Feel free to browse but we invite you to register completely free of charge in order to enjoy the full functionality of the website.

AlexN

[project] 405 Mi16x4/t16 Track Car

Recommended Posts

AlexN

Hi all, I have finally decided to start a thread on here detailing my track car build. As you can see from the title it is not a 205 but a 405! I know it isn't a 205, but it is still a Peugeot! Hopefully some of you will be interested in what I have to put up on here. I was intending to have it finished for Pugfest this year, but I am still way off :huh: hopefully next year though!


The idea started about 3 years ago when my Mi16x4 decided to blow both crank shaft oil seals. It had had loads of little niggling problems (like complete brake failure in the outside lane of the M4!!), and I decided enough was enough. I took it off the road and left it to sit for a few months while I made up my mind what to do next.


The first idea was to try and make it rear wheel drive and turn it into some sort of drift beast (having the transmission tunnel already in the car would have helped). However this would have meant using a non-Peugeot engine and quite extensive modification of the engine bay. I wanted to keep the car as original as possible so I ruled this out.


So a track/race car it was. I started by stripping it out completely and removing the engine etc.. I started off the work by making a jig that would allow me to turn the shell through 360°. I bought some box section and welded it up (my first ever attempt at welding – hence it was a bit rough!). It did the job and allowed me access to the underside of the car so I could remove all the underseal.


2534342317_7d5a2346ef_z.jpg


2535163808_f1a2950fe9_z.jpg


2601360555_7baeee1a51_z.jpg


2601366073_e499a43ff1_z.jpg

Share this post


Link to post
Share on other sites
AlexN

Whilst this lot was going on I made use of the facilities available to me at my work to start making some small bits and pieces for the drivetrain. First were some solid bushes for the rear diff.


2535129078_975cd18826_z.jpg


2534318503_55ab3ebfab_z.jpg


2615306827_bb63bb4ce1_z.jpg


Then everything went quiet for a little while. The project drifted while I was trying to make up my mind about how much I wanted to spend and exactly how far I wanted the overhaul to go. So last August I pretty much made up my mind to go for it, and within reason, money no object!


I had the front and rear subframes powdercoated and I also bought a full polycarbonate window kit (sides and rear screen). This was the commitment to the project that I needed, I had bought something that had little resale value and was destined for a dedicated track car!


3803792170_4221869327.jpg


3802980787_b2c9f31dd6.jpg

Share this post


Link to post
Share on other sites
AlexN

I also started to patch up some rusty parts of the car including a rotten sill. This was all going ok until I realised I had reached the limit of my patchy welding skills (I am still meaning to do some evening classes in welding to learn properly). It was around this time that I realised if I was going to get the shell prepared the way I wanted it I would need outside professional help, so I got in touch with Colin Satchell :huh:


3803794300_43339089a0.jpg


3926995502_cc80816cf3.jpg


I reassembled the front and rear subframes and put the wheels back on. The car was back on it's wheels for the first time in two years! This was only to be a temporary occurrence though as the wheels were simply to move the shell from its semi-permanent tented home to the gateway from my parents field! Colin arrived with his trailer to pick it up, I don't think he had bargained for helping out pushing the shell up the field to the gate! With the car loaded up it was off to his workshop (where it is still currently residing) for some serious work – more on that later.


3926994054_1204a9801d.jpg


Meanwhile, perhaps one of the more ludicrous 'holidays' I have ever taken was underway. I had bought a low mileage 405 T16 engine and gearbox through the 405mi16 forum. There was one slight problem though, both were situated in Slovenia! So I went with my housemate on a 4000 mile round trip to pick it up! En-route we stopped in the north Italian alps for two days stunning mountain biking (puts riding in the UK into perspective!), then 18 hours solid driving to pick it up and head home!


4768363637_9a2f04e8fc_z.jpg


So when I got home, with some blood, sweat and tears we got the engine onto it's stand, I was the proud owner of a T16 engine! It came with pretty much all the parts needed for a complete rebuild and this is exactly what I have been doing (it's almost finished now!).


3926209719_1ce6e87d92.jpg


3926990804_71d95a6305.jpg


So I now had an engine that would comfortably make me the right side of 300hp and similar torque. The T16 gearbox (ME type) had been proven by other T16 owners to easily cope with that kind of power. The transfer box on the other had was another story...


The shafts that mate the two together were the weak point (even with standard horsepower) on the Mi16x4. I was planning to use the Mi16x4 transfer box on my car. This needed an end plate from a T16 box to mate up to the gearbox, otherwise it was very similar to the T16 box. Unfortunately it was not just the transfer shafts that would need upgrading. The central differential is also unable to cope reliably with very high horsepower. There is a guy in France that sells everything you could possibly want to upgrade the drivetrain, but at a price. Adding it all up it would cost me well in excess of £3000 to make the drivetrain bomb proof!


3934277696_ac3724018c.jpg

Mi16x4 box on the left, T16 one on the right.

Share this post


Link to post
Share on other sites
AlexN

Next job on my list was to refurbish the rear suspension arms. Thankfully all the parts but the bearings were still available from Peugeot, and the bearings were easily found from a local supplier. The arms were well overdue a service, the bearings pretty much fell apart when I took them out! I took them to work to get cleaned up, blasted and painted black.


3977874468_4b9457683b.jpg


3977873588_9c5a5a6f03.jpg


4008937223_610411e665.jpg


4008939867_d63fec5e70.jpg


I refurbished the rear diff at this time with all new seals. It went OK apart from the bolt holding the output flange on shearing off. Luckily I managed to get it removed without too much trouble. The rear diff is the one part of the Peugeot drivetrain that is a nice bit of kit, and more than capable of handling a couple of hundred horsepower.


I also had manufactured two pairs of solid rear subframe mounts. The rear mounts were machined and anodised and the look the business! The car will be pretty unpleasant to drive long distances on the road, but on track hopefully it will benefit greatly from all solid mounts.


4011625263_4a53e81d2c.jpg


4447138105_1ff122dc63_z.jpg


4447137811_ac55547243_z.jpg


I will cover the rebuild of the engine later on in detail, but here are a few pictures of the fuel system. It pretty much is overkill for the power I want to make, but it gives me enough overhead that in the future should I want to chase big hp the fuel system will not let me down. All that is left to purchase are some aeroquip fittings and hose, plus the injectors. I am thinking of getting a set of flow matched Siemens Deka 630cc ones.


4131197499_e1b6cb43e2.jpg


4131960384_7196c0e790.jpg

custom swirl pot all -8 fittings.


I have an old but still serviceable 80L foam filled ATL fuel cell with a NASCAR top plate. The low pressure Holley pump will lift fuel out of this, the rest is pretty obvious.

Share this post


Link to post
Share on other sites
AlexN

I think I will cover the work that has been carried out on the shell now, I'll leave the engine until later.


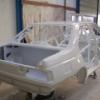
After chatting with Colin about what he can do and what I wanted I decided that a full, very extensive, weld in roll cage was a must. He would also put a plate in the sunroof (after and unsuccessful search for a non-sunroof 405 saloon to nick the roof from!), and plate over the the fuel filler cap (the fuel cell is going in the boot). We also decided that it would be both be possible and a good thing for Colin to do his rear suspension turret conversion on my car. The original suspension was a Citroen style hydrostatic arrangement. While this was good on the road I imagined it neither being stiff enough nor reliable enough for serious track use. It was around this time that the Gaz group buy was going on, and I actually met the owner of Gaz at the Autosport show. I inevitably ordered a pair of Gaz gold coilovers for the front and some F3 style coilovers for the rear.


4535381543_19e0850d16_z.jpg


I also decided to go for Colin's tubular wishbone setup for the front, this is the last major job that Colin has left to complete on the car. So with the plans made it was done to Colin! The following pictures show the progression from start to the present day!


4258074610_e15af16369_z.jpg


4258075238_36409e908b_z.jpg


These were the first shots of the cage, and the first time I saw it! I was impressed to say the least!


A few weeks later the cage was pretty much finished with the new steering column in, the seat mounts (both seats have been moved towards the middle of the car to make room for the cage meaning a bit of work was required on the transmission tunnel), my OBP triple cylinder bias pedal box and the rear bulk head completely separating the passenger compartment from the boot and the fuel cell. You can also see the turrets in the boot.


4295594508_b4eca9602e_z.jpg


4294851025_f566e8da76_z.jpg


4295595308_6f491c5a50_z.jpg


4294851919_29b327ac21_z.jpg


You can also see the solid upper engine mounts (completely reconstructed by Colin) and the swaging around the roll cage.


4294853719_885f80ce94_z.jpg


A little while later I received an email with some more pics from Colin. This was where the shell started to look really good, I will let the pictures do the talking!


4332527357_21b5cf7bc5_z.jpg


4333268022_819007951d_z.jpg

Share this post


Link to post
Share on other sites
AlexN

4332528427_8ccbdc8af7_z.jpg


4333266094_ca8d15aa8c_z.jpg


4338153804_c0529fd4eb_z.jpg


4337409139_76c1203a88_z.jpg


4337409457_9fbc16e0f8_z.jpg


4338153182_c7f6297042_z.jpg


Sorry for the picture heavy posting! The external colour was matched to the original Peugeot white, I can't remember what it was called but it is a slightly off white colour.


The final part of the story of the shell is about a few little extras I bought to make the car a bit more special. One of the guys I met when I picked the engine up, and have got to know through the T16 forum (Mandic on here), came up with a find of genuine 405 Super Touring car in Slovenia! The guy who owned it was trying to get rid of it and I managed to buy the carbon fibre rear spoiler, the fibreglass front splitter, rolled arches and wind mirrors. These will also be painted white to match the car. One of the wings has a bit of damage but nothing that cannot be repaired. The rest of the shell got sold to a guy from Ecosse I think.


4382061585_ed60108d7b_z.jpg


4382061907_7f8a4ecf5a_z.jpg


4382825486_ca8b0971c0_z.jpg


That's it for now, I am knackered! The rest of the story will come later, if you guys are interested in it.

Share this post


Link to post
Share on other sites
AlexN

Yeah I thought I should start a thread on here as well, this community is massive compared to the 405 one so hopefully I can get some good help and advice on here!

Share this post


Link to post
Share on other sites
dcc

I remember my ride in Ziga's t16 in croatia!


certainly something I wont forget! they are F*cking nuts! (both cars and drivers)

Share this post


Link to post
Share on other sites
Batfink

I have a sneaky look at this whenever I pop in to see colin :)

Share this post


Link to post
Share on other sites
Daviewonder

Wow this is going to be a great project to follow. Nice to see a 405 getting some TLC for once rather than just being stripped for bits :)

Share this post


Link to post
Share on other sites
Paulmac19

nice one cant wait to see or hear it running very impressive so far

Edited by Paulmac19

Share this post


Link to post
Share on other sites
ade 4wd

I saw your car when i was there a few weeks ago. Very impressive. Will be awesome when finished.

Share this post


Link to post
Share on other sites
stefan

great job, going to be very interesting to see how it turns out.

I have my mind set on doing the 405 to, just NA and FWD.

Interested to see how will you're t16 handle the corners

Share this post


Link to post
Share on other sites
AlexN
I remember my ride in Ziga's t16 in croatia!


certainly something I wont forget! they are F*cking nuts! (both cars and drivers)

I didn't get a run out in his car as I am not certain it was working properly when I met him! Sounds like I missed out on an interesting experience though!


I will put another update on here tonight, thanks for all the positive comments so far, it's nice to know some people don't think I'm a complete nutter for doing this :huh:

Share this post


Link to post
Share on other sites
M@tt

fantastic build! keep the updates coming


I know the transfer box is the weak part in my supercharged 4x4 gti6 build but unfortunatley i only have the Mi164x4 parts to work with. Whats you're plans for beefing up the transfer box? or is it a case of stumping up the £3K?

Edited by M@tt

Share this post


Link to post
Share on other sites
AlexN
Whats you're plans for beefing up the transfer box? or is it a case of stumping up the £3K?

Will let you know later :huh: , suffice to say I won't be stumping up the full amount if my plans work out!

Edited by AlexN

Share this post


Link to post
Share on other sites
welshpug

I know :huh:

Share this post


Link to post
Share on other sites
mickie

proper job!


keep the pic's coming :lol:

Share this post


Link to post
Share on other sites
AlexN

Time for part two of the story so far!


So the engine, I wanted to do a full rebuild on it, with a few upgrades here or there, but I wasn't sure what condition it would be in when I stripped it down. Thankfully the head and the bottom end were both in very good condition. Talking to guys on the T16 forum I decided to try out a Peter Taylor regrind in the engine. My Mi16x4 XU9J4 cams have longer duration and higher lift than the T16 ones (which are extremely mild), so I shipped the inlet off to Peter for him to work his magic. He sent it back with an extension plate for the oil pick-up so I could expand the sump volume by fitting a spacer.


4285771520_ee75d24bcb.jpg


4390160367_42f3994ef7_z.jpg


Unfortunately I really cannot at this stage afford a dry sump system so I am doing all the right things to try and get the wet sump to be as reliable as possible (sump baffle, windage tray, extra volume etc etc). The T16 oil pump already has all the upgrades. I will fit a big red low pressure warning light and see how it goes. If it is looking bad I will just have to save up! Reading on here about Accusumps there seems to mixed opinions. Is this something anyone would recommend trying? If only for the pre-start oiling?


So I stripped down the rest of the engine and got the crank out. The mains looked in extremely good condition, so much so I am going to re-use them. The big ends were worn, but not excessively so. I managed to buy a new set through a guy in France from a group buy on one of the French T16 forums.


4467391421_2189e61e26_z.jpg


I completely cleaned and degreased the block and prepared it for a lick of paint. Once this was finished it was time to get the crank back in.


4341015003_f04ccb1311_z.jpg


4372916507_5e58e157db_z.jpg


4375836823_b53e38a87b_z.jpg


I also bought a MLS head gasket through Rich Walker on the 306 forum. It fits perfectly, just it is missing the coolant holes for the exhaust valve cooling. Colin is hopefully going to try and do something about this, but modifying those gaskets can be pretty tough by the sounds of it. The old gasket was pretty well knackered and just about stayed in one piece when I took it off!


4373668354_9aeda47487_z.jpg


First though I had to fit my new ARP rod bolts. The originals were stuck in tighter than a ducks ass so I whipped out the pistons and knocked out the old ones and fitted the new. Unfortunately I was a clutz when I refitted one of the pistons and broke a ring :o


4468166336_9fe386eeff_z.jpg


My plan was to re-use the original rings at this stage as the engine was making very good compression before I bought it. I managed to get some part worn rings from the guy I bought the engine off, which was nice! Hopefully I won't have too many problems rebuilding it this way, maybe I should go the whole hog and fit new rings after honing the bores? What do you lot think, there is still time as I have not yet got the crank back in...

Share this post


Link to post
Share on other sites
AlexN

The reason the crank hasn't been refitted yet is because I got clearances that were all over the place with the new bearings! Some were tight, some loose. I needed to get this checked so I was recommended a company in Uxbridge called Serdi. They took a look a the crank and rods and concluded the crank was perfect (being nitrided this wasn't a surprise) and the rods were slightly out of round. They honed these for me so hopefully now everything will go back together fine.


Whilst I was there they got me talking about head work. Originally I was not intending to do a great deal to the head, but I was persuaded otherwise! I went for the full works, new guides, seats and valves re-cut and porting. I must admit I am happy I chose to do this as the work looks amazing and it should help the engine breath a little better. Combined with the more aggressive cams hopefully the engine will make good power.


4711978824_6bb37689d5_z.jpg


4711979228_0218cce290_z.jpg


4711980096_2e8f68bb05_z.jpg


4711340597_5fecf67ef1_z.jpg


4711341065_5e4d7afb19_z.jpg

Share this post


Link to post
Share on other sites
AlexN

The cam shafts had one further little issue to sort out, the cam timing tag on the T16 cam was not present on the Mi16x4 one. Today at work I managed to get some of the guys to sweat it off and swap it over. It went back on aligned as best we could with how it was taken off. Hopefully the ECU I am going to use will be able to compensate for any slight errors.


4772728314_1f35176010_z.jpg

Now on the right cam!


The head is also going to be built up with a brand new set of XU10J4RS hydraulic lifters as these are considerably lighter than the standard XU10 ones fitted to the T16. This is a proven mod on a lot of T16's. I managed to buy them at a huge discount through a mate that works for Citroen so I couldn't really refuse. I am not intending this engine to be a screamer. Somewhere around 7500 will probably do it.


4002128822_cb0a6242c9.jpg


The whole bottom end was balanced while Serdi had all the parts. Apparently there was 7g difference between the pistons and rods needed a bit of work too. The crank was very close to spot on though. Colin had a heavily modified XU flywheel that had been massively lightened and adapted to take a 7 ¼” clutch. The clutch now leads me onto my plans for the transmission.


4768196891_d3ef4c11e2_z.jpg


4768196891_d3ef4c11e2_z.jpg


4768198633_89d9b0f735_z.jpg


I bought a QuarterMaster twin plate sintered clutch with a hydraulic concentric release bearing from America.


4711976682_4233e63368_z.jpg


4711977772_67ea2940a7_z.jpg


4714130166_23a822a27e_z.jpg

Share this post


Link to post
Share on other sites
AlexN

The splines are designed to fit a Mitsubishi Evo – can you guess what I am going to do yet? Yep, I have bought an EVO IV gearbox and transfer box, they cost me £400 and should cope with the power levels I want to throw at them without any upgrades. The potential to upgrade these boxes to take massive horsepower is available as well, should I see the need for more power in the future.


4584938618_4ffea8e693_z.jpg


4584940902_4ef64d222d_z.jpg

The flywheel fits!


4584941798_9148ca5fd6_z.jpg

T16 box vs the EVO one


I did a quick trail fit and amazingly apart from the starter motor mount being in the wrong place, the EVO boxes mount up with no major issues. Colin has kindly offered to make an adapter plate to mount the gearbox, he remembered he had done a similar thing a while ago so I wasn't going to refuse! The other great thing about the EVO boxes is the transfer box ration is almost identical to the Peugeot rear diff (I say almost, for EVO V and later it IS identical!). The Mi16x4 rear diff is 3.307 and the EVO IV tb 3.312. I think this difference won't be and huge issue. If it is I can always sell my boxes and buy some V ones instead.


4669758644_1023f8143a_z.jpg


4669135341_4af7530b37_z.jpg


4669135849_1c1a4e0f6b_z.jpg


4669136811_dd32a1d65d_z.jpg


The gearbox shaft lined up nicely! If the engine was bolt upright like an Evo this would be impossible, thank goodness for Peugeot building tall engines!


I have also bought a pair of front EVO driveshafts which will be adapted to fit the Peugeot hubs, and an EVO prop which will be modified and balanced to attach to Peugeot Torsen diff. The gearbox chassis mount will have to be modified too, and the gear linkage system modified. I am getting one of Colins gear systems, he didn't do too much to it to try and make it work with the T16 box, so hopefully getting it to work with the EVO box will be pretty straight forward.


I know I have probably missed loads of stuff that has happened, I will update as and when I remember things! One last update though, I got a rather nice carbonfibre oil breather tank from the USA in the post today. It weighs almost nothing and should make my engine bay look a little more exotic!


4772089119_c5343236f3_z.jpg


I will keep the updates coming now I have pretty much worked through the back log! Tomorrow, the brakes....

Share this post


Link to post
Share on other sites
DrSarty

Good stuff Alex. I was there when your shell was sprayed. It's very nice work and a good write up.

Share this post


Link to post
Share on other sites
BusEngineer

Absolutely stunning, and very ingenius, liking the Evo transmission route


Its great to see a 405 get some attention for once, very unusual


How much did the carbon fibre catch tank set you back if you dont mind me asking?

Share this post


Link to post
Share on other sites

Please sign in to comment

You will be able to leave a comment after signing in


Sign In Now

×