Jump to content
  • Welcome to 205GTIDrivers.com!

    Hello dear visitor! Feel free to browse but we invite you to register completely free of charge in order to enjoy the full functionality of the website.

Sign in to follow this  
sounds of silence

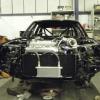
[project] Sos Track 205 16v Turbo Project

Recommended Posts

sounds of silence
sounds of silence

06012009473.jpg


06012009485.jpg


06012009484.jpg

Share this post


Link to post
Share on other sites
Miles

Top job and thats coming from me!!, The only point I would make is the seat mounting's, The std one's are too flimsey and having a proper bar welded to the floor pan makes a huge differance.

Share this post


Link to post
Share on other sites
sounds of silence

ye mate i was going to but opted to just strenghthin the std ones for now but if i opt to change then its a easy enough job and a little touch up on the paint lol

Share this post


Link to post
Share on other sites
sounds of silence

the car got flattened and polished and took back out the booth then back into position to start the rebuild , and build the engine.


now first off was to start by putting the steering column and servo back in


Picture002.jpg


then the full car loom had to be put back in as i removed this for painting.


Picture019.jpg


removed the tape so i could re tape and remove any wiring thats not getting used and make it alitte neater


Picture012.jpg

Picture010.jpg

Picture039.jpg

Picture038.jpg


part of the dash and wiring back in


Picture022.jpg

Share this post


Link to post
Share on other sites
sounds of silence

one of my fav new bits hahahah and new master cylinder and res bottle and cap with float


Picture015.jpg

Picture014.jpg


nice new competition engine mounts


Picture041.jpg

Picture030.jpg

Picture032.jpg


made a start at the brake pipes etc before the engine goes into place


Picture047.jpg

Picture046.jpg

Share this post


Link to post
Share on other sites
sounds of silence

then i started putting the proper engine together


Picture001-2.jpg

Picture004.jpg


nice new oversized forged pistons


Picture004-1.jpg

Picture009-1.jpg


ARP rod bolts


Picture010-1.jpg


lightened polished and shot peened rods and fully balanced bottom end


Picture007.jpg


new oil pump


Picture014-1.jpg

Share this post


Link to post
Share on other sites
sounds of silence

next up was the head rebuild


the head got completely stripped and sent away to get skimmed and the valves recut


when it cam back the valves got lapped back in and refitted


Picture003.jpg

Picture019-1.jpg

Picture017-1.jpg

Picture016-1.jpg

Picture015-1.jpg

Picture021-1.jpg

Share this post


Link to post
Share on other sites
sounds of silence

head now rebuilt time to mate it to the block


DSCN0911.jpg

DSCN0919.jpg


cometic Multi-Layer Steel head gasket


DSCN0921.jpg

DSCN0925.jpg

Picture022-1.jpg

Share this post


Link to post
Share on other sites
sounds of silence

manifold with black heat wrap


DSCN0655.jpg

DSCN0652.jpg

Picture027-1.jpg

Picture032-1.jpg


manifold fitted to engine


Picture034-1.jpg

Picture035-1.jpg

Picture036-1.jpg

Share this post


Link to post
Share on other sites
sounds of silence

managed a bit more work on it over the weekend and last few days , spent alot of time having to get braided pipe etc made up ( not been easy :twisted: ).


got all the brake pipes made and engine bay ready for engine .


Picture001-3.jpg

Picture003-2.jpg


gearbox on engine and turbo fixed down inc all oil and water pipes fitted .


Picture006-2.jpg

Picture007-2.jpg

Picture009-2.jpg


engine mounted up and fixed in


Picture015-2.jpg

Picture016-2.jpg

Picture017-2.jpg

Picture018-2.jpg

Share this post


Link to post
Share on other sites
sounds of silence

oh and also managed to pick up my stack dash


8130-WHITE-light.gif


and made a start at making my group a rear axle


Picture005-2.jpg

Picture004-2.jpg


got all the stack sensors fitted today into the engine with alittle work .


found a position for the baileys breather and had to make a new alloy bracket and weld on .


oil cooler all fix'd on and plumbed in


90% of the water system plumbed


and first boost pipe made to go under the inlet and the inlet now fixed to the engine with new gasket


Picture024-2.jpg

Picture025-2.jpg

Picture027-2.jpg

Picture028-2.jpg

Share this post


Link to post
Share on other sites
taylorspug

Is it me or is the cambelt hitting the cage bracing?


EDIT: Bugger by the time id posted that new pictures had appeared and it wasnt touching it anymore! :lol:


Are you not running a cambelt cover then?

Edited by taylorspug

Share this post


Link to post
Share on other sites
sounds of silence

new injectors picked up and fitted


Picture010-3.jpg

Picture011-3.jpg


AST coilovers in position with modified hubs to give neg 1.5 camber and group A stud and nut conversion


Picture016-3.jpg

Picture018-3.jpg


intercooler fitted


Picture019-3.jpg

Picture024-3.jpg


boost pipes made up and fitted


Picture028-3.jpg

Picture030-2.jpg

Picture032-2.jpg


stack modified to fit within std 205 clocks will look factory in the new dash


Picture026-3.jpg

  • Like 1

Share this post


Link to post
Share on other sites
RossD

Wow, thats a great project with so much attention to detail! Keep the updates coming :lol:

Share this post


Link to post
Share on other sites
cybernck

yep, got my approval, LOL.


keep the updates coming!

Share this post


Link to post
Share on other sites
sounds of silence

ok been working alot on the car in the last week car is now up and running kms management all wired up along with the stack dash . Downpipe for the exhaust system made , and my dash arrived back from being flocked also my rose jointed bottom arms have been made and also been delivered along with the rose jointed track rod ends .


exhaust downpipe all heat wrapped


DSCF0221.jpg


tight but still clearance


DSCF0222.jpg


dash and stack being wired


DSCF0224.jpg


DSCF0225.jpg


stack wired inc all warning lights


DSCF0228.jpg


DSCF0236.jpg


DSCF0238.jpg

Share this post


Link to post
Share on other sites
welshpug

erm....


DSCF0221.jpg


is that it?! :P

Share this post


Link to post
Share on other sites
Dj_mini

Stack dash looks sweet!

Share this post


Link to post
Share on other sites
hillbilly

Where did you get your dash done?

Share this post


Link to post
Share on other sites
BackStreetRacecars

absolutely loving this... never noticed it before.. cant believe its not too far away from me either!!! this will have to come along to the next scottish meet if it happens!!!! loving the dash too..... looks furry... kinda wanna stroke it... the dash that is....

Share this post


Link to post
Share on other sites
Spiky

yeah, a pretty amazing project. B)


dont think euan is going to be able to catch you, with his spec...lol

Share this post


Link to post
Share on other sites
Sam

Looking good. Shame about the pistons ;-)

Share this post


Link to post
Share on other sites
weejimmy

point taken

Share this post


Link to post
Share on other sites
maxi

It just gets better and better! Keep the updates comming!


I too am a big fan of that dash, above anything else it will hide it cracking and going off colour in the sunlight.


Maxi

Share this post


Link to post
Share on other sites

Please sign in to comment

You will be able to leave a comment after signing in


Sign In Now
Sign in to follow this  

×